The following information is provided for reference purposes only and should be used at your own risk!
In no event shall Beisan Systems, LLC or its members be liable for incidental, consequential, or special loss or damages of any kind however caused.
Introduction
“Vanos” is BMW’s name for its variable valve timing units. Vanos units take on various shapes and design according to car year and model (engine model). The vanos discussed here is BMW part # 11-36-7-838-161. It’s a double vanos, meaning both the intake and exhaust valve timing is varied. This vanos unit is part of BMW 6-cylinder engine S54. This engine is incorporated into the M3 E46 00-06, Z3 E36 M Roadster & M Coup 00-02, Z4 E85 M3.2 Roadster 05-08, Z4 E86 M3.2 Coup 06-08.
This vanos experiences multiple failures and related failures. A major chronic failure is the breakage of the exhaust camshaft sprocket hub vanos oil pump driver tabs. There are two tabs and one or both can break.
This vanos, as with other performance engine vanos units, incorporates an oil pump to provide high oil pressure for the vanos function. The high oil pressure allows for quick and precise positioning of the vanos and engine timing. With this vanos the oil pump is driven by the exhaust camshaft. Due to the need to have the vanos exhaust piston positioned to the center of the camshaft, the oil pump driver is offset from the center. Thus two drivers 180 degrees apart are used to balance the drive. The vanos has an oil pump disk with two holes and the exhaust hub has two driver tabs that insert into the oil pump disk holes.
One or both of the driver tabs can break and cause vanos malfunction and engine fault codes. A broken tab can stay lodged in the vanos oil pump disk hole or it can drop to the oil pan. In rare cases the tab can engage the chain and sprockets and cause engine damage.
The oil pump driver tab is breaking either from excessive rotational pressure force or rattling hitting force. Inspection of the vanos oil pump disk holes shows wall indentations in the rotational and counter rotational tab engagement positions. The counter rotational indentations indicate a rattling hitting movement. A dynamic hitting movement can also produce significantly higher forces than a pressure force.
This oil pump driver design was first used on the Euro S50 double vanos/engine. But the Euro S50 double vanos rarely encounters a tab breakage. Comparison of the Euro S50 double vanos and S54 designs shows design changes made for the S54. The S54 exhaust hub driver tab is lengthened by 3mm with 2.5mm used for new large chamfers. Also the oil pump disk hole diameter is increased by .7mm.
It is evident these changes were made to ease the installation of the vanos to the engine head. During this installation the vanos oil pump disk holes need to be aligned with the exhaust hub driver tabs and the disk holes inserted onto the tabs. Introducing large chamfers on the tabs and increasing the disk hole diameter eases the installation.
The lengthening of the driver tab does not seem to cause any oil pump performance changes. The new oil pump disk holes are deep enough to accommodate the extra length and this extra length is mostly a chamfer and thus does not engage the hole wall.
But the disk hole diameter increase can significantly affect the driver tab hitting issue. The Euro S50 double vanos oil pump disk hole diameter is 10.00mm and the tab width is 9.60. This provides .40mm tab to hole side play. The S54 vanos oil pump disk hole diameter is 10.70mm and the tab width is 9.70mm. This provides 1.00mm tab to hole side play. This constitutes a two and a half multiple increase in tab to hole play from the Euro S50 design. This significant increase in free space can facilitate much higher hitting forces and thus is likely the cause of the tab breakage.
A comparison of the Euro S50 double vanos and S54 vanos oil pump disk hole indentations shows the S54 can encounter notably deeper indentations in the oil pump rotational direction. The hole indentations cause to increase the tab to hole play and thus can further increase the tab hitting force. S54 cars that encounter the tab breakage usually show significant oil pump disk hole indentations in the rotational direction.
BMW has been engaged regarding vanos problems in the past and has elected to not address the issues, “No further development will be done”. New (rebuilt) vanos units are being sold with the same oil pump disks with the same large diameter holes. BMW does not provide the vanos oil pump disk as a separate part.
If the above hypothesis is correct, the simple answer to the tab breakage problem is to reduce the oil pump disk hole diameters. There are three potential approaches to accomplishing this. First, a sleeve can be inserted into the hole to reduce its diameter. In practice this has not worked well as the sleeve is indented into the existing hole indentations and the sleeve could crack due to this. Second, a new disk can be made. Metallurgical inspection of the disk center bushing indicates it is molecularly fused to the disk. This is a very special technique used by automotive manufacturers for camshaft and crankshaft bearings and is only made exclusively by a few companies in the world for auto manufacturers. The bushing is only .5mm thick and thus can’t be replaced with a pressed in bushing without thickening it and changing other design aspects of the disk which make the approach non-viable. Third, new holes can be drilled in the disk at a 90 degree offset form the existing holes. The holes must be precisely 180 degrees from each other and precisely the same diameter for both driver tabs to engage the hole sides simultaneously.
A vanos oil pump disk with newly driller smaller holes can be acquired through Beisan Systems (bee-saan), www.beisansystems.com/products. The disk hole diameter is 9.80mm. This leaves .10mm play between the driver tab and hole sides and is a further decrease from the Euro S50 double vanos .40mm play. This play reduction is intended to eliminate the occasional tab breakage that occurs on the Euro S50 double vanos. It might also resolve the occasional oil pump seize and damage that can occur.
This vanos piston seals and static seal O-rings, other than the small O-ring on the oil pressure restrictor, are made of the correct materials and don’t experience premature failure. However over time and use the piston seal O-rings will experience notable compression set (flattening) and the Teflon rings will experience wear (loss of material). This can lead to degradation in performance. The static seal O-rings will also experience notable compression set and could eventually leak. Thus there is a need for a replacement seals solution for this vanos.
A vanos seals/O-rings repair kit can be acquired through Beisan Systems (bee-saan), www.beisansystems.com/products. It includes a vanos replacement set of OEM equivalent material Teflon rings and Viton O-rings.
The following repair procedure also covers the installation of the Beisan S54 vanos sealing plate repair kit and rebuilt vanos solenoid coil pack. Discussion of these products and the associate failure modes is found in the Beisan S54 vanos solenoid procedure, S54 Vanos Solenoid Procedure
Symptoms
Fault codes:
P0010 (BMW xx, 0xxx): Vanos intake solenoid circuit
P0011 (BMW 67, 0x43): Vanos intake timing over advanced
P0012 (BMW 72, 0x48): Vanos intake timing over retarded
Pxxxx (BMW 184, 0xB8): Vanos intake position control
P1525 (BMW xx, 0xxx): Vanos intake solenoid open circuit
P0013 (BMW xx, 0xxx): Vanos exhaust solenoid circuit
P0014 (BMW 22, 0x16): Vanos exhaust timing over advanced
P0015 (BMW 21, 015): Vanos exhaust timing over retarded
Pxxxx (BMW 185, 0xB9): Vanos exhaust position control
P1531 (BMW xx, 0xxx): Vanos exhaust solenoid open circuit
The generation of one of these codes will cause the DME to not utilize the vanos. Unfortunately the engine timing is left in the same position as when the failure occurred. Thus the engine will likely behave better at low RPM and worse at high RPM, or worse at low RPM and better at high RPM. Engine misfire with fault codes can also occur.
Diagnosis
If a circuit code is present the solenoid coil pack is likely failed.
The above codes, other than the circuit codes, can occur when the vanos oil pump driver tab(s) breaks or the vanos solenoid coil pack fails. Thus an effort must be taken to distinguish between the two failures.
A simple, but not conclusive, method of differentiating between the two failures is to reset the fault codes and start the engine and allow it to idle. If the oil pump driver tabs are broken the fault codes and check engine light will be generated in a few minutes. The solenoid coil pack failure is often intermittent and will take some driving before the fault codes and check engine light appear.
Unfortunately, there are cases where the solenoid coil pack can be significantly failed and the fault codes and check engine light appear at idle after reset. Further in some cases only one of the oil pump driver tabs will break. In such a case the fault codes and check engine light will not appear at idle and some driving will be necessary for them to appear.
A definitive method of assessing which of the two failures exists is to remove the valve cover and inspect the oil pump driver tabs. If one or both are broken then that is the source of the problem. If they are present then the problem is most likely the solenoid coil pack.
Repair Procedure
The following is an E46 M3 vanos oil pump disk, sealing plate rings, vanos seals, solenoid coil pack, R&R (remove and replace) procedure.
Repair time: 5 hours mechanic, 7+ hours DIY.
Valve adjustment repair can be combined with this repair. But only perform valve adjustment repair while vanos is fully mounted on engine head.
Thus perform valve adjustment repair just before removing vanos or just after installing vanos. This is referenced in the procedure.
Parts, Tools, and Shop Supplies
Parts with part number pattern xx-xx-x-xxx-xxx are BMW parts and can be acquired from a BMW dealership.
Beisan Systems only provides the vanos oil pump disk, sealing plate repair kit, seals repair kit, rebuilt solenoid coil pack.
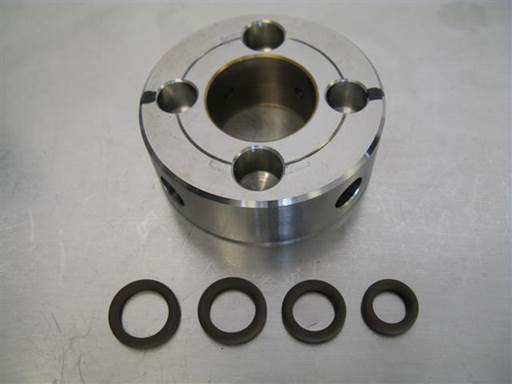
S54 vanos oil pump disk (BS025) $150 + $300 refundable core charge (www.beisansystems.com), S54 vanos sealing plate repair kit (BS024) $10/each (www.beisansystems.com)
1% of vanos units will have a .001mm diameter oversized cap that will stick in a Beisan new oil pump disk side cylinder.
If this is encountered, a 30 second polishing of a side cylinder with 400 grit sandpaper and 1/4″ socket extension will remove .0005mm material and accommodate the oversized cap.
$300 core charge (deposit) is refunded upon return of original undamaged oil pump disk to Beisan Systems within 90 days of purchase date.
Oil pump disk should be wrapped to protect from damage.
Include name and date on purchase transaction in return package.
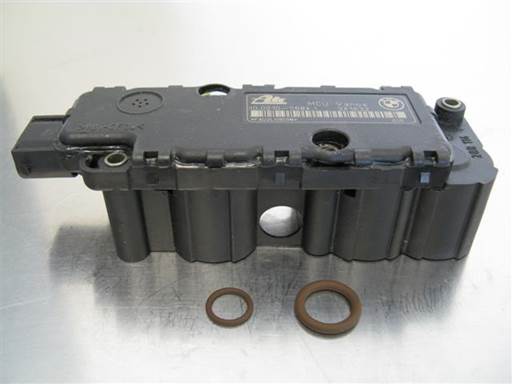
S54 rebuilt vanos solenoid coil pack (BS023) $200 + $300 refundable core charge (www.beisansystems.com)
Note: Rebuilt solenoid coil pack includes vanos oil pressure restrictor O-rings.
$300 core charge (deposit) is refunded upon return of original undamaged solenoid coil pack to Beisan Systems within 90 days of purchase date.
Coil pack should be wrapped to protect from damage.
Include name and date on purchase transaction in return package.
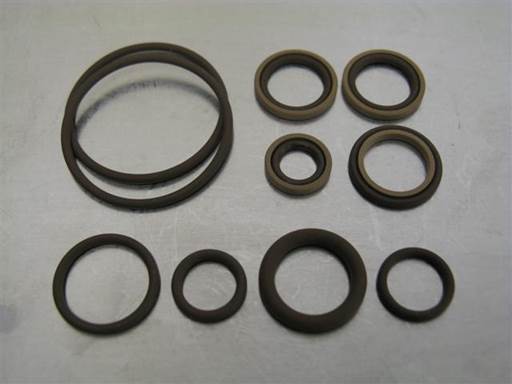
S54 vanos seals repair kit (BS021) $60/each
Note: Seals repair kit includes vanos oil pressure restrictor O-rings.
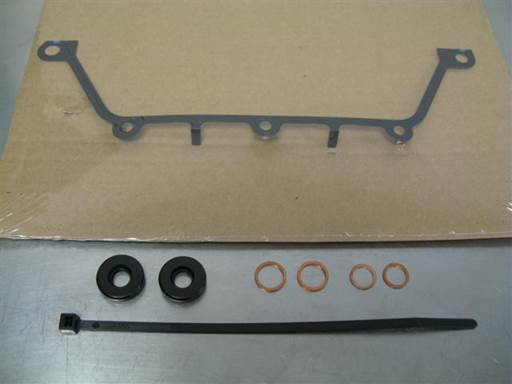
Vanos gasket (11-36-7-831-938) $11.69/each
2 x valve cover stud grommet (11-12-1-437-395) $1.17/each, 2 x oil drain hose crush washer (07-11-9-963-129) $0.11/each
2 x vanos oil accumulator pipe crush washer (07-11-9-963-072) $0.11/each, cable strap (zip tie)
Vanos oil filter (11-36-1-401-971) $9.66/each (not shown). Note: Oil filter replacement is not required. Oil filter can be spray cleaned (brake cleaner).
Note: S54 engine valve cover gaskets and bolt grommets, except front two corner grommets, are made from Viton and thus do not wear and need replacement. Valve cover front two corner grommets are Buna and thus wear and need replacement. They are included in the above list.
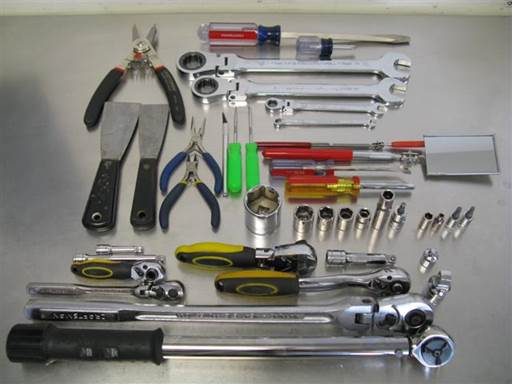
2 x putty-knife (small, medium), straight pick tool (small), 90 degree pick tool (small).
pliers (medium), medium nose pliers (small), cutters (small), razor knife (small)
24mm combo wrench, 22mm combo wrench, 10mm combo/ratcheting wrench, 7mm combo wrench
Flathead screwdriver (large), phillips screwdriver, tack lifter, magnet pickup, mirror (medium)
32mm socket 1/2″, 17mm socket 3/8″, 14mm socket 3/8″, 13mm socket 3/8″, 10mm socket 3/8″, 10mm deep socket 3/8″, 5mm hex bit socket 3/8″
8mm socket 1/4″, E-5 torx or 4mm socket 1/4″, T30 torx bit socket 1/4″, T25 torx bit socket 1/4″, 3/8″ to 1/4″ socket adapter
1/2″ long-arm ratchet, 3/8″ ratchet, 3/8″ medium-arm ratchet, 1/4″ ratchet, 1/4″ socket driver
1/2″ socket extension (short), 3/8″ socket extension (short), 1/4″ socket extension (short & medium)
3/8″ torque wrench (10 Nm [7 ft-lb], 40 Nm [29.5 ft-lb])
Retaining ring pliers (medium internal) (Craftsman part # 947412, $25)
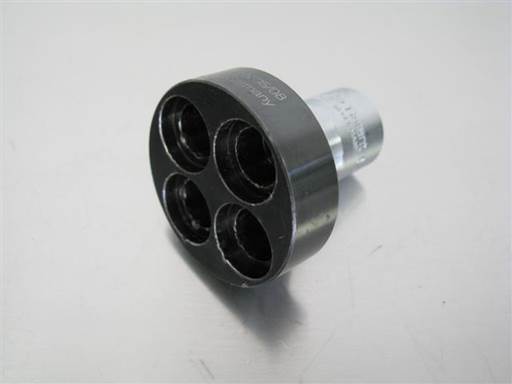
BMW crankshaft turning socket (83-30-0-491-056) $68.04/each
Note: Can be substituted with 36mm 12-point socket 1/2″
Or
32mm 1/2″ socket and 1/2″ extra short extension
Note: First production S54 engines have 4 torx bolts that need special tool or 36mm 12-point socket. Subsequent production S54 engines have adaptor with 27mm hex.
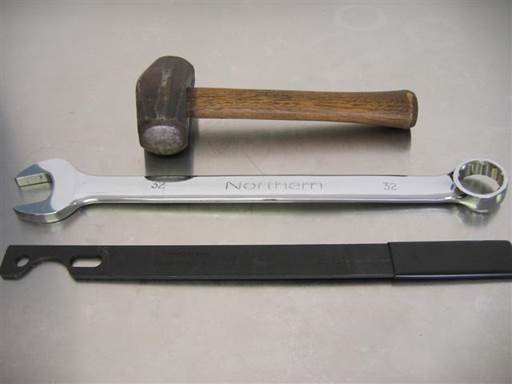
Mechanical fan removal tools:
32mm combo wrench, BMW water pump pulley holder (83-30-0-491-046) $37.76/each
Handheld sledge hammer (3lb)
Note: Water pump pulley holder is available from aftermarket vendors, often found on ebay. It is usually listed under its original BMW part 115030. It is often also available in a combination tool set with a 32mm slim open wrench.
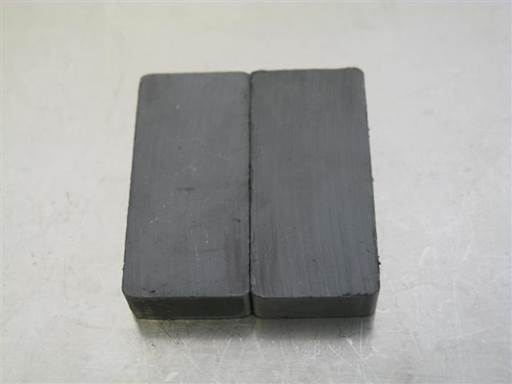
Strong magnet(s) (Harbor Freight Craft Magnet Blocks (2 pc) part #98406, $1.50)
Note: Strong magnet, or multiple magnets to multiply strength, is needed to open vanos solenoid valves for cleaning
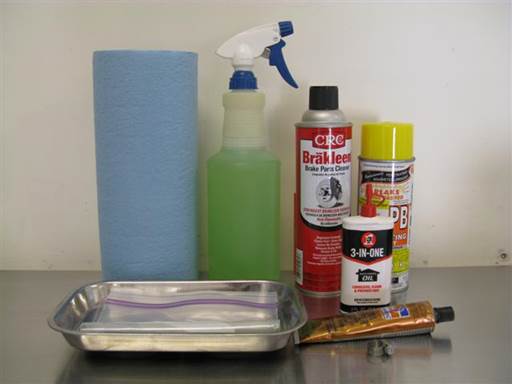
Paper towels, water based cleaner (simple green 1:10), brake cleaner, spray lubricant
Parts plate, gasket sealant, assembly oil (lubricant oil), medium plastic bag
400 grit sandpaper (not shown)
Repair
Car engine must be cold to perform repair procedure.
Right and Left denotations are from car front at hood orientation.
Removal of fan & shroud
Removal of cabin filter housing
E46 M3 cabin filter housing removal
Removal of suspension cross brace
If present, remove suspension cross brace from engine bay.
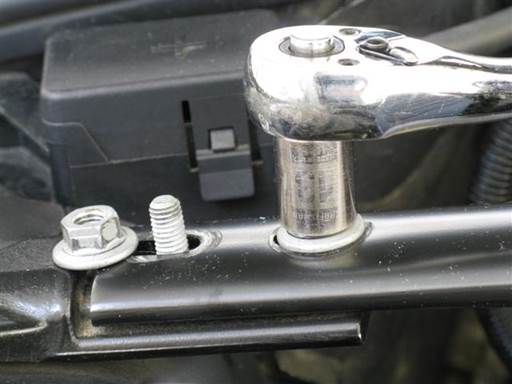
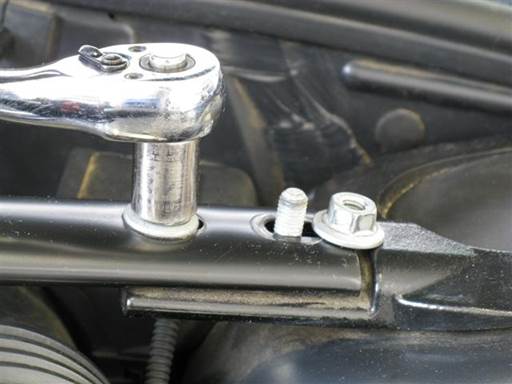
Remove 2 mounting nuts at left and right end of suspension cross brace (13mm socket 3/8″ / 3/8″ medium-arm ratchet).
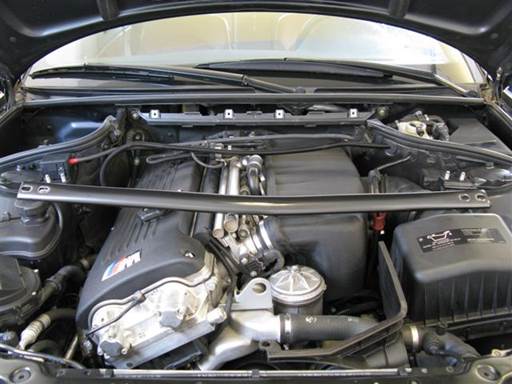
Remove suspension cross brace from engine bay.
Removal of valve cover
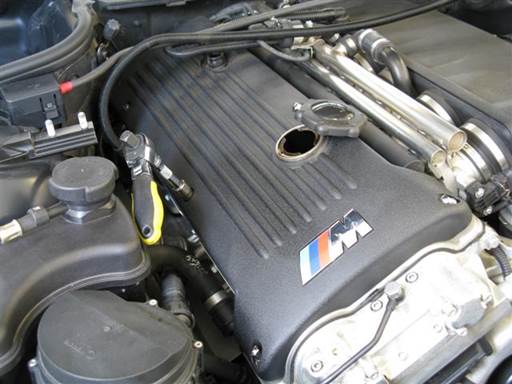
Remove engine top cover.
Remove 6 cover mounting caps (10mm socket 3/8″ / 3/8″ ratchet & extension).
Remove ventilation hose at cover rear top. Press in hose connector side clips and pull up connector.
Remove oil fill cap.
Remove top cover. Lift up cables and ventilation hose and remove cover.
Reinstall oil fill cap.
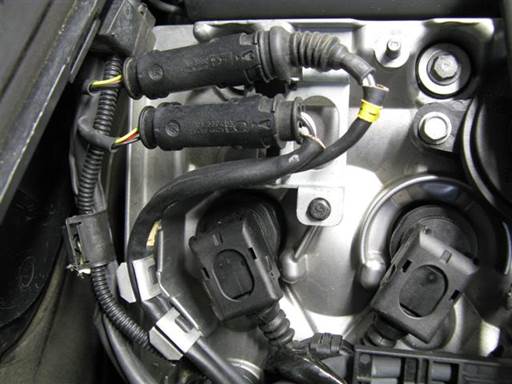
Remove components from brackets at valve cover rear.
Remove O2 sensor connectors, O2 sensors cable mounting clips, rubber block and cables mounting clip.
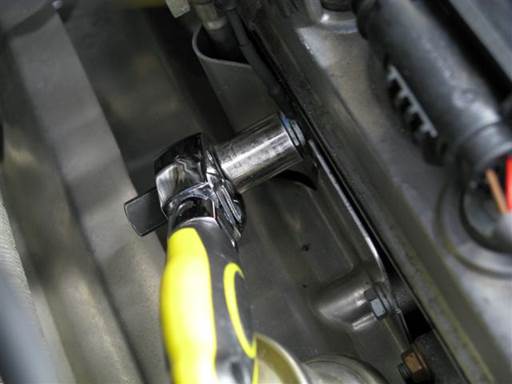
Remove coil harness ground strap mounting bolt at valve cover exhaust side (13mm socket 3/8″ / 3/8″ ratchet).
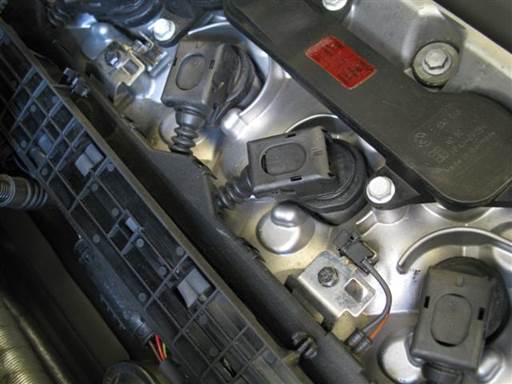
Remove O2 sensors connector bracket at top of valve cover.
Press in clip tabs at front and rear right of bracket and pull off bracket.
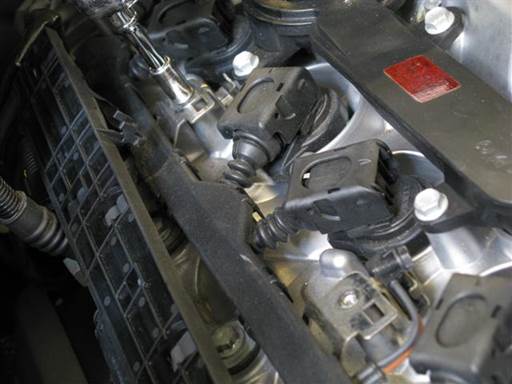
Remove coil harness rail 2 mounting bolts (8mm socket 1/4″ / 1/4″ ratchet & extension).
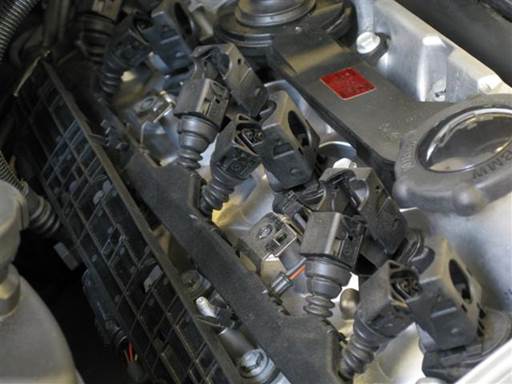
Remove coils electrical cable connectors.
For each coil, pull up and back on coil connector pivot lock until cable connector is thrust out and disconnected.
Remove all cable connectors from coils (picture).
Place O2 sensors connector bracket and coil harness rail and cable connectors to exhaust side of valve cover.
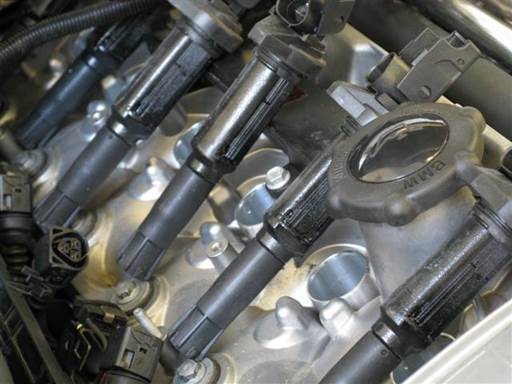
Remove 6 sparkplug coils.
For each coil wiggle hard sided to side and pull up hard to remove.
Note: Coils take great force to pull out.
Note: Maintain coil/cylinder association for reinstallation. This is not necessary, but is good practice.
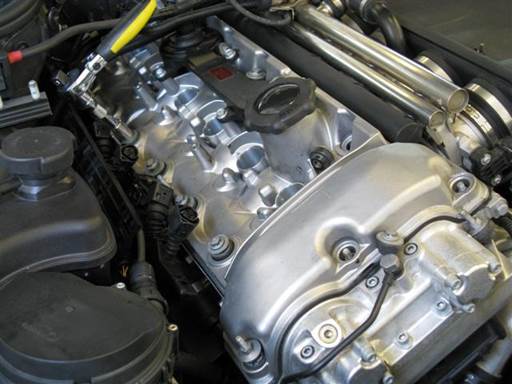
Remove valve cover 15 mounting bolts/studs w/ washers and rubber grommets; 2 front corner studs, 1 front center bolt, 6 bolts at each side (10mm socket & 10mm deep socket 3/8″ / 3/8″ ratchet & extension, tack lifter).
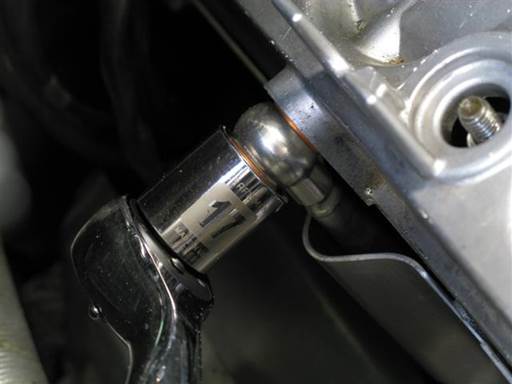
Remove oil drain hose mounting bolt at exhaust side of valve cover.
Place O2 sensors connector bracket and coil harness rail and cable connectors at top of valve cover.
Remove oil hose mounting banjo bolt (17mm socket 3/8″ / 3/8″ medium-arm ratchet).
Catch crush washer at cover side of hose fitting while removing bolt. Place finger at each side bottom of fitting and remove bolt.
Discard removed crush washer and crush washer on bolt.
Place O2 sensors connector bracket and coil harness rail and cable connectors to exhaust side of valve cover.
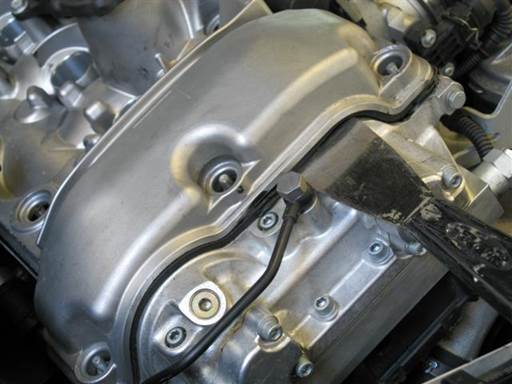
Release valve cover from engine head.
Insert blade (medium putty-knife) between valve cover gasket and engine head and pry up at all front end accessible locations to break gasket bond. Be sure to break gasket sealant bond at front corners.
Repeat blade insertion and prying until cover gasket seize breaks and cover lifts. Notable prying might be needed at front center to break seize.
Note: If valve cover can not be removed, double check valve cover 15 bolts/studs have been removed.
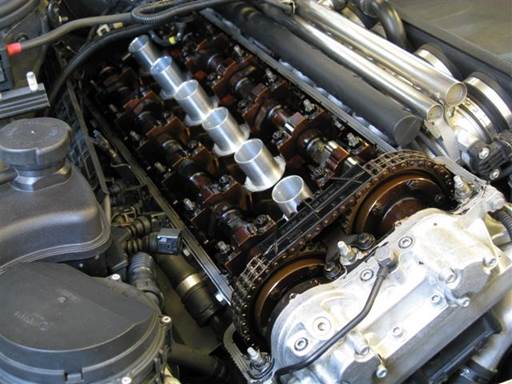
Lift up and remove valve cover from engine head.
Place rear cable rubber block to rear of valve cover.
Lift up valve cover right side above black fuel injector rail.
Lift up cables and hose and lift up and bring forward valve cover.
Remove valve cover.
Remove valve cover perimeter gasket.
Remove valve cover 6 sparkplug well gaskets.
Valve adjustment repair can be performed at this point in the procedure.
Setting of timing to TDC
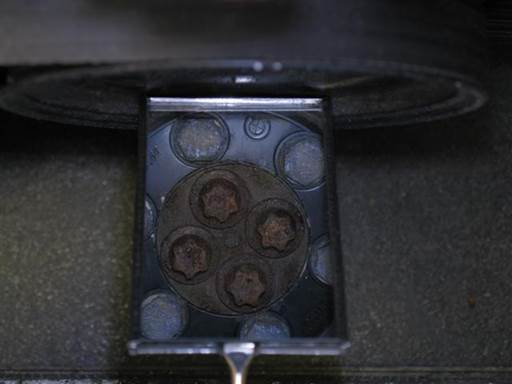
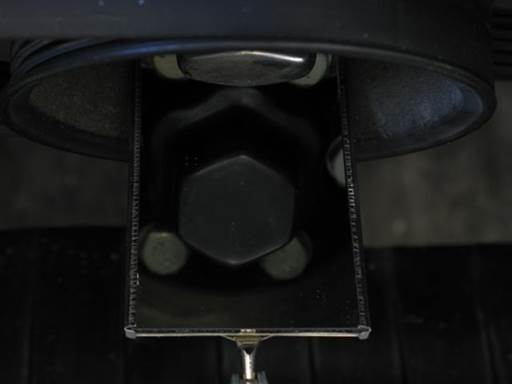
Assess tool needed for turning crankshaft.
Inspect crankshaft pulley turning bolt(s) (mirror).
If 4 torx bolts are found use special torx socket. If hex bolt fond use 32mm socket.
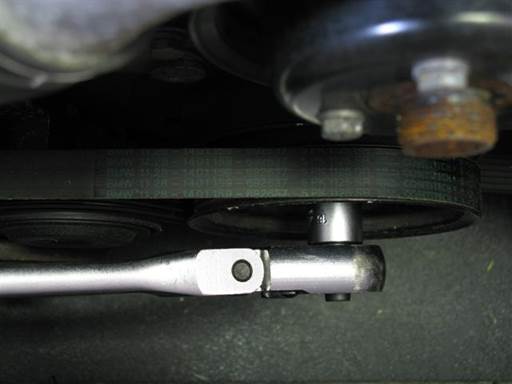
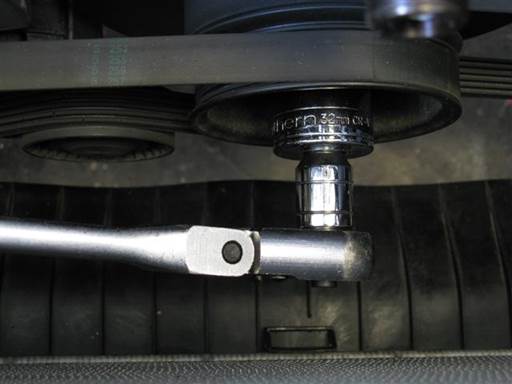
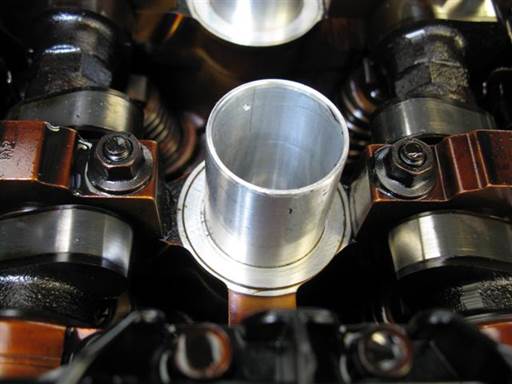
If manual transmission, place transmission in neutral. This allows turning of crankshaft.
Turn crankshaft pulley clockwise until cylinder 1 intake and exhaust cams point to each other at ~45 degree angle (crankshaft turning socket 1/2″ / 1/2″ long-arm ratchet & short extension).
Note: Turning crankshaft counter clockwise is acceptable.
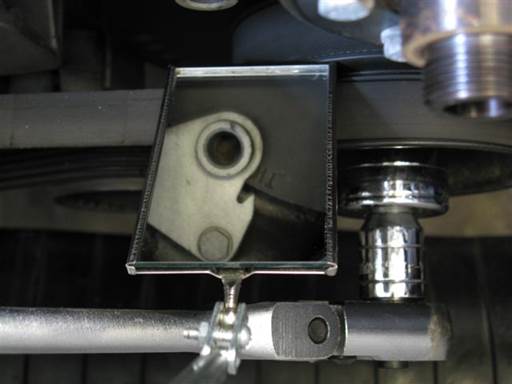
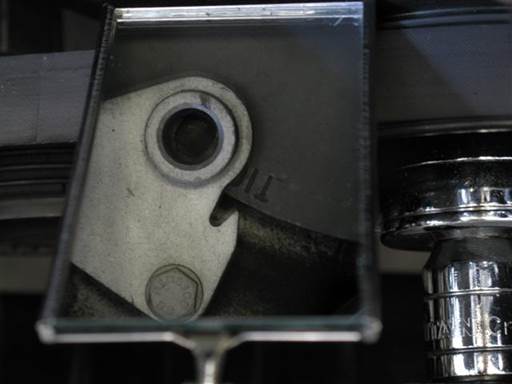
Inspect TDC (top dead center) timing marks on engine timing cover and crankshaft harmonic balancer at ~11 o’clock position (mirror).
Adjust crankshaft pulley to align TDC timing marks (crankshaft turning socket 1/2″ / 1/2″ long-arm ratchet & short extension).
Note: Align pointer on timing cover bracket with 1 mark on harmonic balancer.
Note: Precise alignment is not necessary.
Removal of vanos solenoid
Vanos solenoid removal relieves vanos hydraulics and allows manipulation of vanos and engine timing without need for air compressor and expensive electrical switches. This method is also easier to perform, clearer to understand, and less problematic.
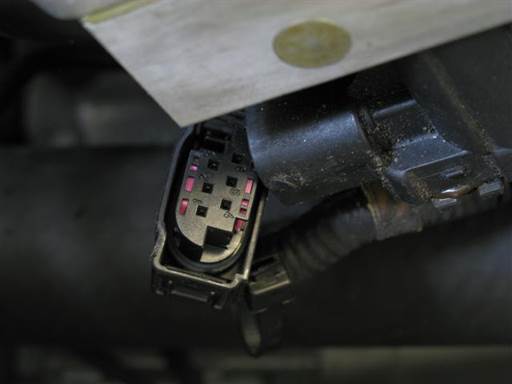
Remove vanos solenoid electrical cable connector at vanos bottom left.
Press in connector side clips and pull/pry off connector (tack lifter).
If present, pull off and discard cable strap.
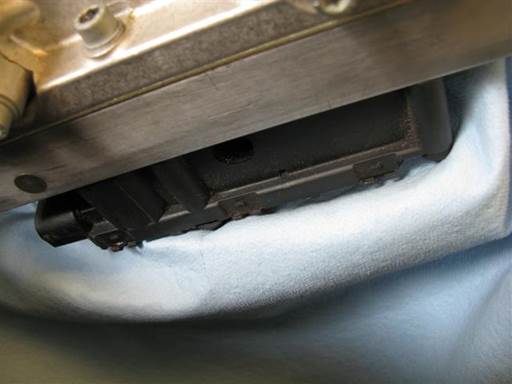
Cover lower radiator hose to protect belts from oil leakage (towels).
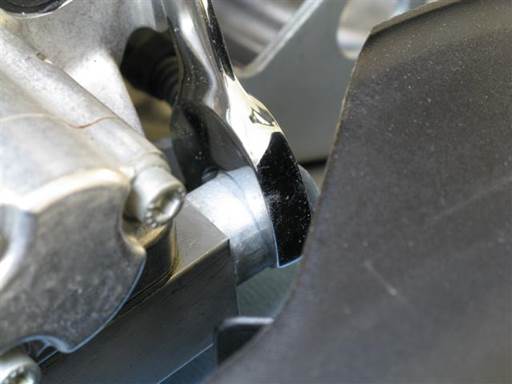
If installing vanos seals repair kit or rebuilt vanos solenoid coil pack, slightly loosen vanos oil pressure restrictor (22mm open wrench).
Note: Pressure restrictor work will be performed at bench. Loosening is easier to perform while solenoid is mounted.
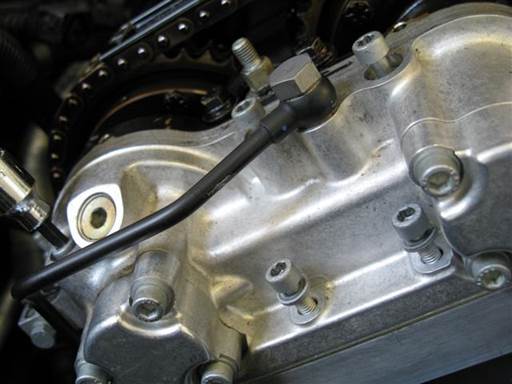
Remove vanos solenoid 5 mounting bolts; 3 upper and 2 lower (5mm hex bit socket 3/8″ / 3/8″ ratchet & extension).
Loosen bolts evenly and support solenoid as it drops from vanos.
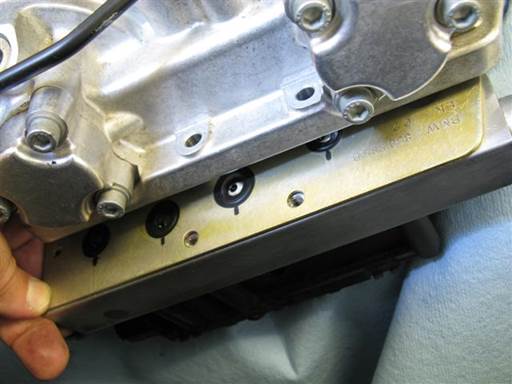
Remove solenoid with sealing plate from engine bay.
Retarding of camshaft timing
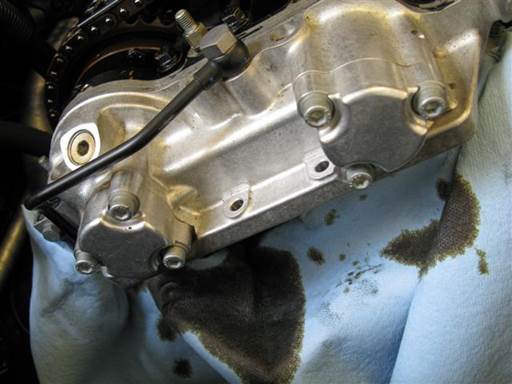
Maintain cover over lower radiator hose during following camshaft adjustment as oil will leak from vanos bottom (towels).
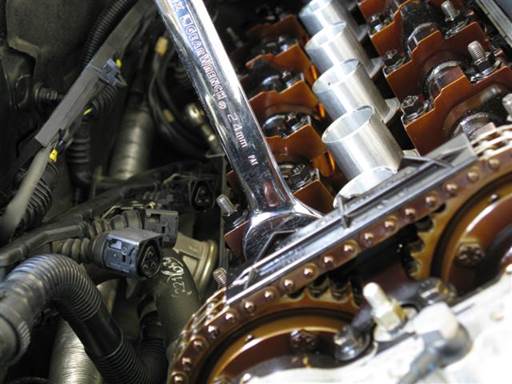
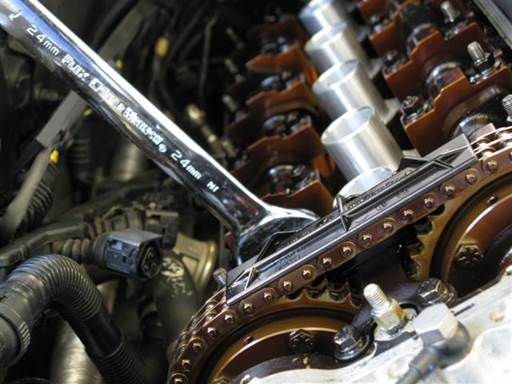
Fully retard exhaust camshaft timing.
Place open wrench (24mm combo wrench) on exhaust camshaft hex at front of camshaft.
Rotate exhaust camshaft counter clockwise to adjustment end position. If camshaft resistant to rotation rock camshaft back and forth to release seize.
Note: Camshaft rotation is most effective when standing at exhaust side of car.
Note: Splined shaft can be seen protruding from sprocket hub front when camshaft is at adjustment end position.
Note: Camshaft adjustment causes full camshaft timing retard. This causes splined shaft and vanos piston forward positioning. This facilitates access for disconnecting splined shaft from vanos piston in coming step.
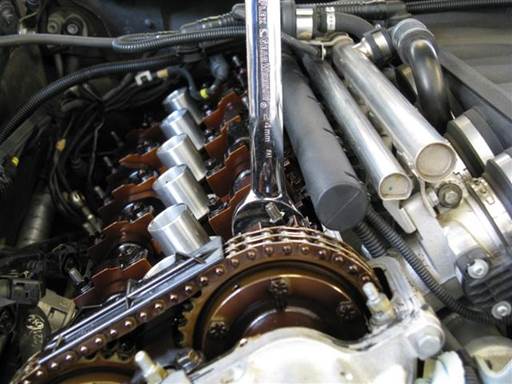
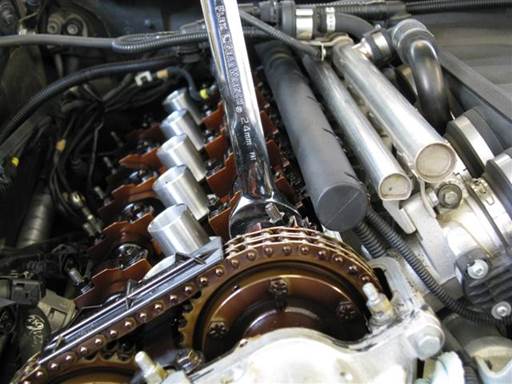
Fully retard intake camshaft timing.
Place open wrench (24mm combo wrench) on intake camshaft hex at front of camshaft.
Rotate intake camshaft counter clockwise to adjustment end position. If camshaft resistant to rotation rock camshaft back and forth to release seize.
Note: Camshaft rotation is most effective when standing at exhaust side of car.
Note: Splined shaft can be seen protruding from sprocket hub front when camshaft is at adjustment end position.
Note: Camshaft adjustment causes full camshaft timing retard. This causes splined shaft and vanos piston forward positioning. This facilitates access for disconnecting splined shaft from vanos piston in coming step.
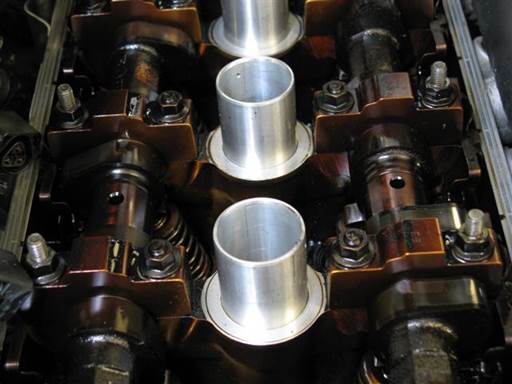
When intake and exhaust camshafts are fully retarded holes in the camshafts between cylinder 2 & 3 will point up perpendicularly to engine head.
Remove covers from lower radiator hose (towels).
Wipe clean bottom of vanos (towels).
Removal of vanos
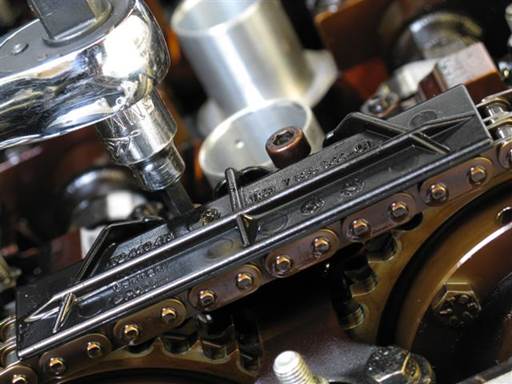
Remove camshaft chain guide.
Remove chain guide 2 mounting bolts (5mm hex bit socket 3/8″ / 3/8″ ratchet).
Remove chain guide.
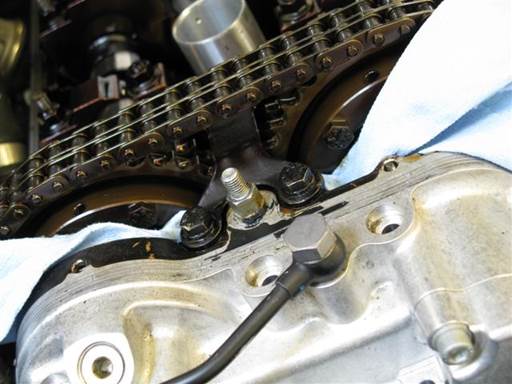
Cover cavities between vanos and sprockets to keep bolts from falling down in next step (towels).
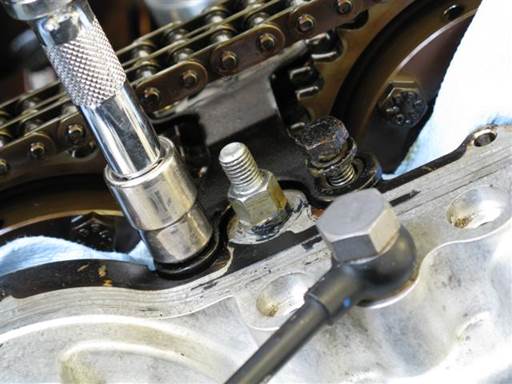
Remove vanos bracket.
Remove vanos bracket 2 mounting bolts (10mm socket 3/8″ / 3/8″ ratchet & extension).
Remove vanos bracket.
Note vanos bracket mounting orientation.
Remove covers (towels).
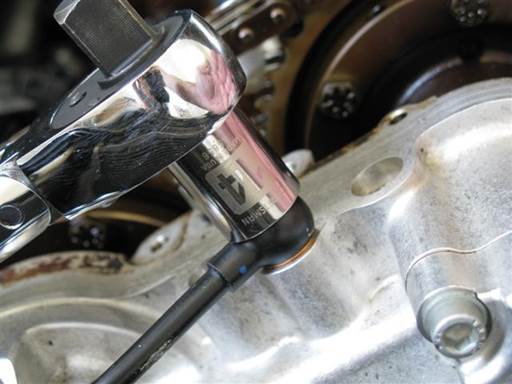
Remove oil accumulator pipe from vanos.
Remove oil pipe mounting banjo bolt (14mm socket 3/8″ / 3/8″ ratchet).
Discard crush washer at each side of pipe fitting.
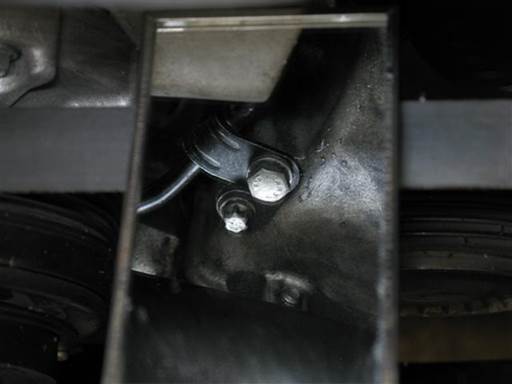
Locate oil accumulator pipe bracket mounting bolt under radiator lower hose (mirror).
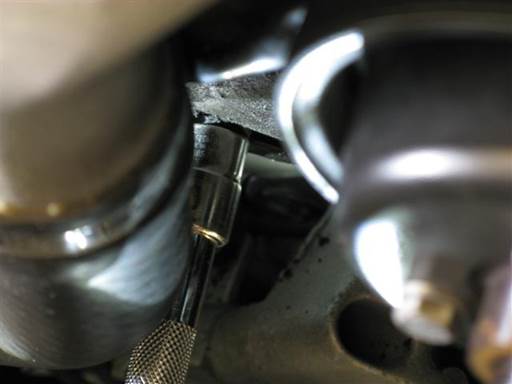
Remove oil accumulator pipe bracket mounting bolt (10mm socket 3/8″ / 3/8″ ratchet & extension).
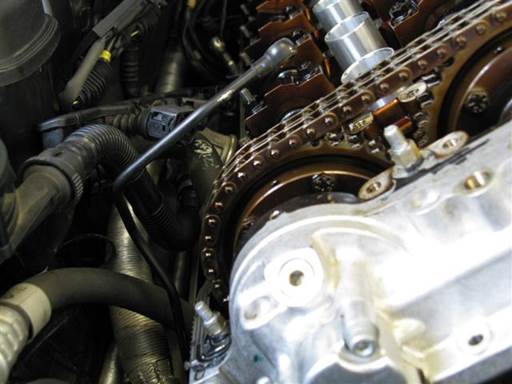
Move oil accumulator pipe to rear.
Cover lower radiator hose to protect belts from oil leakage in next steps (towels).
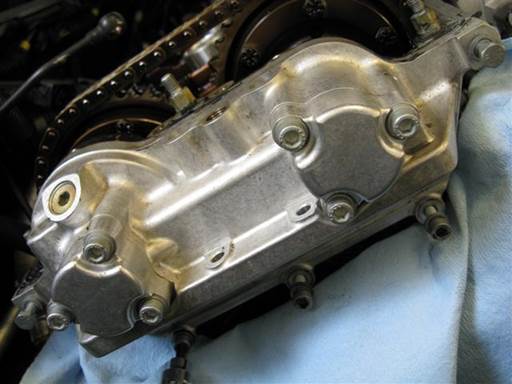
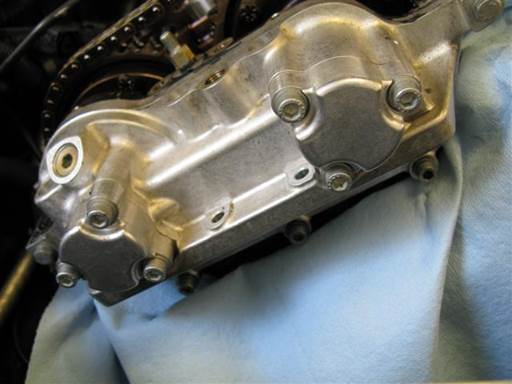
Remove vanos 5 mounting bolts; 2 top corner and 3 lower (10mm socket & 5mm hex bit socket 3/8″ / 3/8″ ratchet & extension).
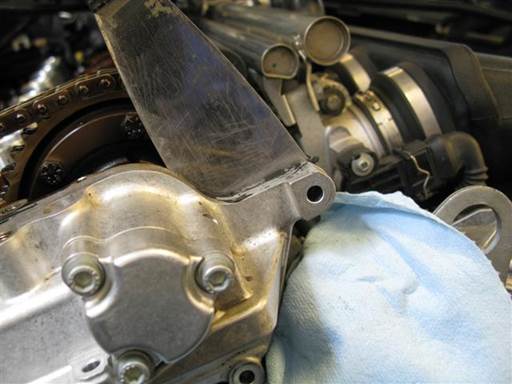
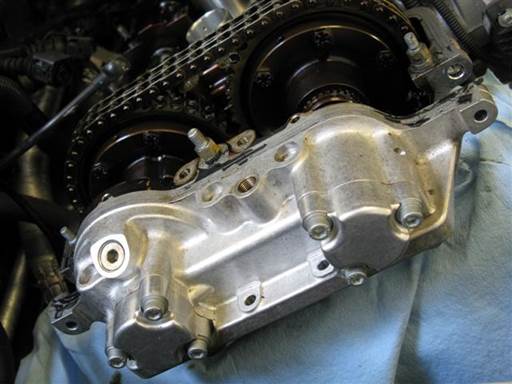
Pry vanos forward off engine head.
Pry between vanos and engine head at vanos top right and left ends (medium putty-knife).
Insert blade between vanos and engine head and hit blade to press in and separate vanos from engine head (medium putty-knife & hand).
Pry vanos evenly rotating between each side until vanos releases and separates from engine head.
Pull vanos forward as far as possible.
Note: Once vanos comes off engine head, vanos will be suspended on intake and exhaust splined shafts.
Caution: Once vanos is pulled off engine head it should not be remounted without aligning exhaust side vanos oil pump and camshaft oil pump driver.
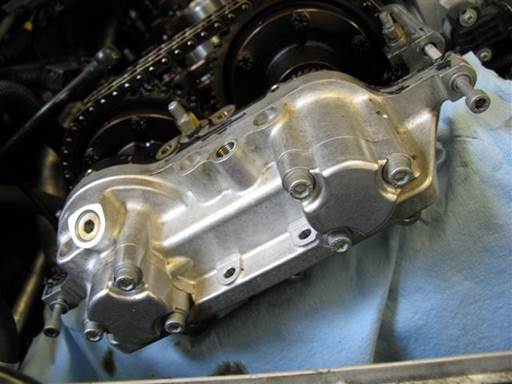
Install vanos solenoid long mounting bolts at vanos top right and left mounting holes to support vanos on engine head (picture).
Insert bolts into head with only a few turns (hand).
Disconnecting of vanos pistons from splined shaft studs
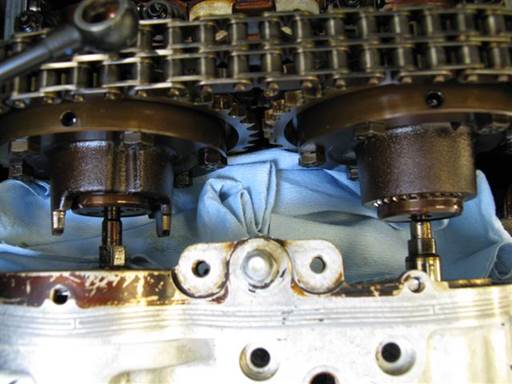
Cover cavities below sprockets to keep tools from falling into cavities (towels).
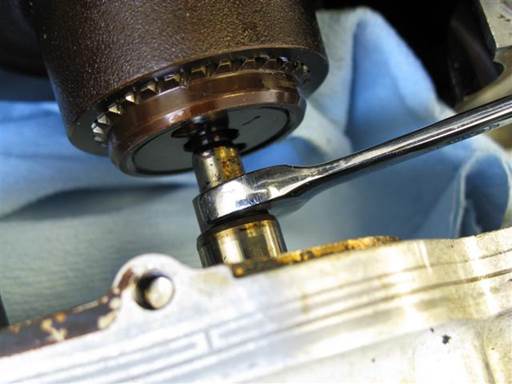
Rotate vanos intake piston to allow tool access to splined shaft stud flats (10mm open wrench).
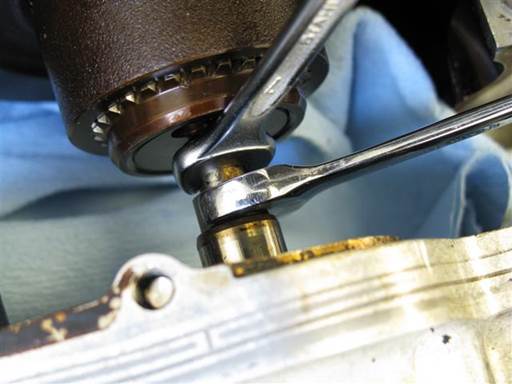
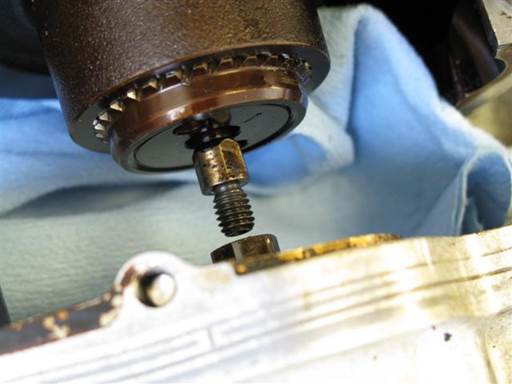
Disconnect vanos intake piston from intake splined shaft stud.
Counter hold splined shaft stud and unscrew vanos piston; left hand thread (7mm open wrench, 10mm open wrench).
Note: Piston and shaft stud are left hand thread, thus unscrew by turning piston tool (10mm open wrench) from left to right (clockwise) (car front orientation).
Note: As needed, rotate piston tool (10mm open wrench) at every turn to facilitate tool access.
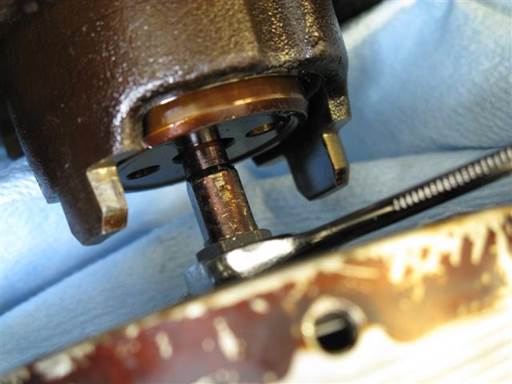
Rotate vanos exhaust piston to allow tool access to splined shaft stud flats (10mm open wrench).
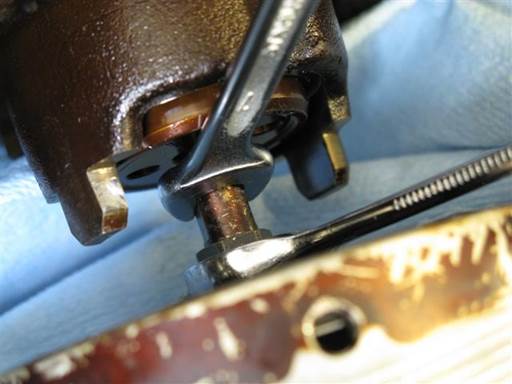
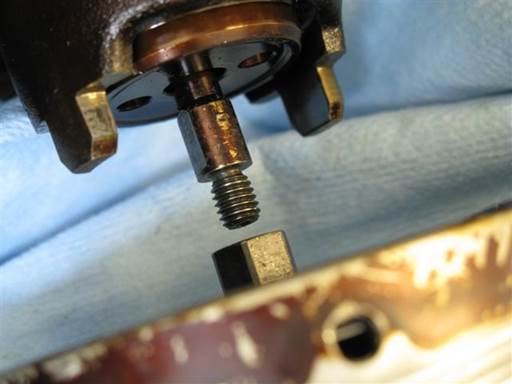
Disconnect vanos exhaust piston from exhaust splined shaft stud.
Counter hold splined shaft stud and unscrew vanos piston; left hand thread (7mm open wrench, 10mm open wrench).
Note: Piston and shaft stud are left hand thread, thus unscrew by turning piston tool (10mm open wrench) from left to right (clockwise) (car front orientation).
Note: As needed, rotate piston tool (10mm open wrench) at every turn to facilitate tool access.
Remove sprocket cavity covers.
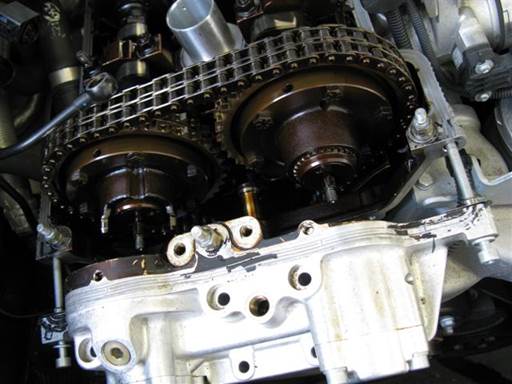
Unscrew solenoid long bolts at vanos top corners from engine head while supporting vanos.
Remove vanos and take to work bench.
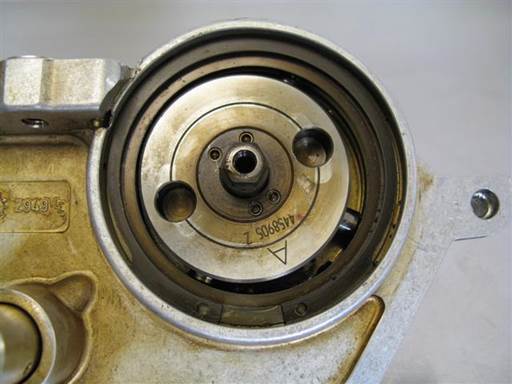
Note rotational position of vanos oil pump holes.
This position is necessary for reinstalling vanos and matting it with oil pump driver tabs.
Replacement of vanos oil pump disk
Perform following work on table to prevent parts from falling and being damaged.
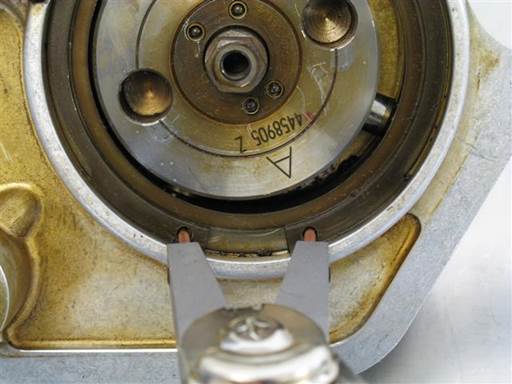
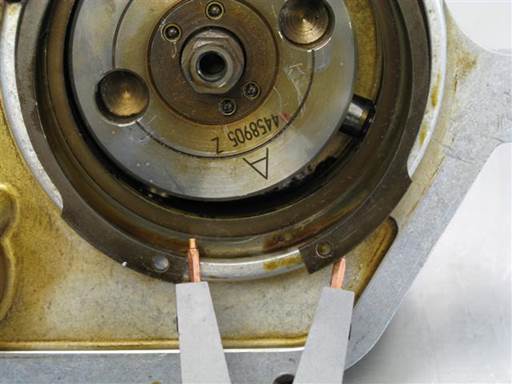
Remove oil pump retaining ring.
Compress ring at end holes and remove ring form vanos (retaining ring pliers).
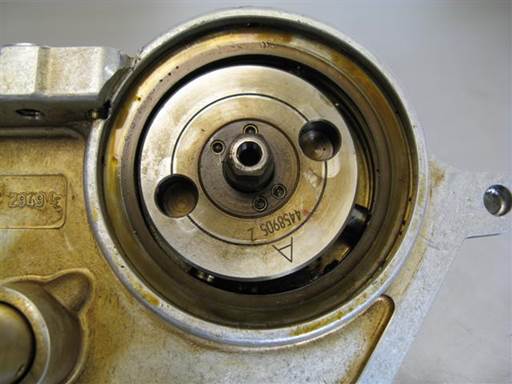
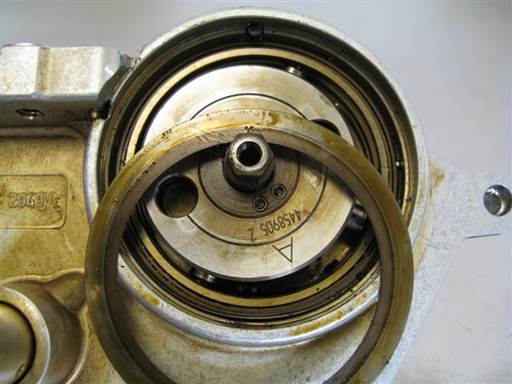
Remove oil pump retaining washer.
Pry out washer from inner perimeter and pull out (90 degree pick).
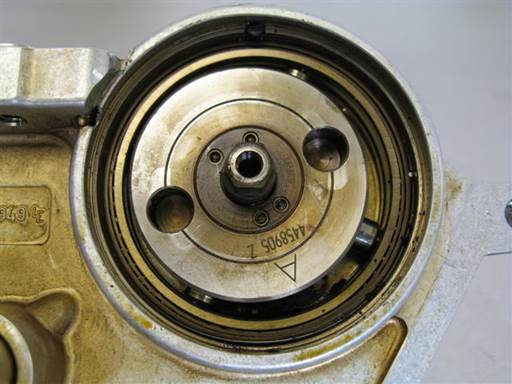
Inspect mounting position of pump disk outer bearing ring to outer radial bearing.
Note bearing ring protrudes out slightly higher than outer radial bearing.
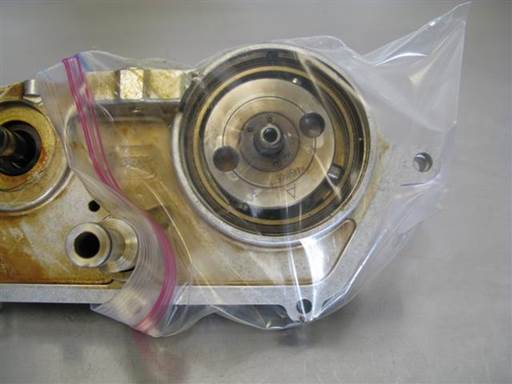
Install clear plastic bag over vanos oil pump side.

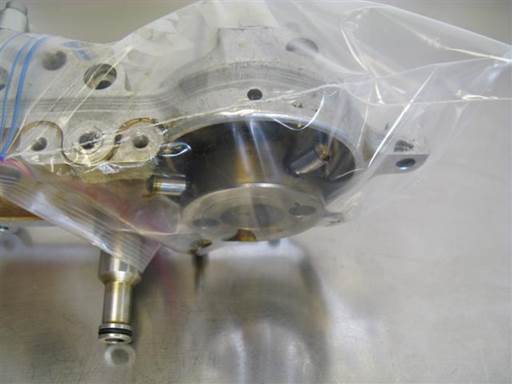
Turn vanos down and hit end of vanos on table to dislodge oil pump disk from vanos.
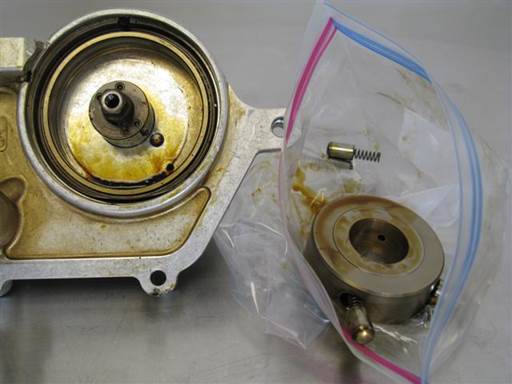
Remove plastic bag from vanos with oil pump disk, caps and springs, and bearing ring.
Note: If bearing ring still in vanos (picture), remove bearing ring from vanos (90 degree pick).
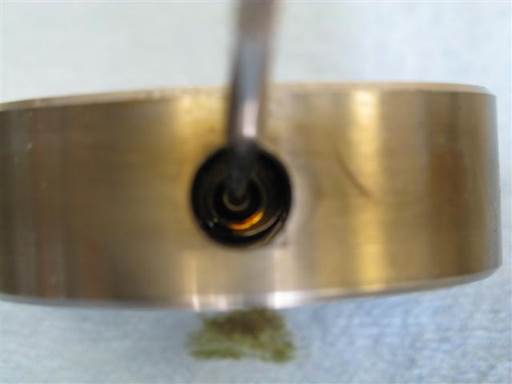
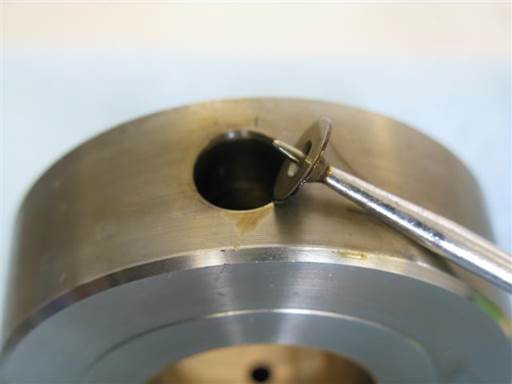
Remove spring pads from oil pump 4 side holes.
Insert tool in pad center hole and pry out pad (straight pick).
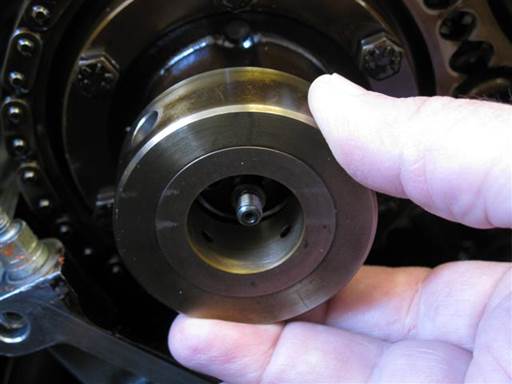
Insert old oil pump disk on exhaust sprocket hub and rotate back and forth to assess amount of play between oil pump holes and exhaust hub tabs.
Perform same with new oil pump disk. Be sure to use newly drilled and marked holes.
New disk holes significantly reduce hole to tab play and thus prevent hitting and tab breaking.
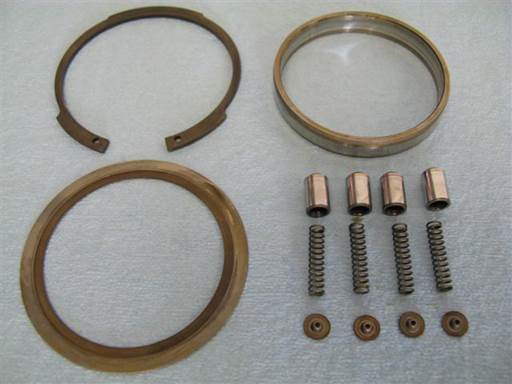
Clean oil pump components and verify inventory (brake cleaner & towels).
Components include: retaining ring, retaining washer, bearing ring, 4 x cap, 4 x spring, 4 x spring pad.
Check fit of oil pump caps in new Beisan oil pump disk.
1% of vanos units will have a .001mm diameter oversized cap that will stick in a Beisan new oil pump disk side cylinder.
If this is encountered, a 30 second polishing of a side cylinder with 400 grit sandpaper and 1/4″ socket extension will remove .0005mm material and accommodate the oversized cap.
Install each cap with a spring in a Beisan new oil pump disk side cylinder and check its reciprocation. The cap should move freely and not stick.
If a cap sticks, wrap a piece of 400 grit sandpaper on a 1/4″ socket extension and insert it in a disk side cylinder and turn the disk on the socket extension and sandpaper for 30 seconds.
Clean the cylinder and check the cap fit again. The cap should reciprocate without sticking.
The polished cylinder will now accommodate the oversized cap.
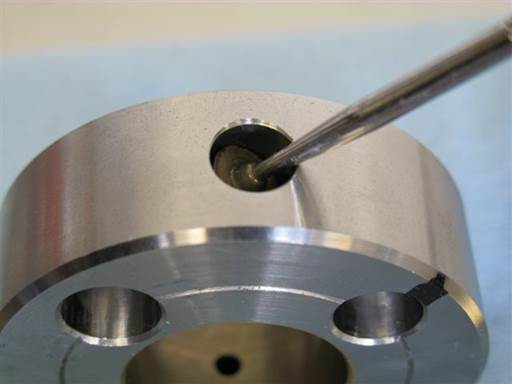
Install 4 spring pads in oil pump side holes.
Insert tool in pad protruding nipple center hole and insert pad to bottom of side hole (straight pick).
Caution: Spring pads must be installed in correct orientation. Pad protruding nipple must point out.
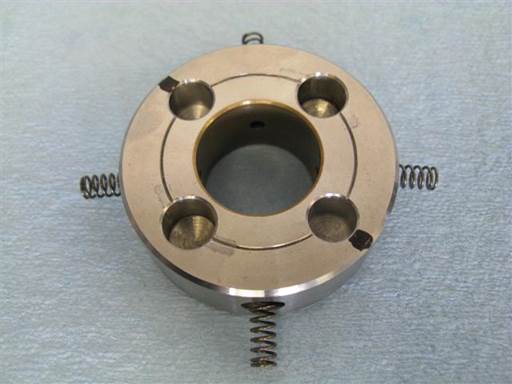
Install 4 springs in oil pump side holes.
Insert spring on side hole.
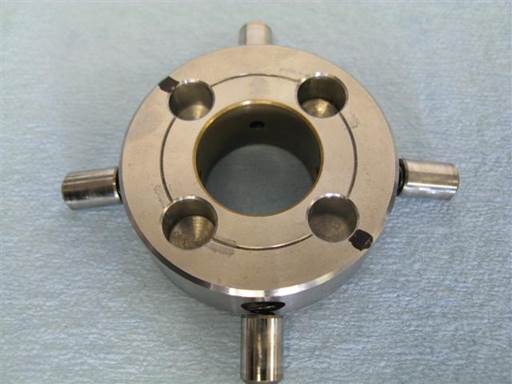
Install 4 caps on oil pump side hole springs.
Install cap on spring.
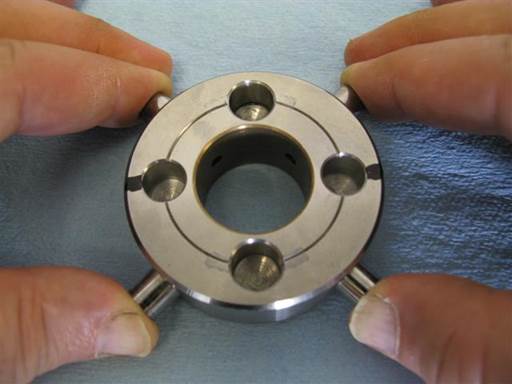
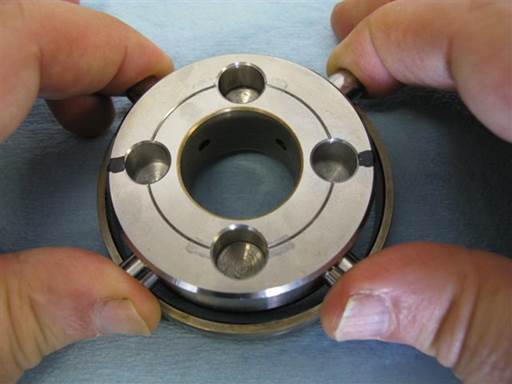
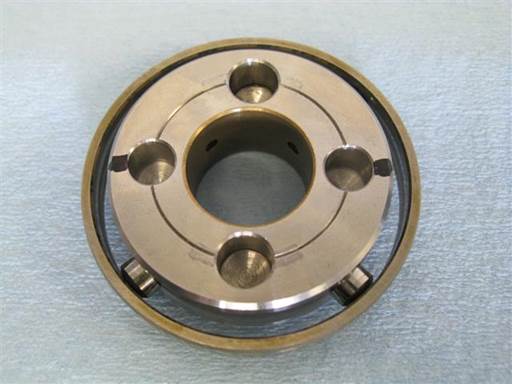
Install pump disk with caps and springs in bearing ring.
Slightly insert 4 caps and springs into oil pump disk side holes with 4 fingers (picture).
Lift disk with caps slightly inserted and place over bearing ring.
Press in all caps and insert disk with caps inside bearing ring.
Once caps inserted into ring, hold disk down and pull ring up slightly to position caps at ring center groove.
Lightly lubricate pump disk center bushing (assembly oil).
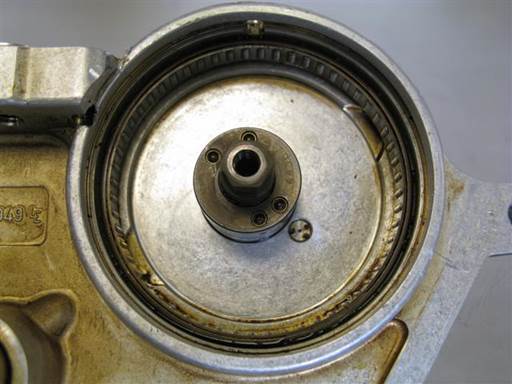
Clean vanos oil pump housing (brake cleaner & towels).
Lightly lubricate vanos center shaft side and outer radial bearing to ease pump installation (assembly oil).
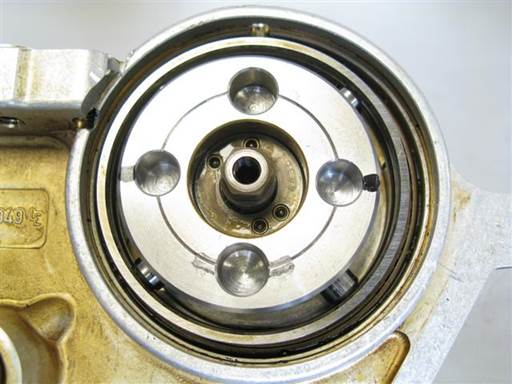
Initially install oil pump disk on oil pump shaft.
Tilt pump side to side as needed to insert onto shaft.
Only initially insert and seat disk onto shaft. Do not insert further.
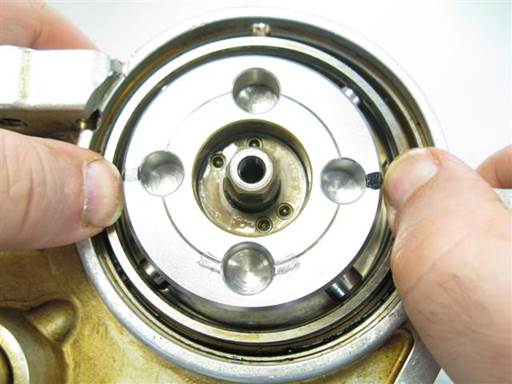
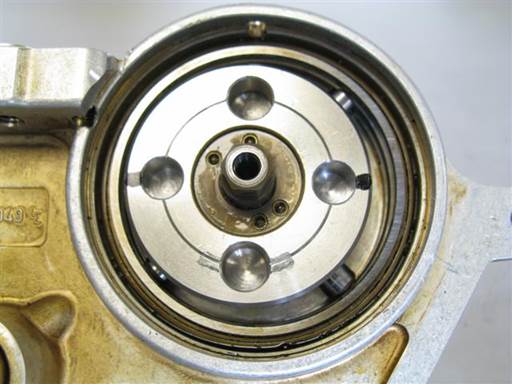
Press bearing ring to right side to align and insert into radial bearing (fingers).
Once bearing ring aligns with radial bearing slightly press down bearing ring to insert into radial bearing.
Press down on bearing ring to fully insert into radial bearing. Oil pump disk will slide down center shaft as bearing ring lowers.
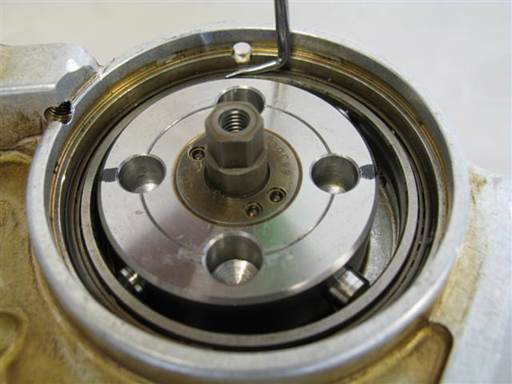
Press down on bearing ring at multiple locations to insure full insertion (90 degree pick).
Once fully pressed down and released, bearing ring will come back up slightly to align with disk caps.
Check position of bearing ring top relative to radial bearing top along perimeter to verify full bearing ring insertion (finger).
Note bearing ring will protrude out slightly further than radial bearing.
Lightly lubricate each pump cap (assembly oil).
Turn pump disk and lubricate each cap as it becomes exposed on right side.
Turn pump disk and verify smooth operation.
Adjust and lubricate components as necessary.
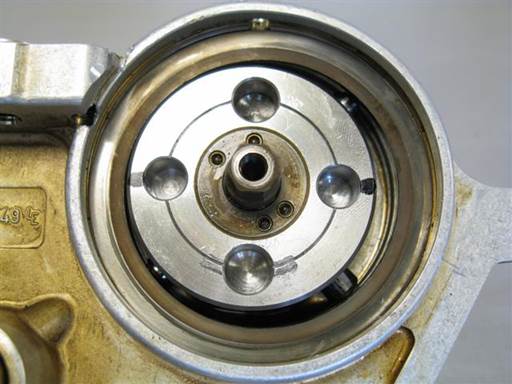
Install retaining washer in oil pump housing.
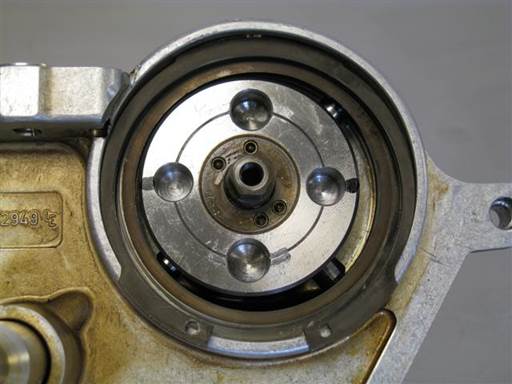
Initially insert retaining ring in oil pump housing.
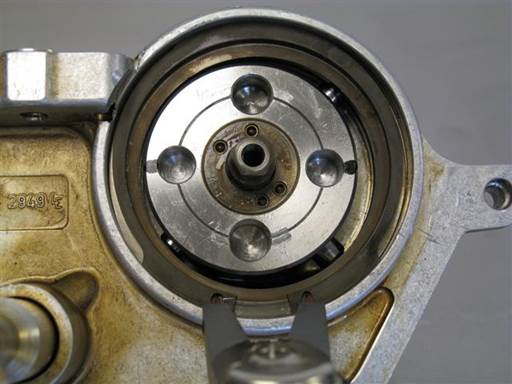
Compress retaining ring and insert into oil pump housing ring groove (retaining ring pliers).
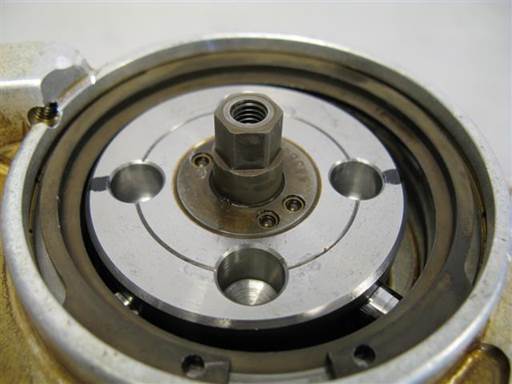
Visually verify retaining ring is inserted into housing ring groove.
Turn pump disk and verify smooth operation.
Note: Oil pump rotates counterclockwise in normal operation. If rotated in this direction air can be heard compressed and released. In engine operation this will be oil compressed and released. Function of oil pump is to compress oil to high pressure. It is then regulated down to 100 bar (1,450 psi).
Replacement of vanos sealing plate rubber rings
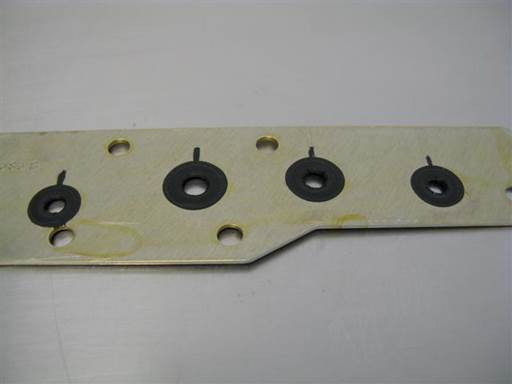
Clean vanos sealing plate (brake cleaner & towels).
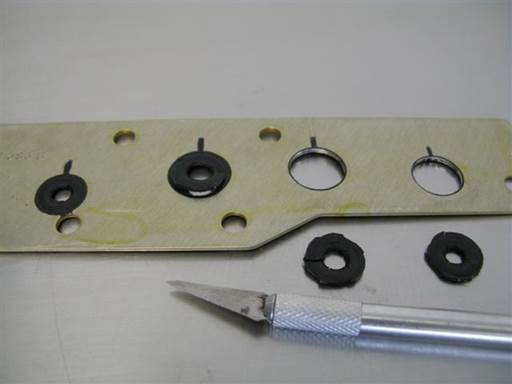
Cut rubber rings from sealing plate (razor knife).
Make radial cut from rubber ring inner diameter to sealing plate hole perimeter, then cut along sealing plate hole perimeter.
Note: Cutting motion facilitates cutting.
Once rubber ring is removed cut out remaining rubber at sealing plate hole perimeter.
Note: Cutting some metal from sealing plate is normal and acceptable.
Note: It is not necessary to remove all rubber from hole perimeter.
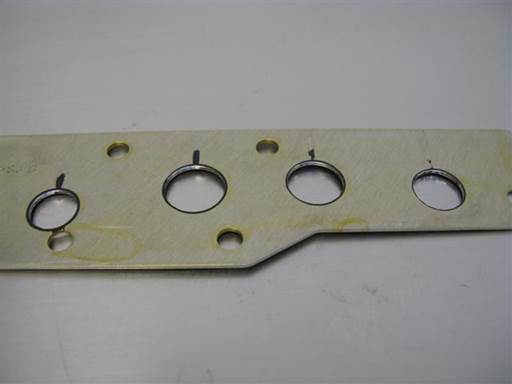
Clean sealing plate rubber ring hole perimeter surfaces (brake cleaner & towels).
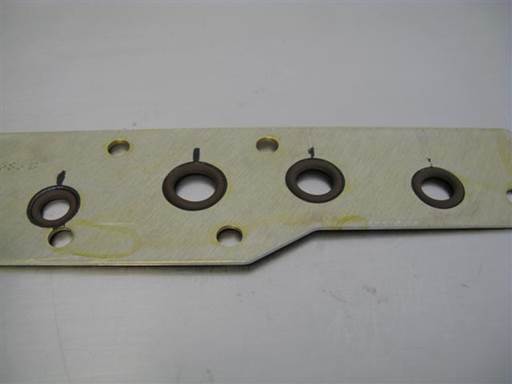
Insert new O-rings into corresponding size sealing plate rubber ring holes.
Note: O-rings fit with slight interference (larger) in holes and thus will maintain their mounted position.
Note: O-rings will adjust position and fit correctly once sealing plate is installed.
Installation of vanos seals
During following seals installation procedure, great care should be taken to not drop and damage vanos components. Perform work over table, so if part is dropped it will fall to table top.
Installation of vanos intake seals
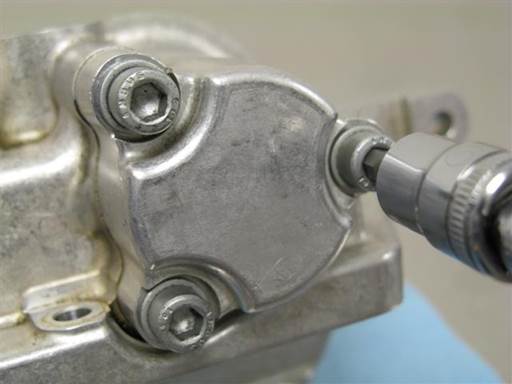
Remove vanos intake cylinder cover.
Remove cover 3 mounting bolts (5mm hex bit socket 3/8″ / 3/8″ ratchet).
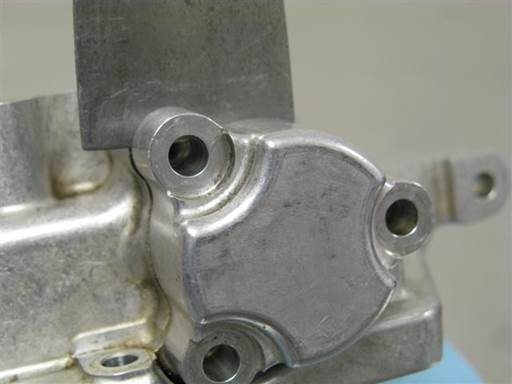
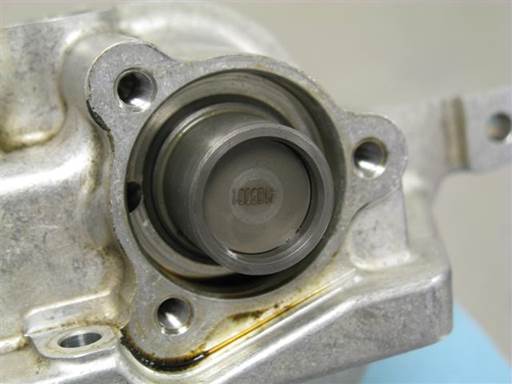
Remove intake cylinder cover.
Pry cover at multiple locations to evenly remove cover (small putty-knife).
As necessary, strike blade between cover and vanos body to initially break seize.
Note: Orient blade with edge ramp side to vanos body. This orientation is more effective.
Note: Cover resistance is due to cover sealing O-ring.
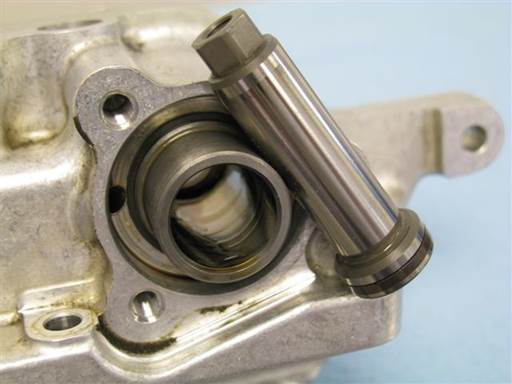
Remove intake piston from intake cylinder.
Press piston from vanos inboard side to remove piston from vanos outboard side (1/4″ socket extension).
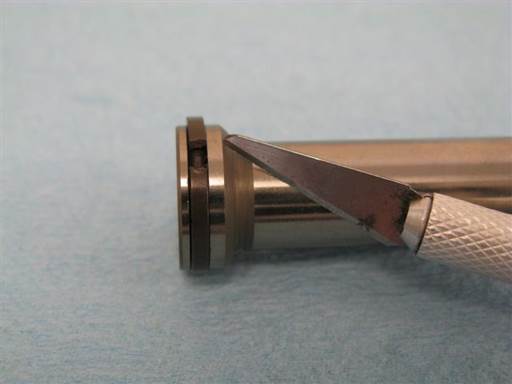
Cut cross section of intake piston end seal Teflon ring (razor knife).
Note: Rocking of blade while pressing helps create cutting motion.
Rotate blade in seal after cutting to note any remaining uncut seal (razor knife).
Remove cut Teflon ring from piston grove.
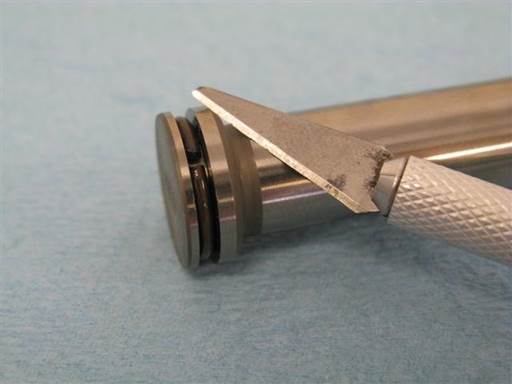
Cut cross section of intake piston end seal O-ring (razor knife).
Note: Rocking of blade while pressing helps create cutting motion.
Rotate blade in seal after cutting to note any remaining uncut seal (razor knife).
Remove cut O-ring from piston grove.
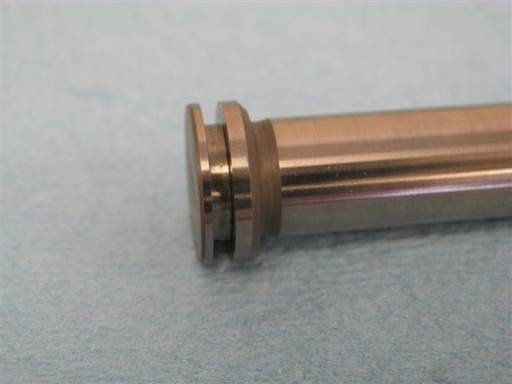 When seal removal is complete, piston seal groove will have exposed metal with no seals.
Clean intake piston (brake cleaner & towels).
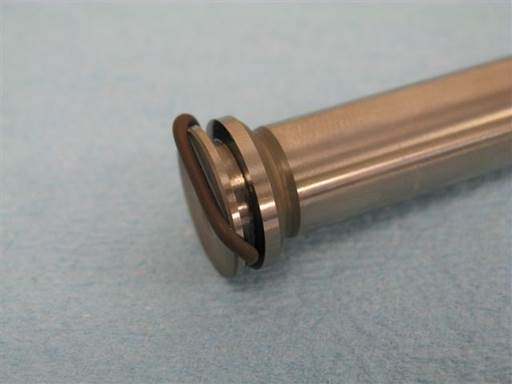
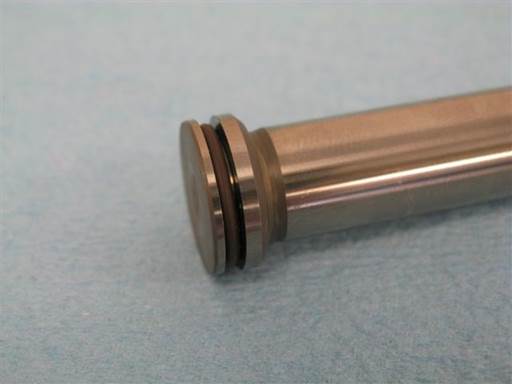
Insert intake piston end seal new O-ring in piston seal groove at one end and stretch other end over piston and drop into seal groove (fingers).
Center O-ring in seal groove (straight pick).
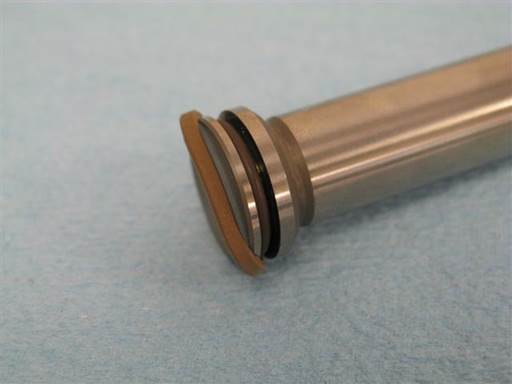
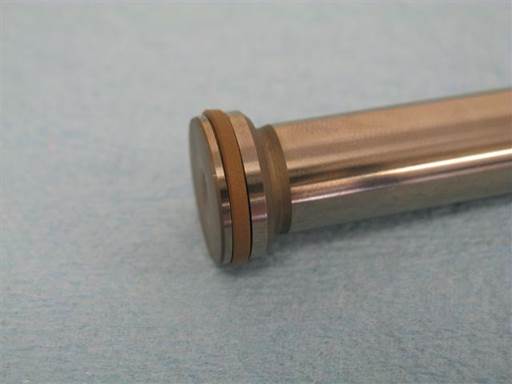
Insert intake piston end seal new Teflon ring in piston seal groove at one end and stretch other end over piston and drop into seal groove (fingers).
Stretch Teflon ring at multiple location along Teflon ring before final stretch over piston and into groove (fingers).
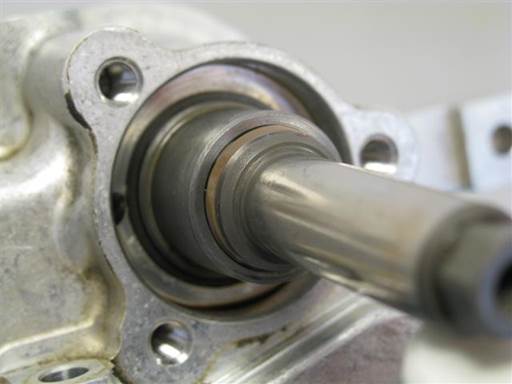
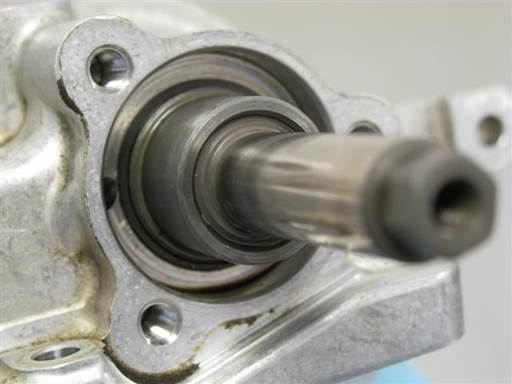
Insert intake piston large end into intake cylinder.
Lightly lubricate cylinder entry inner wall and piston Teflon ring (assembly oil).
Wiggle piston and press straight into cylinder.
Verify Teflon ring is inserting into cylinder at all perimeter locations. Reposition piston and reattempt insertion to facilitate Teflon ring full perimeter insertion.
Once all Teflon ring perimeter inserts into cylinder, wiggle piston and press straight into cylinder to fully insert Teflon ring into cylinder.
Note: Cylinder entry has chamfer which allows for stretched Teflon ring to be collected and inserted into cylinder.
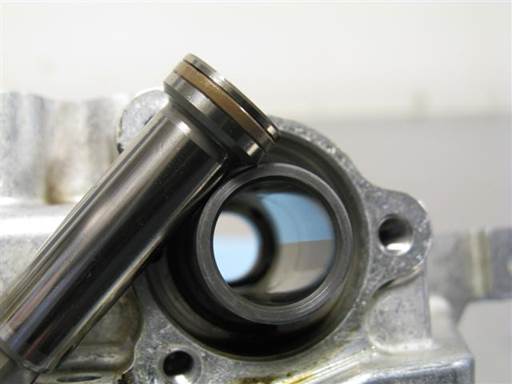
Maintain piston in cylinder for 1 minute then remove.
This period allows Teflon ring to be compressed (resized) close to original size.
Remove piston from cylinder.
Note Teflon ring has decreased in diameter.
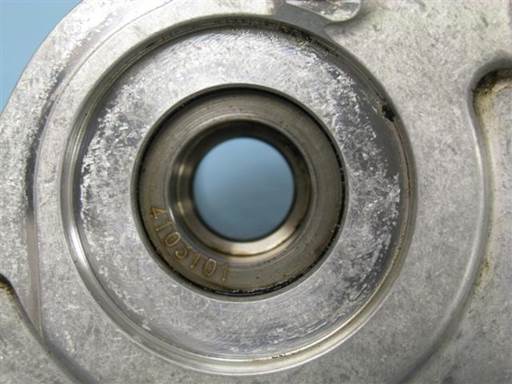
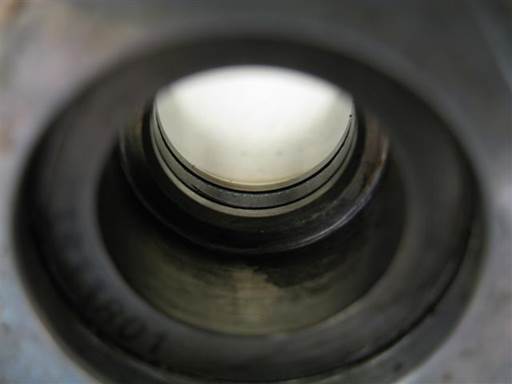
Note intake rod seal on intake cylinder just inside cylinder inboard side.
Note: Picture is of different vanos and shows burnt sludge buildup.
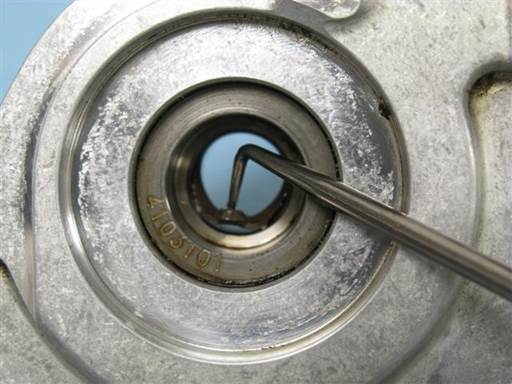
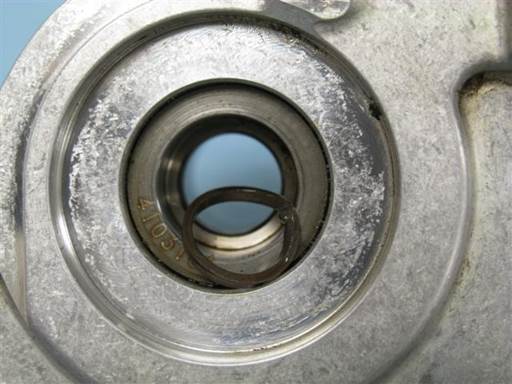
Pry out intake rod seal Teflon ring from intake cylinder seal groove.
Pry Teflon ring from front to rear to dislodge from seal cavity, then pull Teflon ring out of cylinder (90 degree pick).
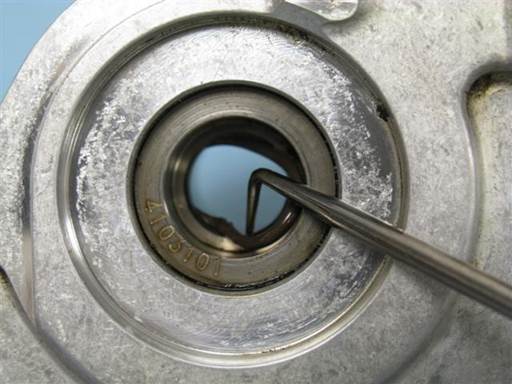
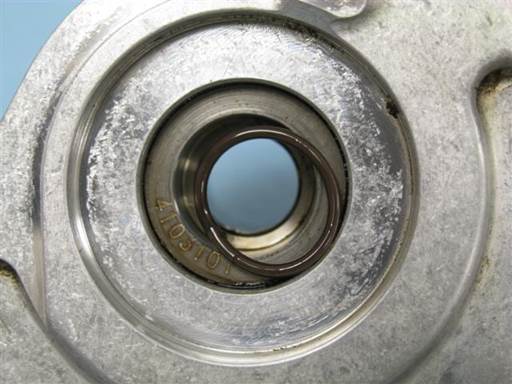
Pry out intake rod seal O-ring from intake cylinder seal groove.
Pry O-ring from rear to front to dislodge from seal cavity, then pull O-ring out of cylinder (90 degree pick).
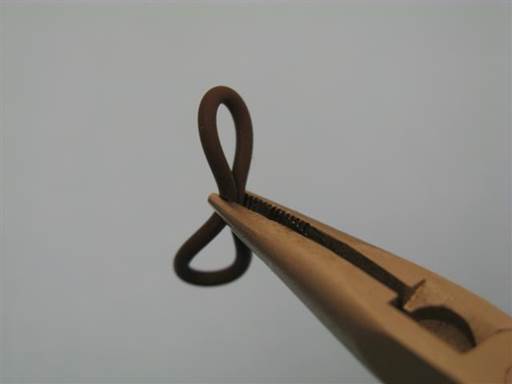
Crimp and hold intake rod seal new O-ring at approximate middle and hold (medium nose pliers).
Note: Attempt to hold O-ring without allowing it to twist, as it needs to be straight for insertion in next step.
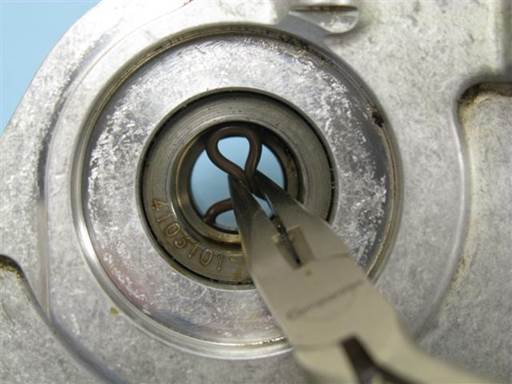
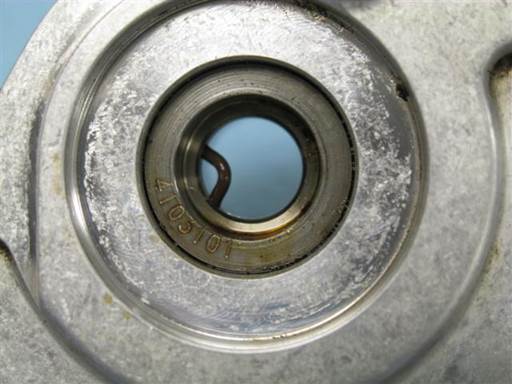
Insert intake rod seal new O-ring into cylinder seal groove bottom (picture).
Then press down on O-ring and insert O-ring top into seal groove top.
Release O-ring holding tool and O-ring will insert into seal groove.
Press against O-ring remaining protruding section to fully insert into seal groove (medium nose pliers).
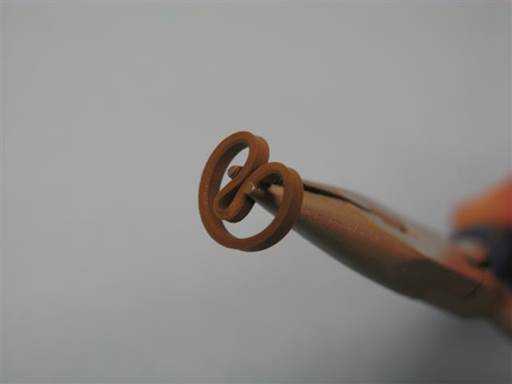
Press Intake rod seal new Teflon ring side into middle of Teflon ring and hold at crimped section (picture) (medium nose pliers).
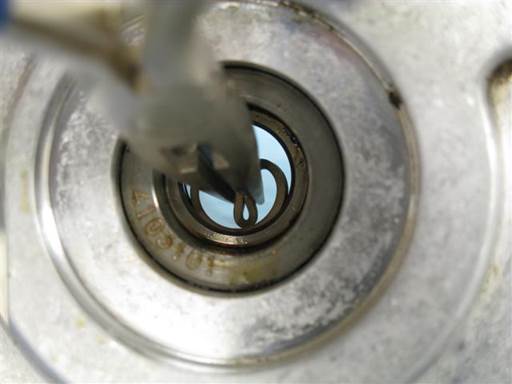
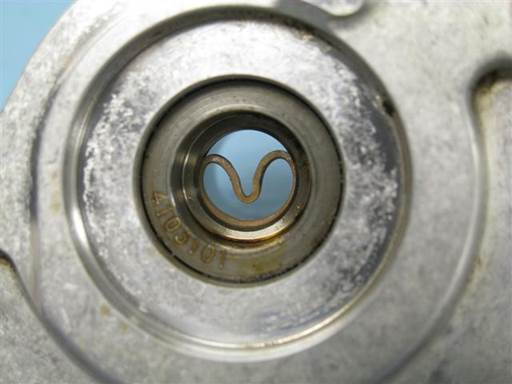
Insert intake rod seal new Teflon ring into cylinder seal groove bottom (picture).
Release Teflon ring from holding tool and Teflon ring will insert into seal groove.
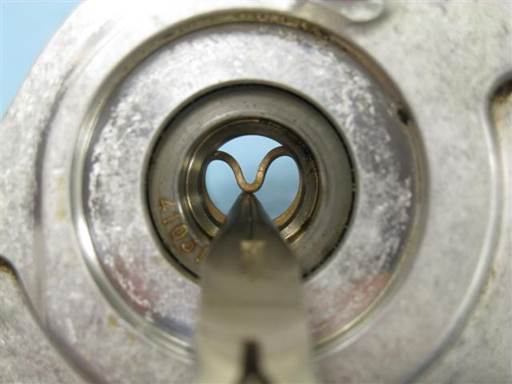
Slowly press against Teflon ring remaining protruding section to fully insert into seal groove (medium nose pliers).
Smooth Teflon ring by pressing along bent section from side to side (medium nose pliers side).
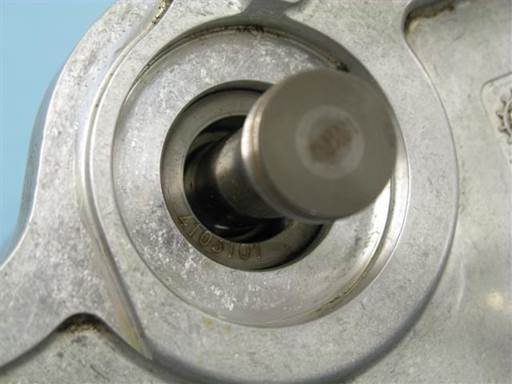
Insert intake piston small end into intake cylinder inboard side.
Lightly lubricate piston and cylinder rod seal Teflon ring (assembly oil).
Wiggle piston and press straight into cylinder.
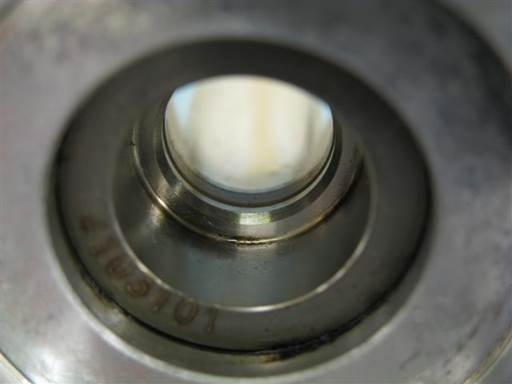
Maintain piston in cylinder for 1 minute then remove.
This period allows Teflon ring to be rebound (resized) close to original size.
Remove piston from cylinder.
Note Teflon ring has returned to original shape.
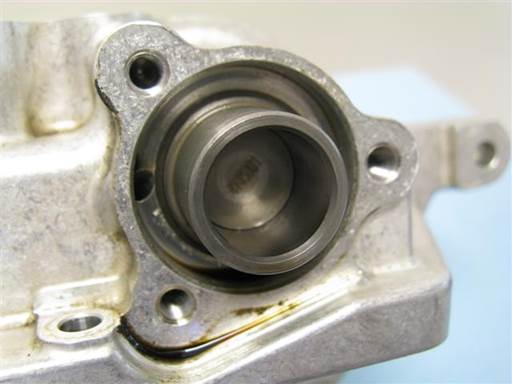
Insert intake piston small end first into intake cylinder outboard side and press piston fully into cylinder.
Clean vanos intake cylinder outboard side cover mating surfaces and cover mounting bolts (brake cleaner & towels).
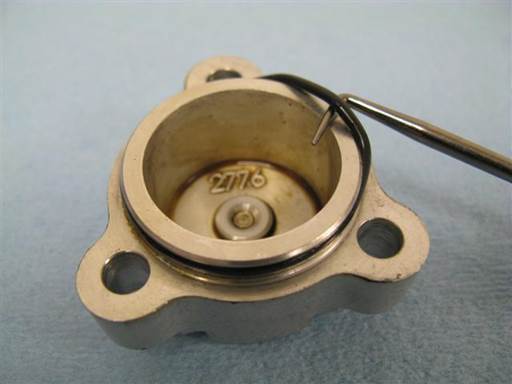
Remove intake cylinder cover sealing O-ring.
Pry O-ring from cover groove and remove from cover (90 degree pick).
Clean intake cylinder cover (brake cleaner & towels).
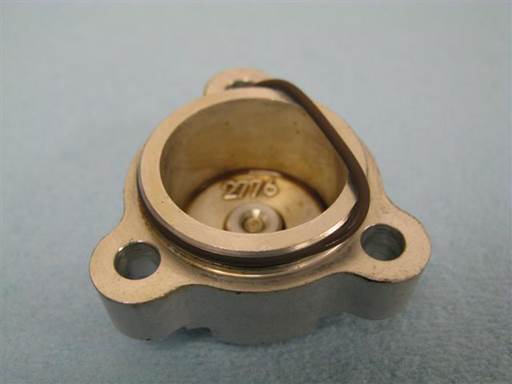
Install new O-ring on intake cylinder cover.
Insert O-ring in cover groove on one end and stretch other end over cover and drop into groove (fingers).
Lightly lubricate O-ring to ease cover installation (assembly oil).
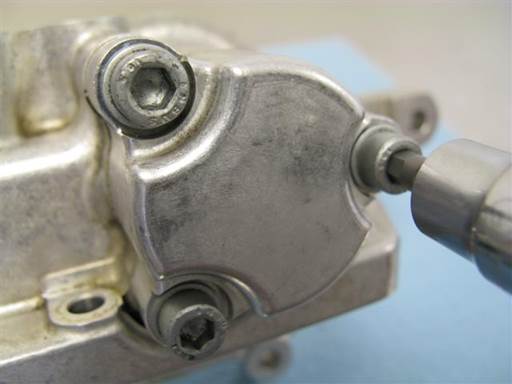
Install intake cylinder cover on vanos.
Orient cover to align cover holes with vanos holes. Cover is asymmetric and only one orientation aligns.
Install intake cylinder cover 3 mounting bolts (5mm hex bit socket 3/8″ / 3/8″ ratchet).
Tighten bolts evenly to draw cover evenly to vanos body.
Fully tighten, 10 Nm (7 ft-lb) (5mm hex bit socket 3/8″ / 3/8″ torque wrench).
Note: Tighten bolts evenly in multiple passes. Verify one pass with all bolts fully tightened.
Installation of vanos exhaust seals
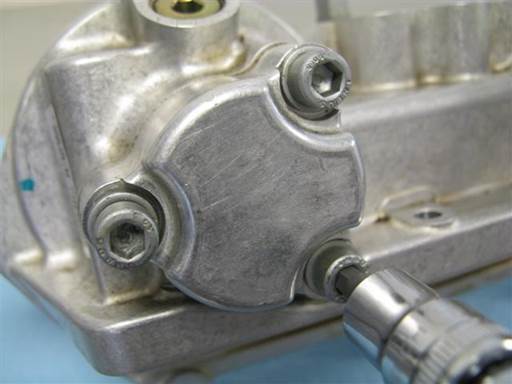
Remove vanos exhaust cylinder cover.
Remove cover 3 mounting bolts (5mm hex bit socket 3/8″ / 3/8″ ratchet).
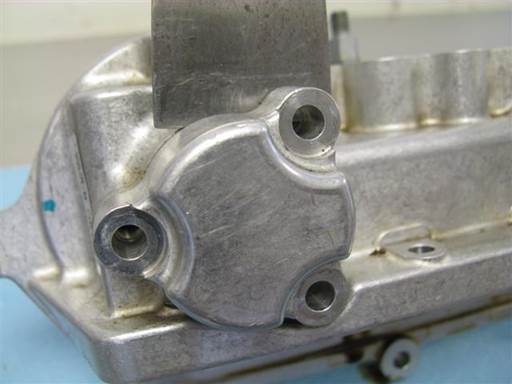
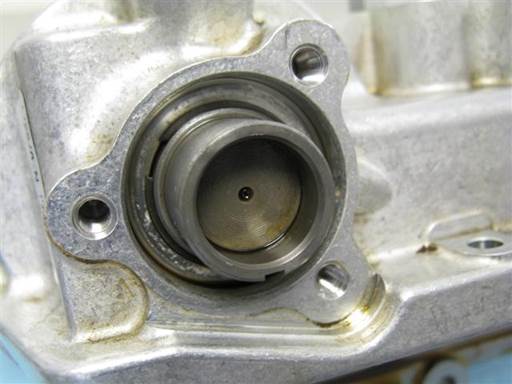
Remove exhaust cylinder cover.
Pry cover at multiple locations to evenly remove cover (small putty-knife).
As necessary, strike blade between cover and vanos body to initially break seize.
Note: Orient blade with edge ramp side to vanos body. This orientation is more effective.
Note: Cover resistance is due to cover sealing O-ring.
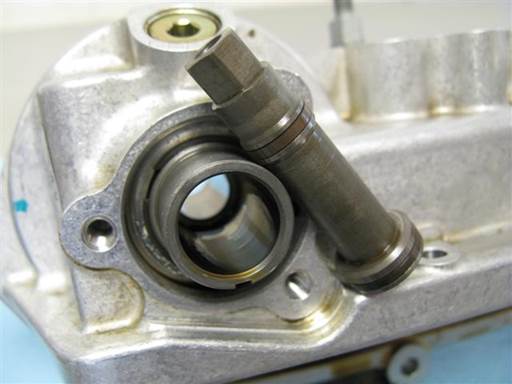
Remove exhaust piston from exhaust cylinder.
Press piston from vanos inboard side to remove piston from vanos outboard side (1/4″ socket extension).
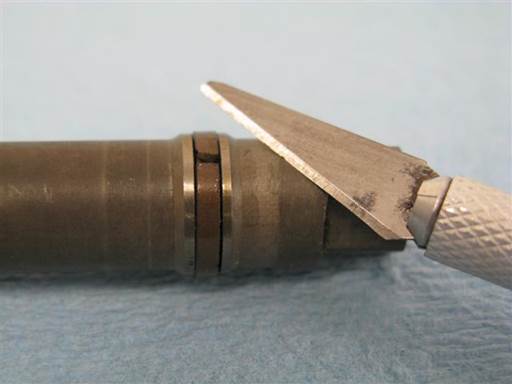
Cut cross section of exhaust piston middle seal Teflon ring (razor knife).
Note: Rocking of blade while pressing helps create cutting motion.
Rotate blade in seal after cutting to note any remaining uncut seal (razor knife).
Remove cut Teflon ring from piston grove.
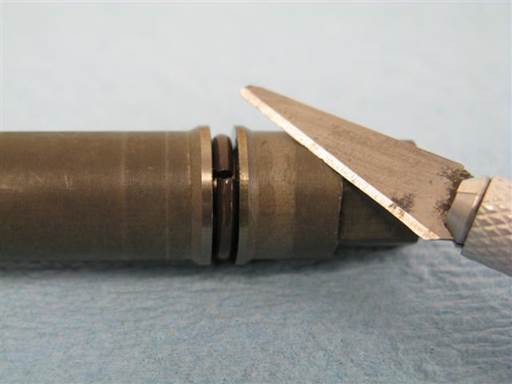
Cut cross section of exhaust piston middle seal O-ring (razor knife).
Note: Rocking of blade while pressing helps create cutting motion.
Rotate blade in seal after cutting to note any remaining uncut seal (razor knife).
Remove cut O-ring from piston grove.
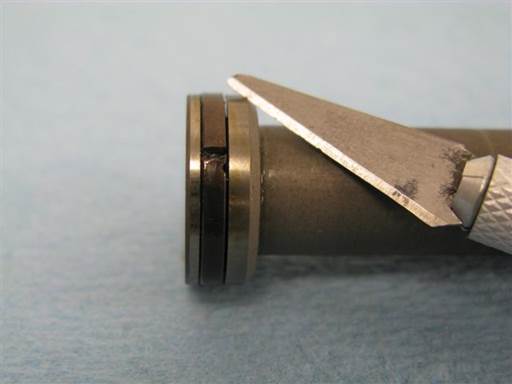
Cut cross section of exhaust piston end seal Teflon ring (razor knife).
Note: Rocking of blade while pressing helps create cutting motion.
Rotate blade in seal after cutting to note any remaining uncut seal (razor knife).
Remove cut Teflon ring from piston grove.
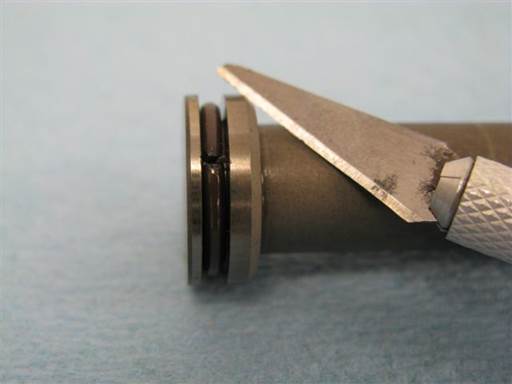
Cut cross section of exhaust piston end seal O-ring (razor knife).
Note: Rocking of blade while pressing helps create cutting motion.
Rotate blade in seal after cutting to note any remaining uncut seal (razor knife).
Remove cut O-ring from piston grove.
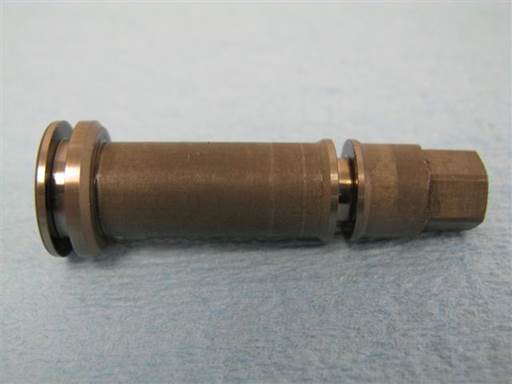
When seals removal is complete, piston seal grooves will have exposed metal with no seals.
Clean exhaust piston (brake cleaner & towels).
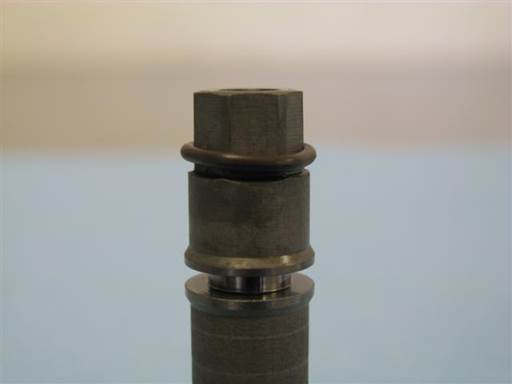
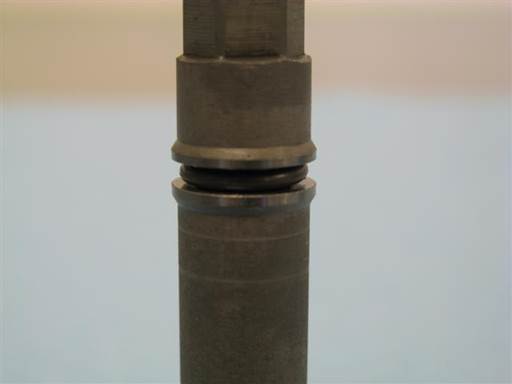
Mount exhaust piston middle seal O-ring onto exhaust piston small end and roll O-ring along piston and drop into seal groove (fingers).
Center O-ring in seal groove (straight pick).
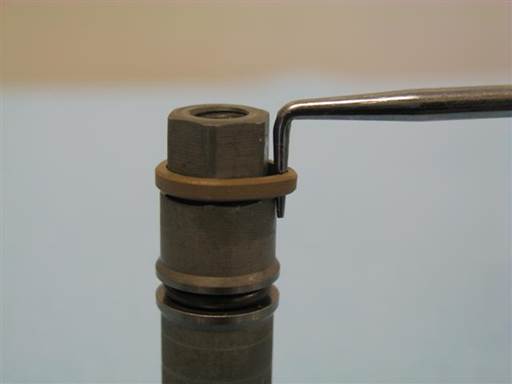
Mount exhaust piston middle seal Teflon ring onto exhaust piston small end.
Insert pick tool between Teflon ring and piston (90 degree pick) (picture).
Leverage pick tool against piston and tilt pick tool to stretch out Teflon ring (90 degree pick).
Perform Teflon ring stretching at multiple locations along Teflon ring until Teflon ring notably stretches.
Note: Teflon ring needs to stretch sufficiently to slide over piston larger diameter.
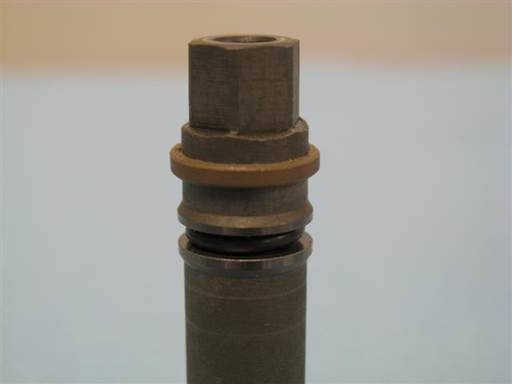
Place exhaust piston vertically with large end down.
Press down on Teflon ring from top end to press Teflon ring onto piston larger diameter (fingers/nails).
Move Teflon ring evenly along piston (picture).
Note: If Teflon ring difficult to press down repeat previous Teflon ring stretching step.
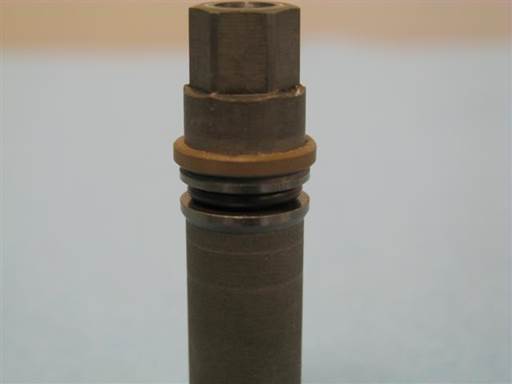
Slide Teflon ring down exhaust piston to seal groove rim (fingers/nails) (picture).
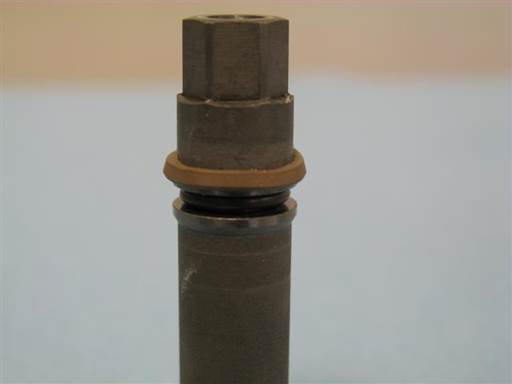
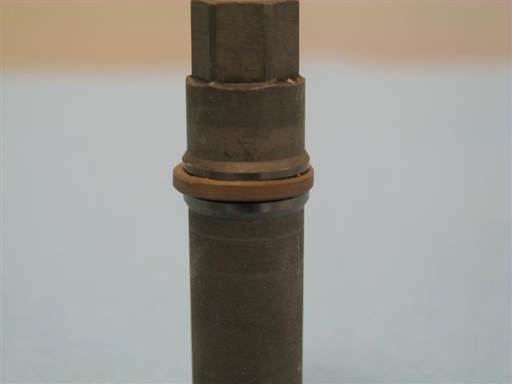
Press down on Teflon ring from top end to press Teflon ring onto piston seal groove rim and drop Teflon ring into seal groove (fingers/nails).
Move Teflon ring evenly along piston (picture).
Note: It has been found that it is practical to first compress this small Teflon ring as next step and insert it into the exhaust cylinder for a few minutes, as shown a few steps below.
After that continue here with the ring on the piston bottom.
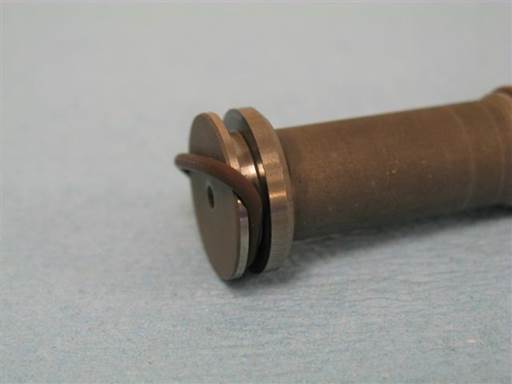
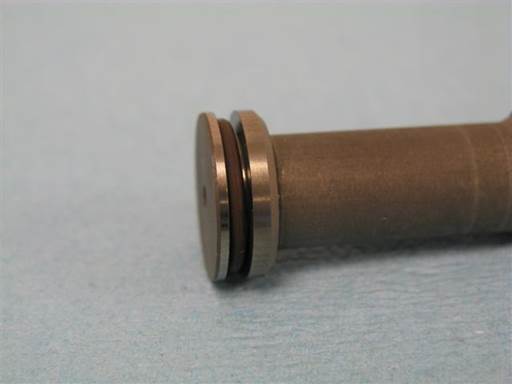
Insert exhaust piston end seal O-ring in piston seal groove at one end and stretch other end over piston and drop into seal groove (fingers).
Center O-ring in seal groove (straight pick).
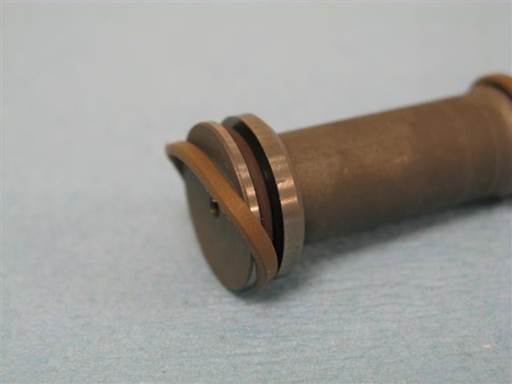
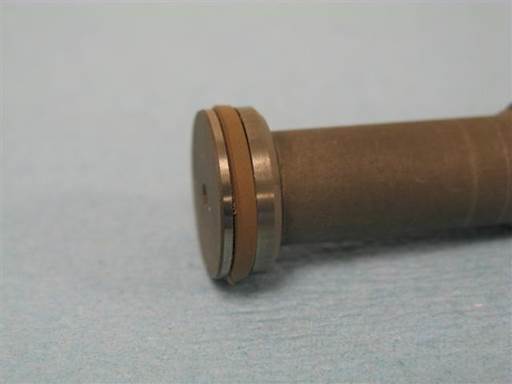
Insert exhaust piston end seal Teflon ring in piston seal groove at one end and stretch other end over piston and drop into seal groove (fingers).
Stretch Teflon ring at multiple location along Teflon ring before final stretch over piston and into groove (fingers).
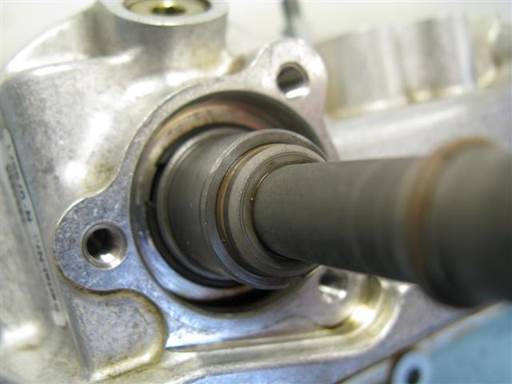
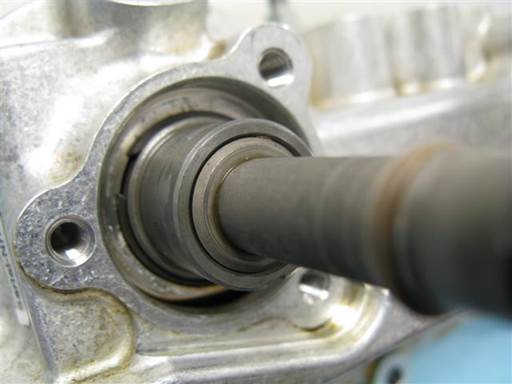
Insert exhaust piston large end into exhaust cylinder outboard side.
Lightly lubricate cylinder entry inner wall and piston Teflon ring (assembly oil).
Wiggle piston and press straight into cylinder.
Verify Teflon ring is inserting into cylinder at all perimeter locations. Reposition piston and reattempt insertion to facilitate Teflon ring full perimeter insertion.
Once all Teflon ring perimeter inserts into cylinder, wiggle piston and press straight into cylinder to fully insert Teflon ring into cylinder.
Note: Cylinder entry has chamfer which allows for stretched Teflon ring to be collected and inserted into cylinder.
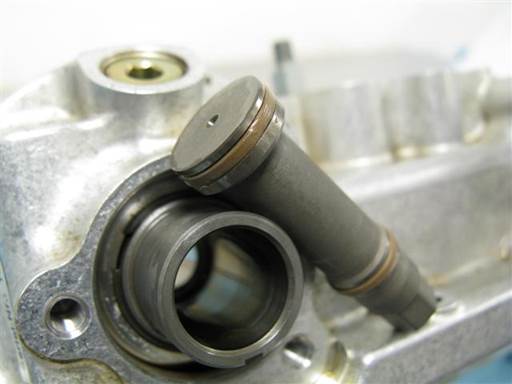
Maintain piston in cylinder for 1 minute then remove.
This period allows Teflon ring to be compressed (resized) close to original size.
Remove piston from cylinder.
Note Teflon ring has decreased in diameter.
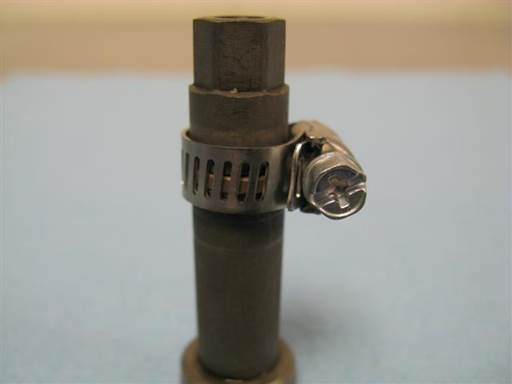
Place small hose clamp around exhaust piston middle seal Teflon ring (small hose clamp).
Tighten clamp until it seats on piston (Philips).
Note: Only lightly tighten clamp on piston.
Note: Mounting clamp on piston middle seal Teflon ring will compress Teflon ring to close to original size and allow piston insertion in next step.
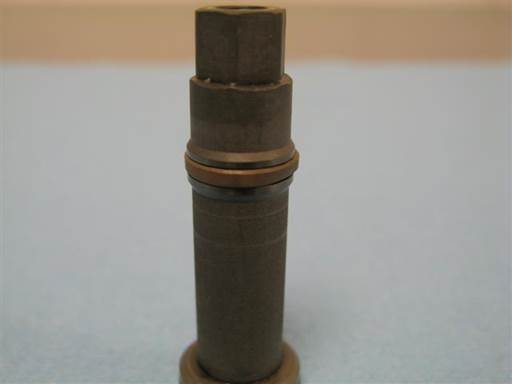
Remove hose clamp from exhaust piston (Philips).
Note Teflon ring has compressed.
Note: Clamp will leave slight crease on Teflon surface. This crease will rectify once Teflon ring is heated in engine.
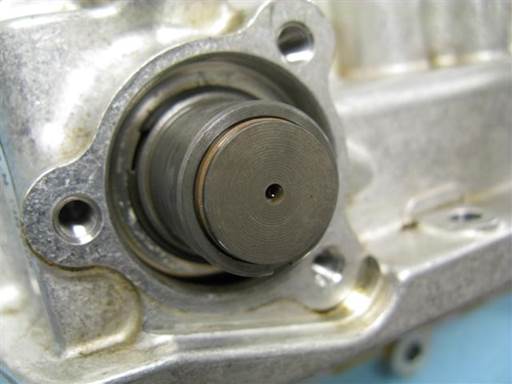
Lightly lubricate exhaust piston middle seal Teflon ring (assembly oil).
Insert exhaust piston small end into exhaust cylinder outboard side.
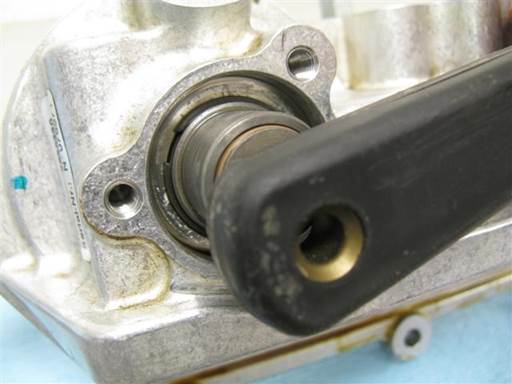
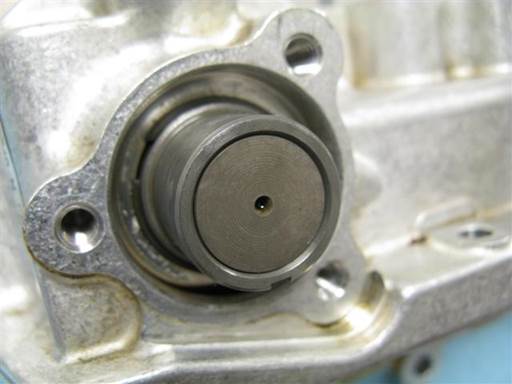
Place flat object on exhaust piston end (small putty-knife handle).
Press in on piston with moderate pressure until piston inserts into cylinder (picture).
Note: During this step piston middle seal Teflon ring is being inserted into exhaust smaller cylinder. Cylinder entry has chamfer which will allow for stretched Teflon ring to be collected and inserted into cylinder.
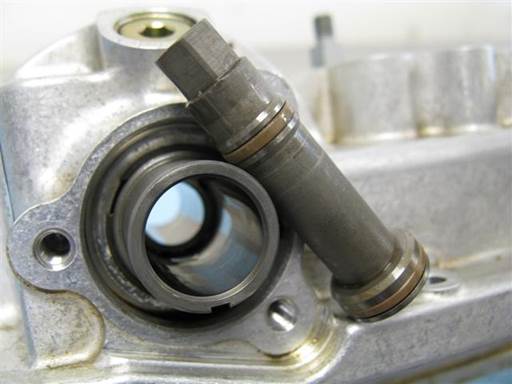
Maintain piston in cylinder for 1 minute then remove.
This period allows Teflon ring to be compressed (resized) close to original size.
Remove piston from cylinder by pressing piston from inboard side.
Note Teflon ring has decreased in diameter.
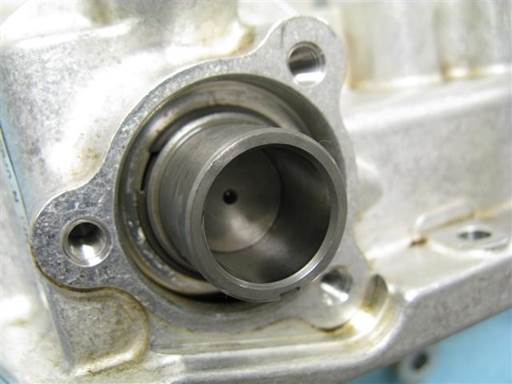
Insert exhaust piston small end first into exhaust cylinder outboard side and press piston fully into cylinder.
Clean vanos exhaust cylinder outboard side cover mating surfaces and cover mounting bolts (brake cleaner & towels).

Remove exhaust cylinder cover sealing O-ring.
Pry O-ring from cover groove and remove from cover (90 degree pick).
Clean exhaust cylinder cover (brake cleaner & towels).

Install new O-ring on exhaust cylinder cover.
Insert O-ring in cover groove on one end and stretch other end over cover and drop into groove (fingers).
Lightly lubricate O-ring to ease cover installation (assembly oil).
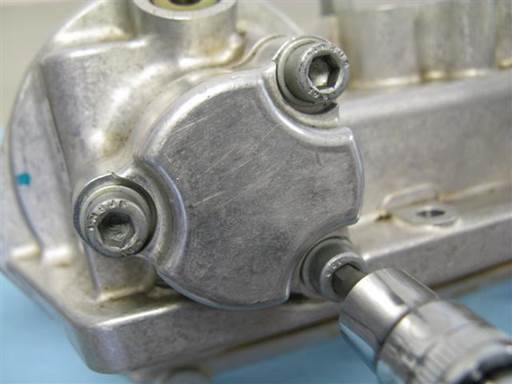
Install exhaust cylinder cover on vanos.
Orient cover to align cover holes with vanos holes. Cover is asymmetric and only one orientation aligns.
Install exhaust cover 3 mounting bolts (5mm hex bit socket 3/8″ / 3/8″ ratchet).
Tighten bolts evenly to draw cover evenly to vanos body.
Fully tighten, 10 Nm (7 ft-lb) (5mm hex bit socket 3/8″ / 3/8″ torque wrench).
Note: Tighten bolts evenly in multiple passes. Verify one pass with all bolts fully tightened.
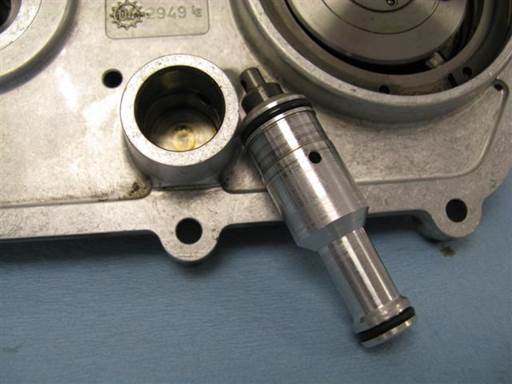
Remove vanos oil flow regulator from vanos.
Rotate regulator to break seize then pull regulator from vanos.
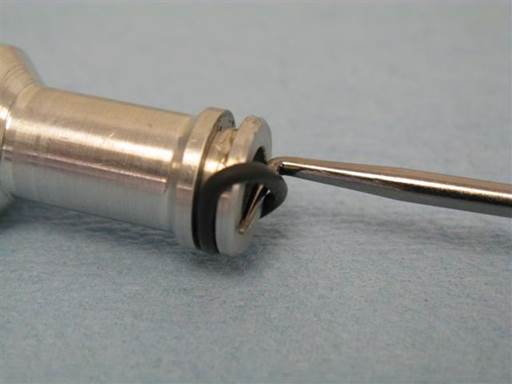
Remove regulator small O-ring.
Pry O-ring from regulator groove and remove from regulator (90 degree pick).
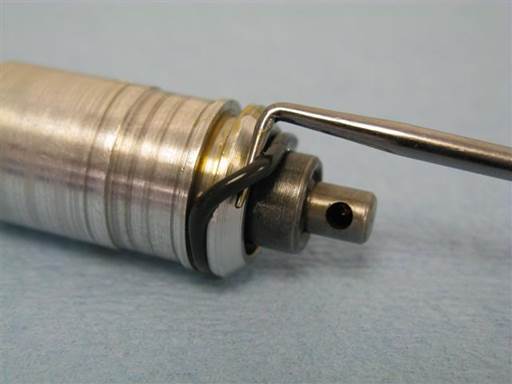
Remove regulator large O-ring.
Pry O-ring from regulator groove and remove from regulator (90 degree pick).
Clean oil flow regulator (brake cleaner & towels).
Spray through end port to flush out any debris (brake cleaner). Not: Do not use compressed air as it can damage filter.
Verify oil flow regulator valve is moving smoothly. Press and release wider brown component at end of regulator (above picture). It should insert with some resistance and spring back when released. Movement should be smooth.
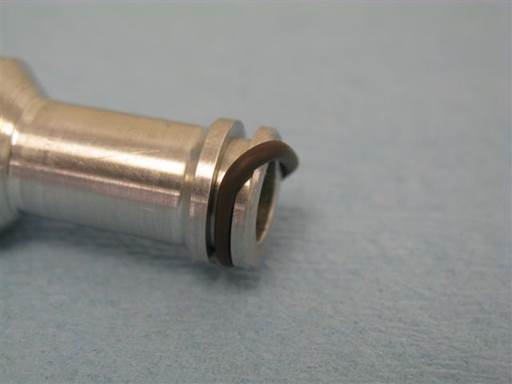
Install new small O-ring on regulator.
Insert O-ring in regulator groove on one end and stretch other end over regulator and drop into groove (fingers).
Lightly lubricate O-ring to ease vanos installation (assembly oil).
Note: Oil regulator small O-ring is similar in size to vanos solenoid oil pressure restrictor small O-ring. Oil regulator O-ring is slightly thicker in cross section than oil pressure restrictor small O-ring.
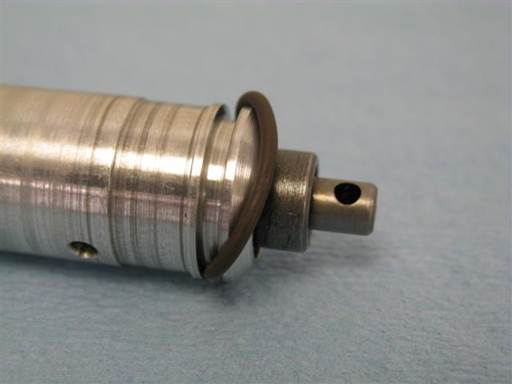
Install new large O-ring on regulator.
Insert O-ring in regulator groove on one end and stretch other end over regulator and drop into groove (fingers).
Lightly lubricate O-ring to ease regulator installation (assembly oil).
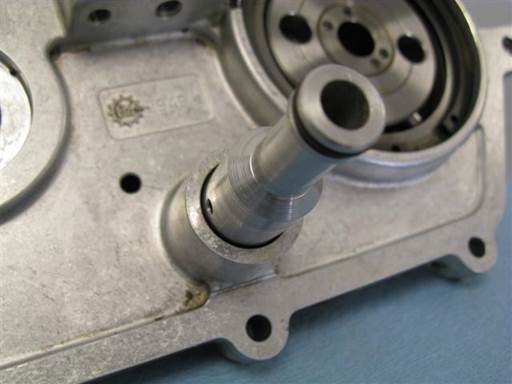
Orient regulator with overflow holes to sides of vanos (picture) and fully insert regulator into vanos.
Remaining two O-rings in seals kit are for oil pressure restrictor and their installation is covered in the next solenoid section.
Replacement of solenoid coil pack, pressure restrictor O-rings, and oil filter
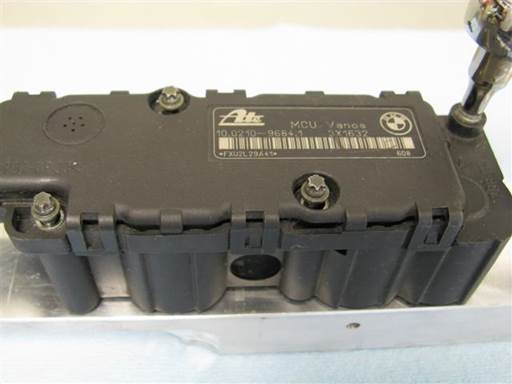
Remove coil pack 4 mounting bolts (E-5 torx or 4mm socket 1/4″ / 1/4″ ratchet).
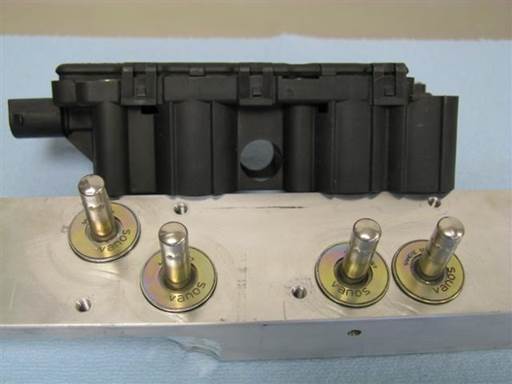
Pull off coil pack (black) from valve body (silver).
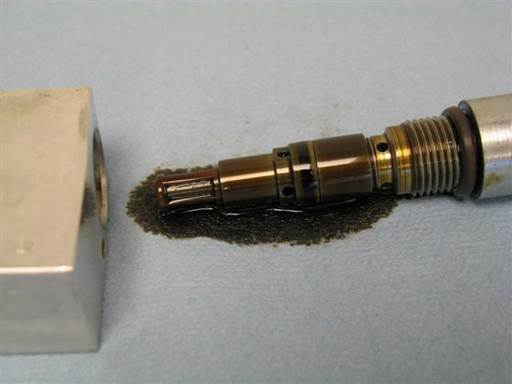
Unscrew oil pressure restrictor from valve body (hand).
Drain and discard oil from valve body.
Cleaning of solenoid valves
Spray cleaner into all valve body available holes to clear out oil (brake cleaner).
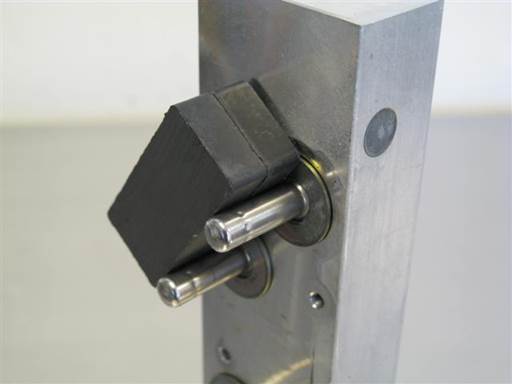
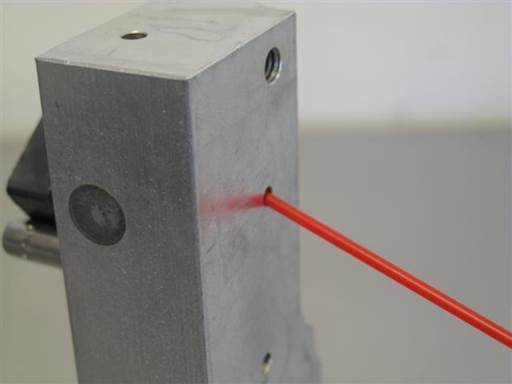
Mount magnet on each valve shaft of valve body to open valve, then spray cleaner in corresponding valve small hole on opposite side of valve body (brake cleaner).
Continue to spray cleaner into valve hole until cleaner runs clean from valve body.
Perform valve opening and cleaning process for 4 valves.
Once valves cleaned, each valve internal piston should be heard easily moving and clicking when magnet is applied on and off valve shaft.
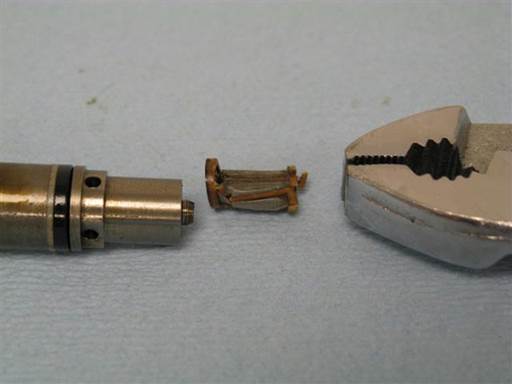
Pull off oil filter from pressure restrictor (pliers).
Note: Oil filter replacement is not a requirement. Oil filter can be spray cleaned (brake cleaner).
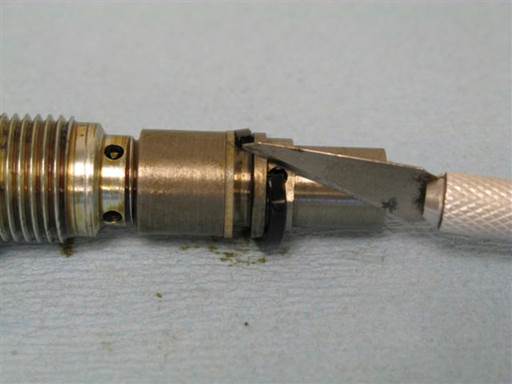
Cut cross section of small O-ring on pressure restrictor (razor knife).
Note: Rocking of blade while pressing helps create cutting motion.
Note: Take care to not cut or damage adjacent plastic washer. Plastic washer already has cross section cut which is needed for installation.
Remove cut O-ring from pressure restrictor.
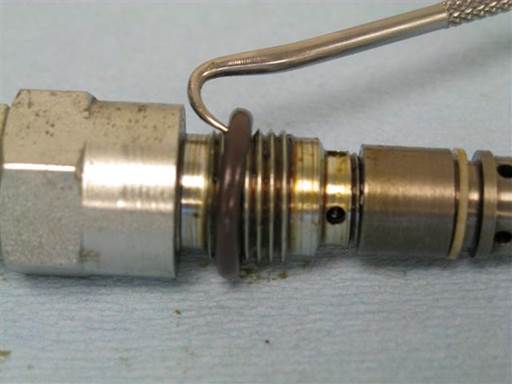
Remove large O-ring from pressure restrictor (90 degree pick).
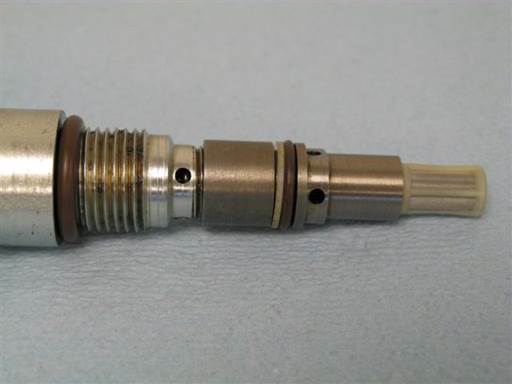
Clean pressure restrictor (brake cleaner & towels).
Install new large O-ring on pressure restrictor. Roll O-ring onto pressure restrictor till O-ring drops into base groove.
Install small O-ring on pressure restrictor. Roll O-ring onto pressure restrictor till O-ring drops into groove.
Install new oil filter on pressure restrictor. Press filter small hole end onto pressure restrictor end stud.
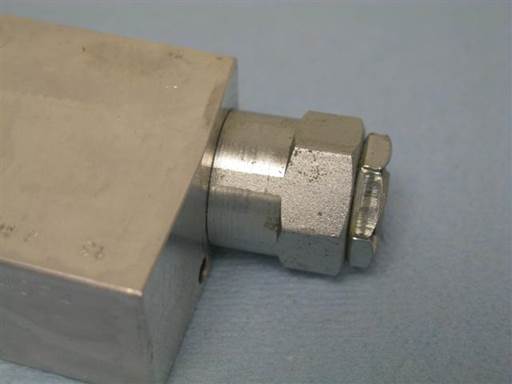
Screw pressure restrictor into valve body (hand).
Note: Pressure restrictor will be tightened once solenoid is mounted on vanos.
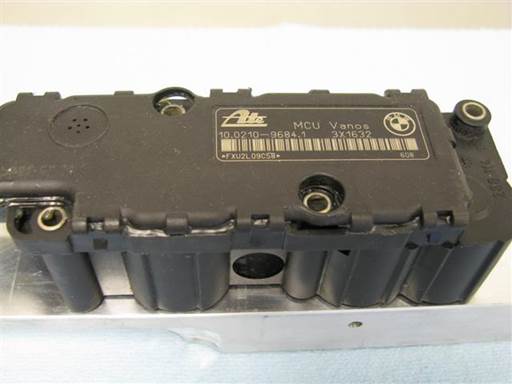
Mount new coil pack on valve body.
Align coil pack holes with valve body studs and mount.
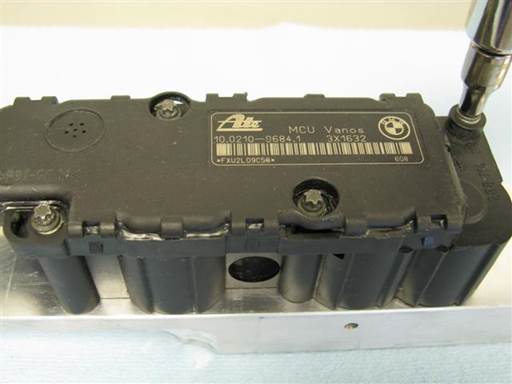
Install coil pack 4 mounting bolts (E-5 torx or 4mm socket 1/4″ / 1/4″ ratchet).
Tighten bolts evenly in multiple passes.
Fully tighten, 4 Nm (3 ft-lb) (E-5 torx or 4mm socket 1/4″ w/ 3/8″ to 1/4″ socket adapter / 3/8″ torque wrench).
Note: Bolts can be tightened lightly by feel. Do not over tighten.
Cleaning of parts
Note: When cleaning parts, spray cleaning compound on towel then wipe component with towel. Components can also be placed in a small container and sprayed with cleaning compound then individually wiped with towel.
Clean all mounting bolts, nuts, washers (brake cleaner & towels).
Clean vanos matting surfaces; solenoid (both vanos and solenoid), head gasket (brake cleaner & towels).
Clean head matting surfaces; sparkplug well, top perimeter and rear half-moons, front vanos gasket (brake cleaner & towels).
Clean coil harness ground wire (brake cleaner & towels).
Clean coils mounting contact surfaces (at coils) (brake cleaner & towels).
Clean valve cover gaskets (brake cleaner & towels). Note: S54 valve cover gaskets and bolt grommets are made of Viton and thus can withstand brake cleaner. Brake cleaner will allow for removing oil from gaskets.
Clean valve cover mating surfaces; inner gasket, bolt access holes, all studs, exhaust side ground wire hole, exhaust side oil drain hole (brake cleaner & towels).
Perform rattle procedure
If performing rattle procedure, do so at this time.
S54 Vanos Rattle Procedure
Installation of vanos
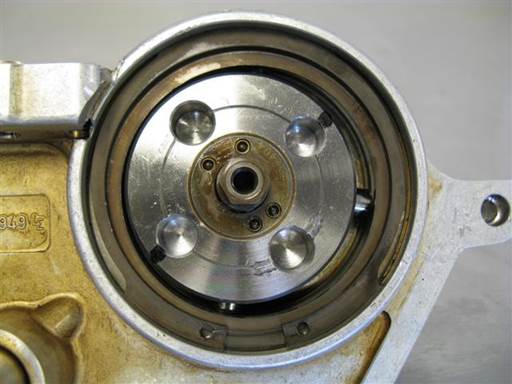
Rotate vanos oil pump to approximate position found when vanos was first removed.
This position will locate oil pump holes close to oil pump driver tabs position on exhaust sprocket hub. This facilitates easier alignment and installation.
Note: Pump disk new smaller holes to be used are marked black.
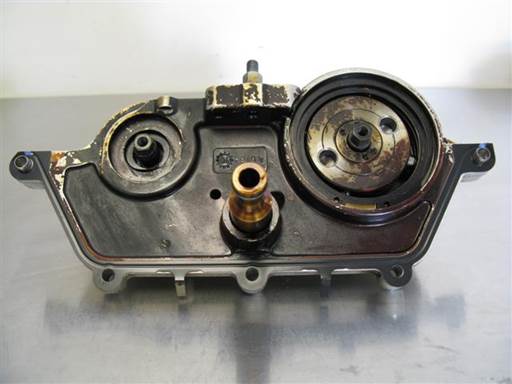
If vanos top corner alignment dowels remained on vanos place vanos gasket on vanos.
Place gasket on vanos with gasket ridge to vanos. Gasket two lower tabs will point to vanos (picture).
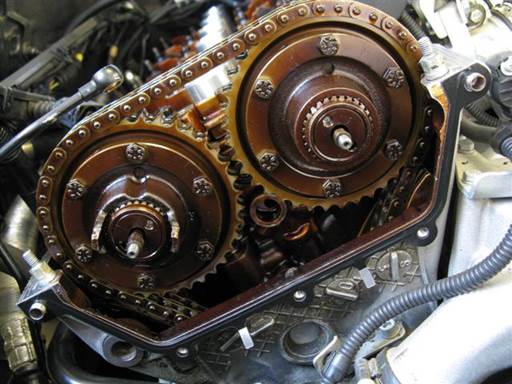
If vanos top corner alignment dowels remained on engine head place vanos gasket on engine head.
Place gasket on head with gasket ridge to vanos (front). Gasket two lower tabs will point to vanos (front) (picture).
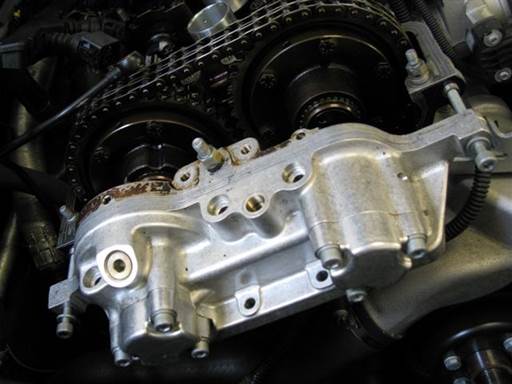
Mount vanos onto engine head with solenoid 2 long bolts at vanos top corners.
Screw solenoid long bolts into engine head just a few turns.
Connecting of vanos pistons to splined shaft studs
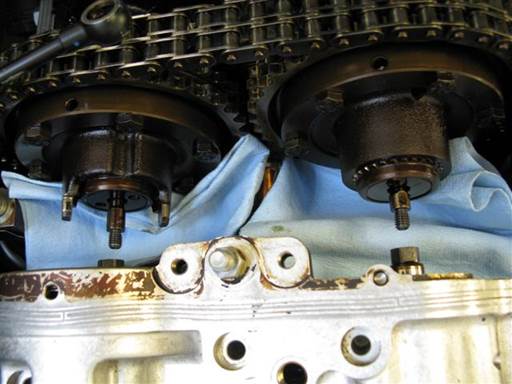
Cover cavities below sprockets to keep tools from falling down (towels).
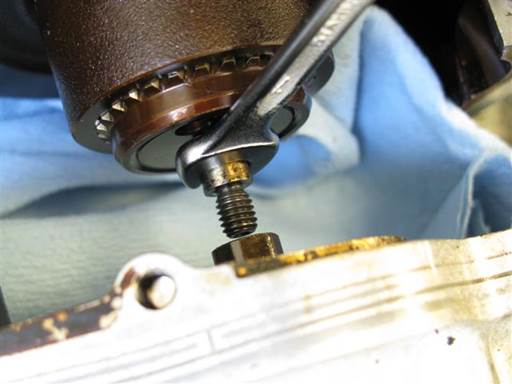
Rotate intake splined shaft stud to facilitate tool access to stud flats (fingers).
Mount splined shaft stud tool (7mm open wrench).
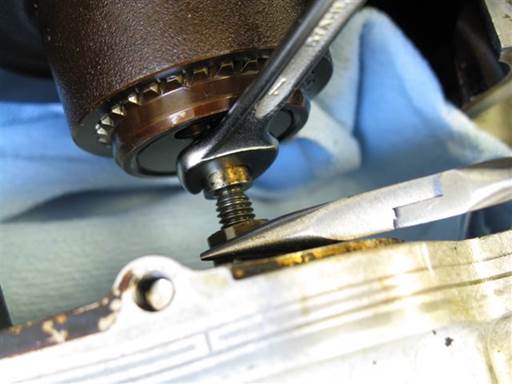
Install pliers on vanos intake piston hex (medium nose pliers).
Lift up vanos and pull vanos intake piston onto splined shaft stud (medium nose pliers).
While pressing piston onto splined shaft, counter hold splined shaft stud and thread piston onto splined shaft stud one rotation; left hand thread (medium nose pliers / 7mm open wrench).
Note: Piston and shaft stud are left hand thread, thus screw by turning piston tool (medium nose pliers) from right to left (counter clockwise) (car front orientation).
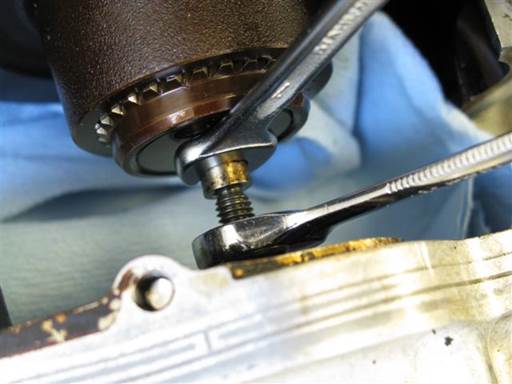
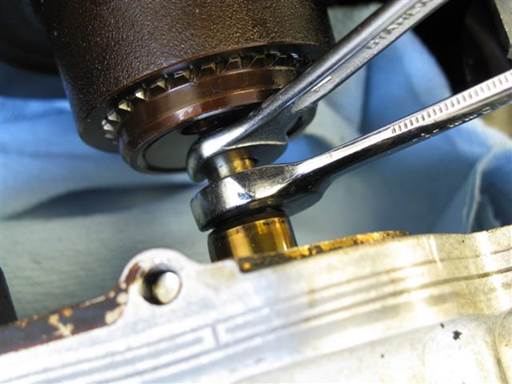
Thread intake piston onto splined shaft stud; left hand thread (10mm open wrench / 7mm open wrench).
Note: Piston and shaft stud are left hand thread, thus screw by turning piston tool (10mm open wrench) from right to left (counter clockwise) (car front orientation).
Note: As needed, rotate piston tool (10mm open wrench) at every turn to facilitate tool access.
Lightly tighten; left hand thread (10mm open wrench / 7mm open wrench).
Note: Due to left hand thread, it is not necessary to over tighten joint.
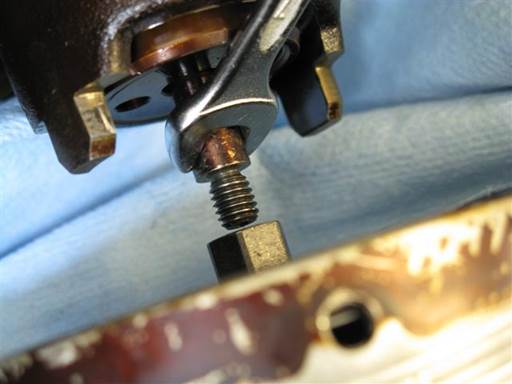
Rotate exhaust splined shaft stud to facilitate tool access to stud flats (fingers).
Mount splined shaft stud tool (7mm open wrench).
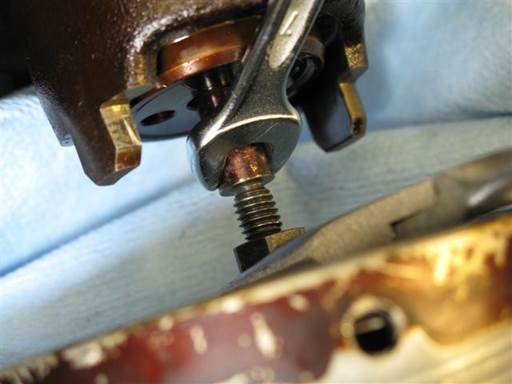
Install pliers on vanos exhaust piston (medium nose pliers).
Pull vanos exhaust piston onto splined shaft stud (medium nose pliers).
While pressing piston onto splined shaft, counter hold splined shaft stud and thread piston onto splined shaft stud one rotation; left hand thread (medium nose pliers / 7mm open wrench).
Note: Piston and shaft stud are left hand thread, thus screw by turning piston tool (medium nose pliers) from right to left (counter clockwise) (car front orientation).
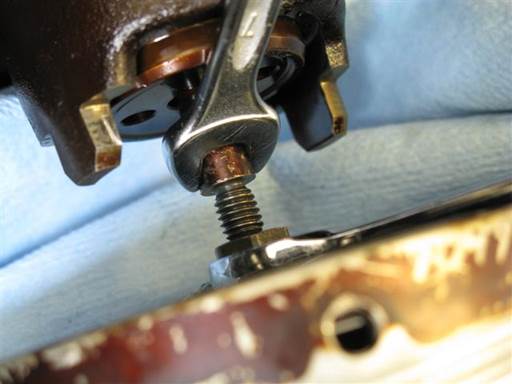
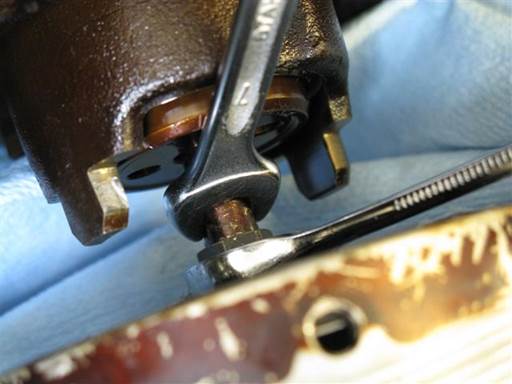
Thread exhaust piston onto splined shaft stud; left hand thread (10mm open wrench / 7mm open wrench).
Note: Piston and shaft stud are left hand thread, thus screw by turning piston tool (10mm open wrench) from right to left (counter clockwise) (car front orientation).
Note: As needed, rotate piston tool (10mm open wrench) at every turn to facilitate tool access.
Tighten; left hand thread (10mm open wrench / 7mm open wrench).
Note: Due to left hand thread, it is not necessary to over tighten joint.
Remove covers (towels).
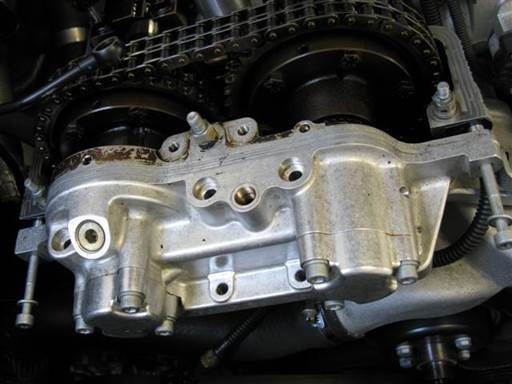
Press vanos onto engine head until it stops or top corner alignment dowels are reached.
Caution: Do not attempt to forcibly fully mount vanos to engine head. This can cause damage.
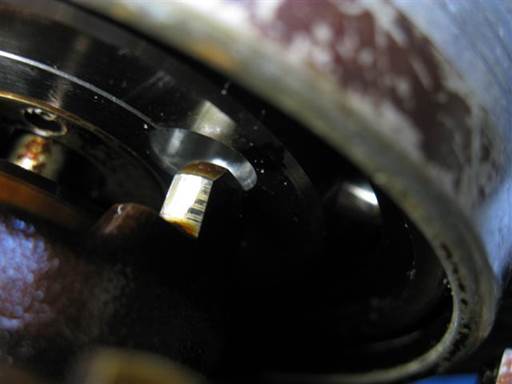
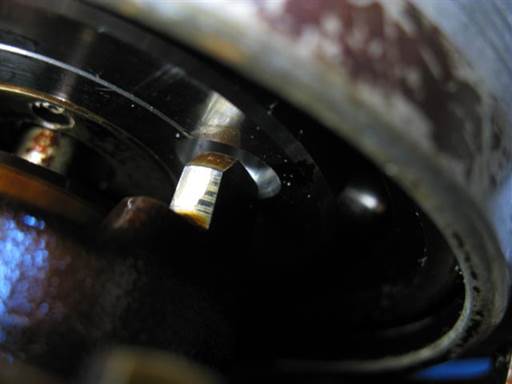
Inspect vanos oil pump side hole and exhaust sprocket hub driver side tab for alignment.
Rotate vanos oil pump as needed to achieve alignment (fingers).
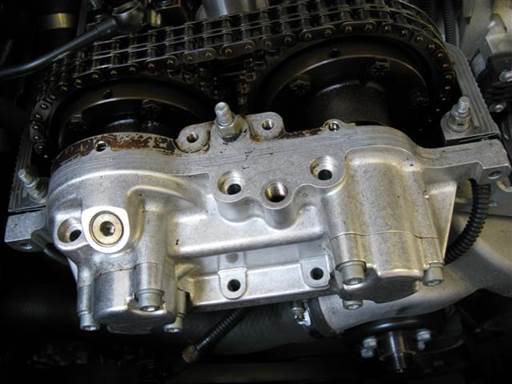
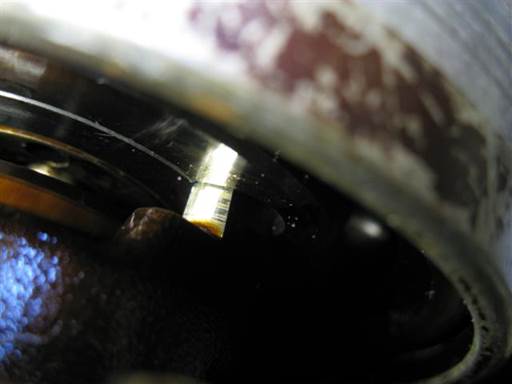
Press vanos onto engine head and verify driver tab insertion into oil pump hole.
Realign vanos pump as need to facilitate tab insertion (fingers).
Remove solenoid long bolts at vanos top corners.
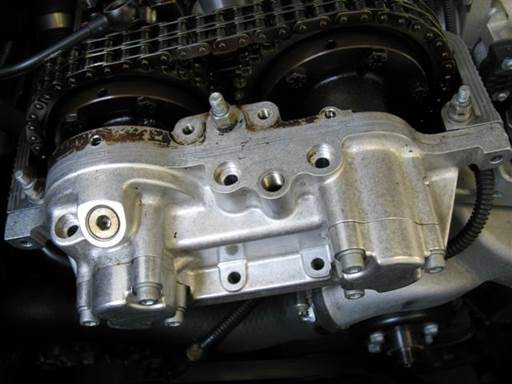
Align vanos dowels and mating holes and press on vanos to mate.
Press on vanos and wiggle and fully mate with engine head.
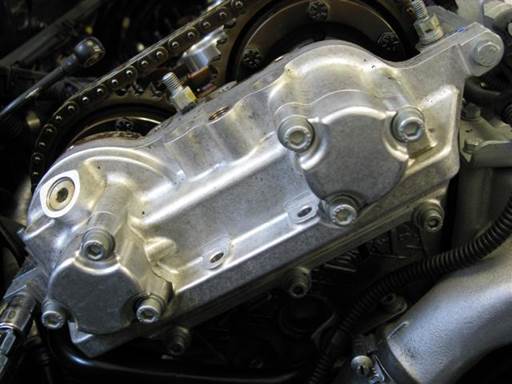
Install vanos 5 mounting bolts; 2 top corner hex head and 3 lower hex bit head (10mm socket & 5mm hex bit socket 3/8″ / 3/8″ ratchet & extension).
Fully tighten, 10 Nm (7 ft-lb) (10mm socket & 5mm hex bit socket 3/8″ / 3/8″ torque wrench & extension).
Tighten bolts evenly in multiple passes. Verify one pass with all bolts fully tightened.
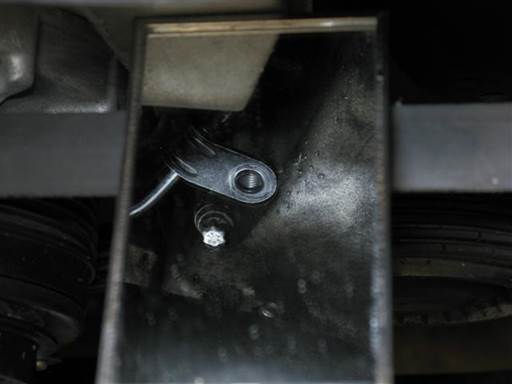
Reposition oil accumulator pipe to vanos.
Align pipe lower bracket to mounting hole below radiator lower hose (mirror).
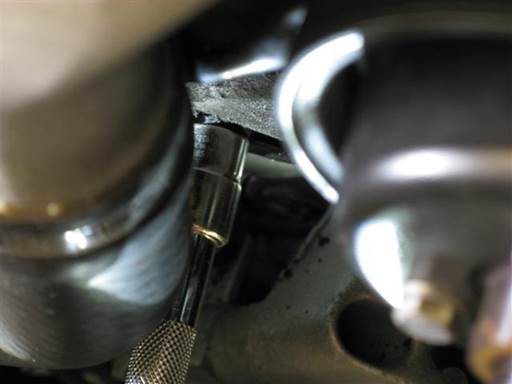
Install oil accumulator pipe bracket mounting bolt (10mm socket 3/8″ / 3/8″ ratchet & extension).
Note: Bolt is similar but shorter than vanos bracket two mounting bolts.
Note: Initially install bolt by feel (hand).
Fully tighten by feel (10mm socket 3/8″ / 3/8″ ratchet & extension). Do not over tighten.
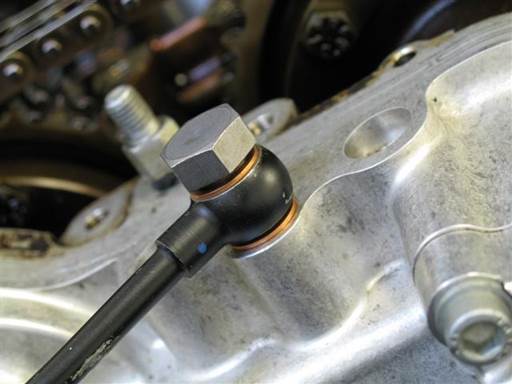
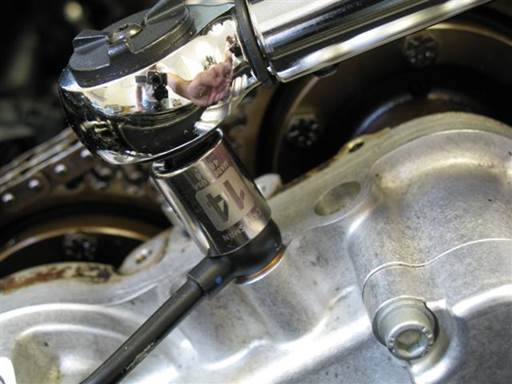
Install oil accumulator pipe at top of vanos.
Install banjo bolt with new crush washer at both sides of pipe fitting (14mm socket 3/8″ / 3/8″ ratchet).
Note: Banjo bolt is smaller of two available banjo bolts and correspondingly crush washers are smaller of two sets of available crush washers.
Note: Lift pipe fitting up to allow bolt to align and thread.
Fully tighten, 13 Nm (9.5 ft-lb) (14mm socket 3/8″ / 3/8″ torque wrench).
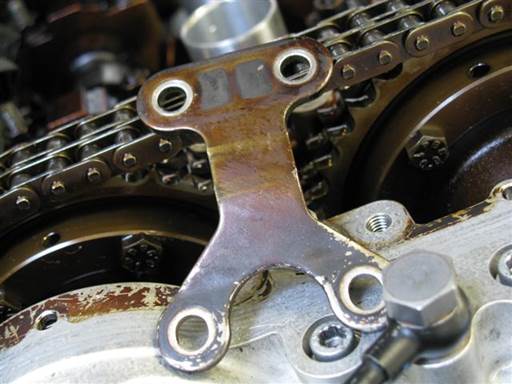
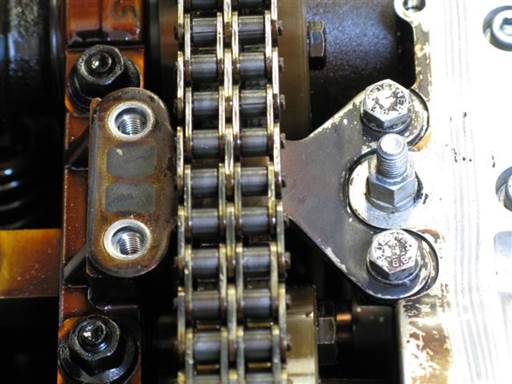
Install vanos bracket.
Cover cavities between vanos and sprockets to keep bolts from falling down (towels) (not shown).
Position bracket in place. Note orientation of bracket.
Install 2 bracket bolts at vanos (hand).
Do not tighten bolts.
Remove covers (towels).
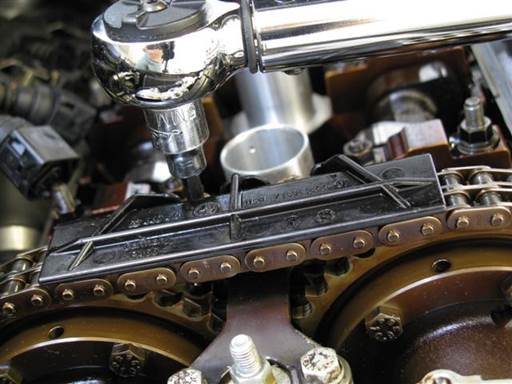
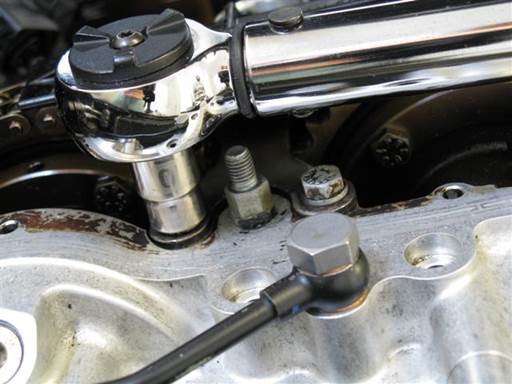
Install chain rail guide.
Align vanos bracket holes with camshaft bracket holes.
Align chain rail guide bolt holes and vanos bracket bolt holes with camshaft bracket holes.
Install chain rail guide 2 mounting bolts (5mm hex bit socket 3/8″).
Fully tighten vanos bracket and chain rail guide mounting bolts, 9 Nm (6.5 ft-lb) (5mm hex bit socket & 10mm socket 3/8″ / 3/8 torque wrench).
Tighten bolts evenly in multiple passes. Verify one pass with all bolts fully tightened.
Installation of vanos solenoid
Clean vanos solenoid matting surface (brake cleaner & towels).
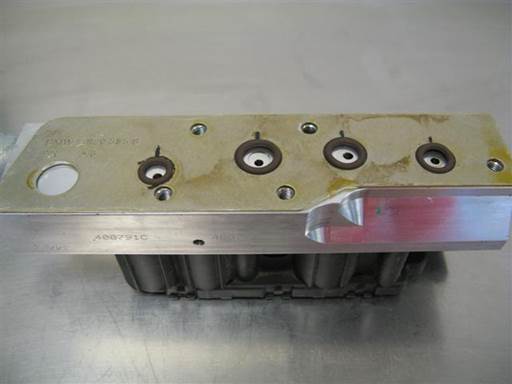
Place new sealing plate on vanos solenoid valve body (silver part).
Align sealing plate notch with valve body notch.
Verify sealing plate bolt holes align with valve body bolt holes, and sealing plate rubber rings align with valve body oil holes.
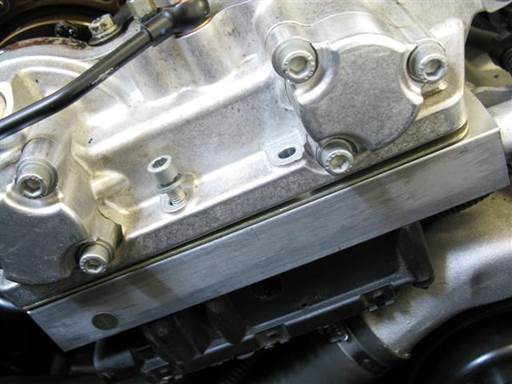
Insert solenoid with sealing plate under vanos. Orient oil pressure restrictor to right.
Align solenoid and sealing plate left front corner to vanos corner.
Align solenoid and sealing plate bolt hole to vanos lower left bolt hole.
Install solenoid lower left mounting bolt to hold solenoid (hand).
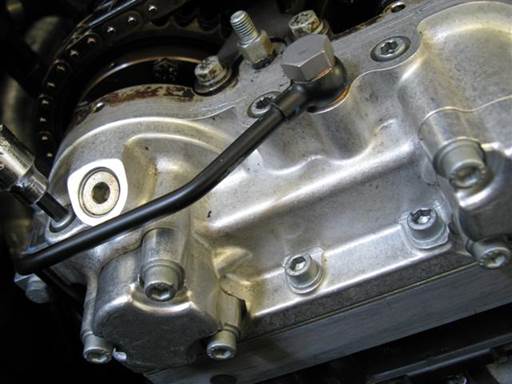
Install solenoid 5 mounting bolts, 3 upper and 2 lower (5mm hex bit socket 3/8″ / 3/8″ ratchet & extension).
Align solenoid and sealing plate to vanos to facilitate bolt insertion.
Fully tighten, 10 Nm (7 ft-lb) (5mm hex bit socket 3/8″ / 3/8″ torque wrench & extension).
Tighten bolts evenly in multiple passes. Verify one pass with all bolts fully tightened.

If vanos oil pressure restrictor previously loosened, fully tighten pressure restrictor (22mm open wrench)
Note: Pressure restrictor is sealed with base O-ring thus restrictor only needs to be moderately tightened.
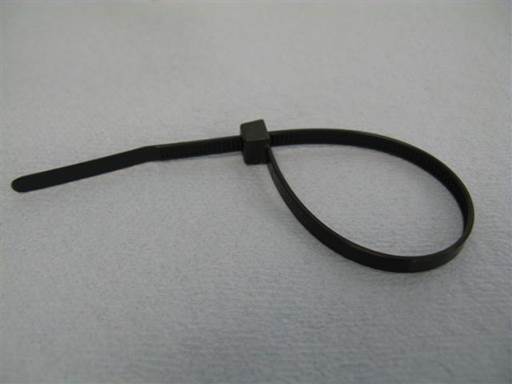
Insert cable strap end into cable strap lock bracket.
Reduce cable strap formed circle to size larger than vanos electrical cable connector.
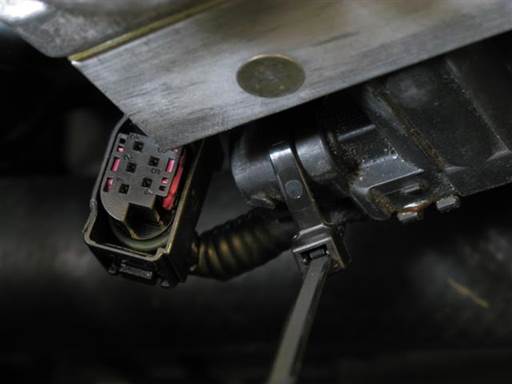
Orient cable strap with excess strip pointing front and up (picture).
Insert cable strap over vanos electrical cable and solenoid electrical connector neck.
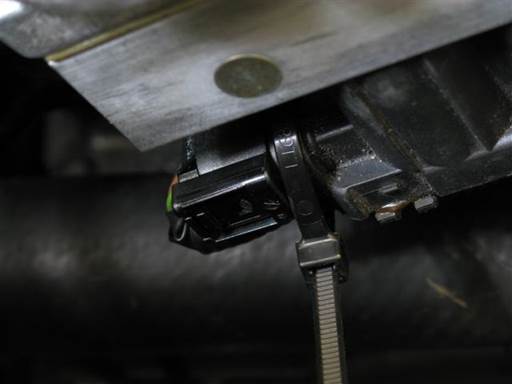
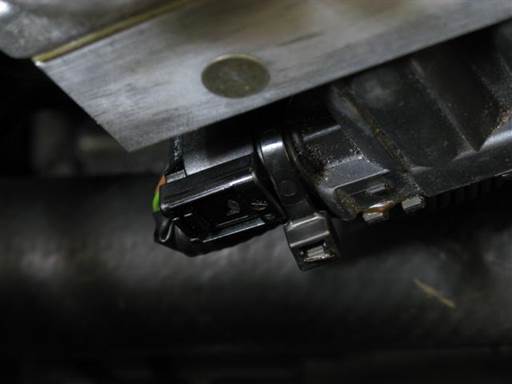
Install vanos electrical cable connector. Press in connector until clips snap into place.
Tighten cable strap on electrical cable and solenoid electrical connector neck.
Cut cable strap excess strip (cutters).
Valve adjustment repair can be performed at this point in the procedure.
Installation of valve cover
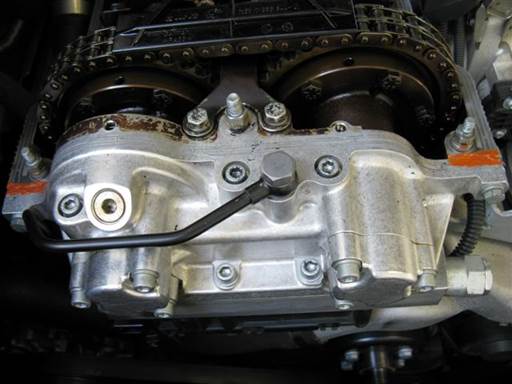
Apply thin layer of sealant at vanos and head matting junctions at top right and left of vanos (gasket sealant).
Allow sealant to solidify for 2 minutes before mounting valve cover gasket.
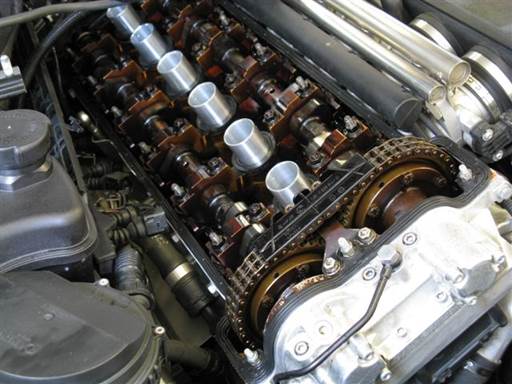
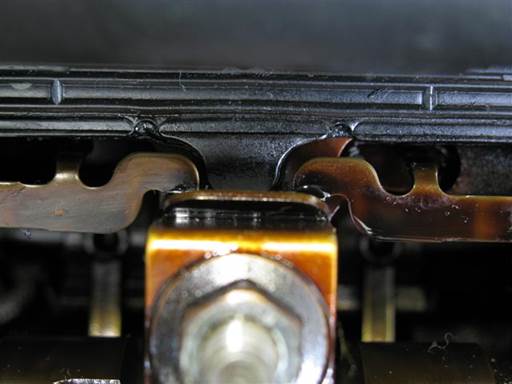
Install valve cover perimeter gasket and sparkplug well gaskets on engine head.
Note: There is no orientation to sparkplug well gaskets.
Orient valve cover gasket with half-moons to rear and facing down.
Verify perimeter gasket alignment pins at cyl 1 & 5 on each side of head and 2 at vanos top are fully aligned and inserted.
Verify gasket rear half-moons straddle and insert onto head.
Note: If gasket perimeter pins do not fully insert into head and vanos then gasket will not lay flat and will leak oil.
Note: Valve cover gasket and sparkplug well gaskets are Viton and can be reused.
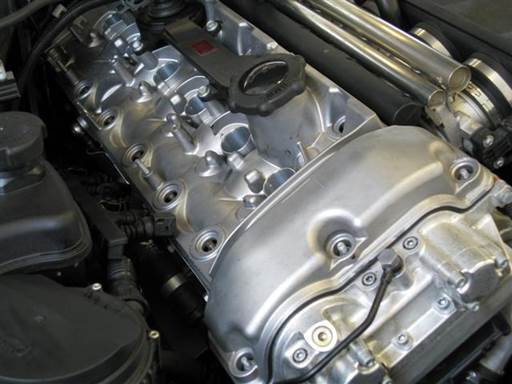
Install valve cover on engine head and vanos.
Lift up rear connectors and cables and insert valve cover under them.
Tilt cover left side up and insert cover right side under fuel injector electrical rail.
Align valve cover with engine head and gaskets and lay valve cover on engine head.
Adjust cover to align head studs to protrude at center of cover holes.
Check, by feel, gasket rear half-moons are aligned and seated correctly on head and cover.
Check gasket dowels at cyl 1 & 5 on each side of head and 2 at vanos top are fully inserted and gasket is laying fully flat at their location.
Do not install valve cover bolts at this time.
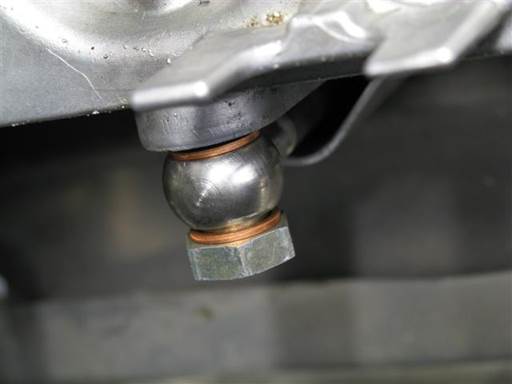
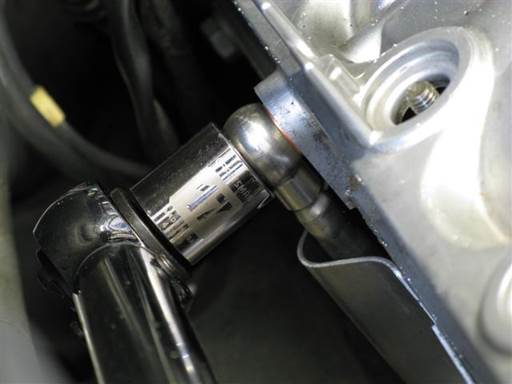
Install oil drain hose at exhaust side of valve cover.
Place O2 sensors connector bracket and coil harness rail at top of valve cover.
Install banjo bolt with new crush washer at both sides of pipe fitting (hand).
Note: Install one crush washer on banjo bolt. Place second crush washer on valve cover and slide down to bolt hole while inserting banjo bolt through hose fitting. Bolt will insert into crush washer once crush washer is lowered sufficiently on valve cover.
Fully tighten, 25 Nm (18.5 ft-lb) (17mm socket 3/8″ / 3/8″ torque wrench).
Place O2 sensors connector bracket and coil harness rail to exhaust side of valve cover.
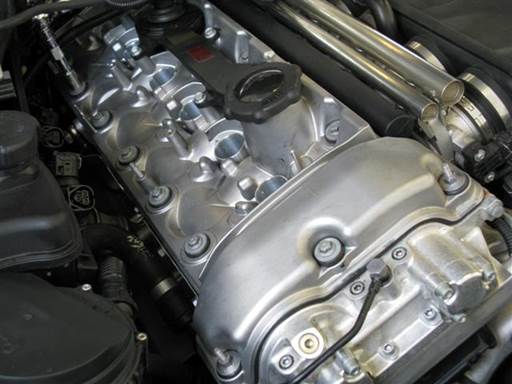
Install valve cover 15 mounting bolts and studs w/ washers and rubber grommets; 2 front corner studs, 1 front center bolt, 6 bolts at each side (10mm socket & 10mm deep socket 3/8″ / 3/8″ ratchet & extension).
Install 2 new stud grommets. Note: Stud grommets are Buna and do fail. Remainder of valve cover bolt grommets are Viton and can be reused.
Tighten bolts/studs evenly working back and forth, assuring even pressure distribution on cover. Tighten until bolts/studs bottom out on head.
Fully tighten, 8Nm (6 ft-lb) (10mm socket & 10mm deep socket 3/8″ / 3/8″ torque wrench & extension).
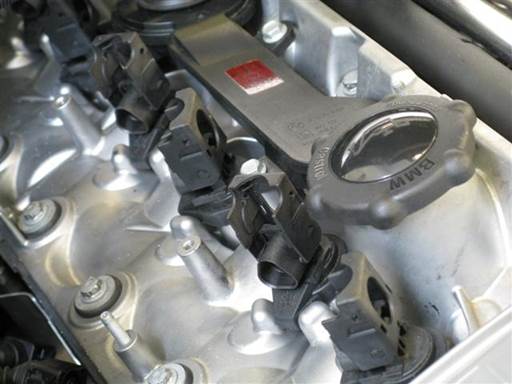
Install each coil into original sparkplug well.
For each coil, orient coil tab to align with valve cover coil tab mating slot, insert coil boot into sparkplug well, and press coil onto sparkplug well until it snaps into place.
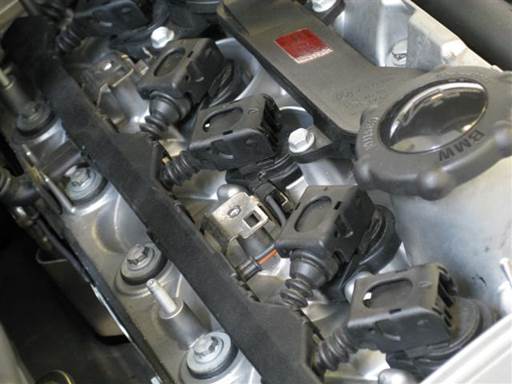
Install coils electrical harness.
Place coil harness rail on valve cover. Insert cable boot in valve cover slot at cyl 4.
For each coil, lift up on connector pivot lock, press in cable electrical connector, and push down on connector pivot lock.
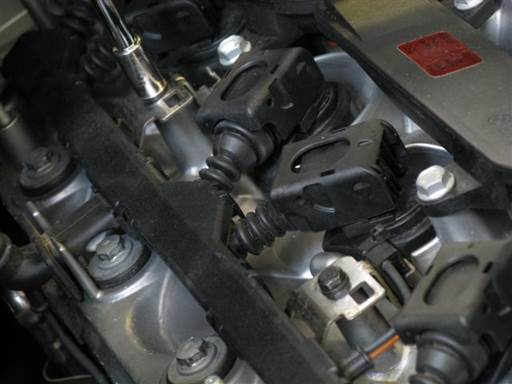
Install coil harness rail 2 mounting bolts (8mm socket 1/4″ / 1/4″ ratchet & extension).
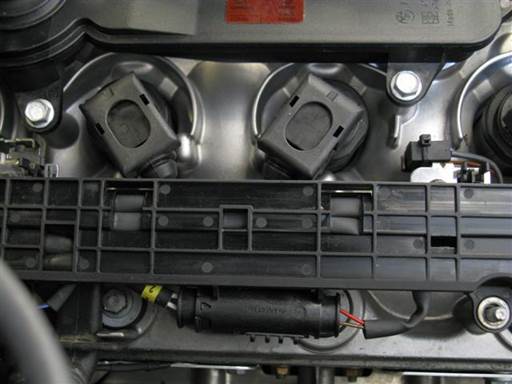
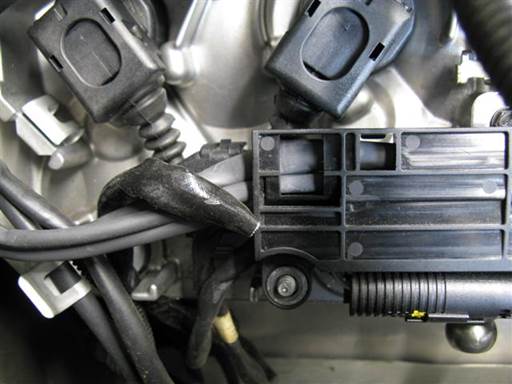
Install O2 sensors connector bracket at top of valve cover.
Insert bracket left front and rear holes onto cover studs at cyl 2 & 5.
Orient rear cables as shown (picture).
Press right front and rear clips into coil harness bracket slots until clips snap into place.
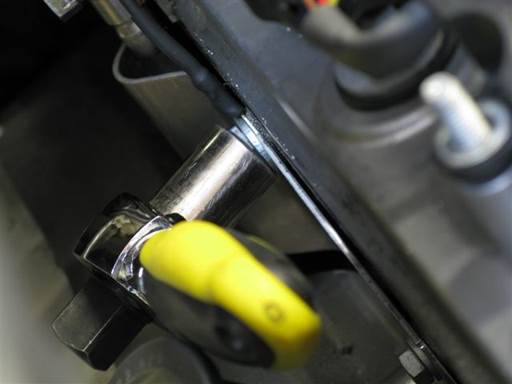
Install coil harness ground strap with mounting bolt at valve cover exhaust side (13mm socket 3/8″ / 3/8″ ratchet).
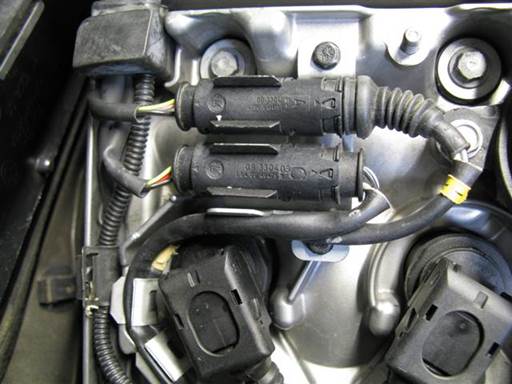
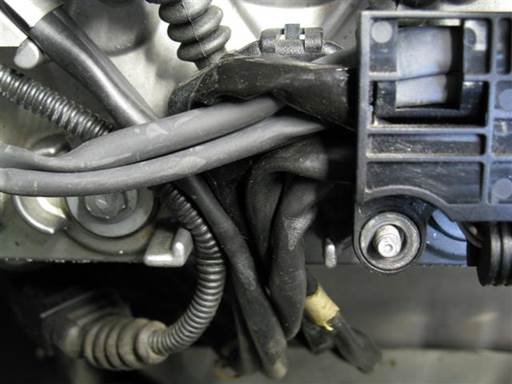
Install components at valve cover rear.
Install O2 sensor connectors, O2 sensors cable mounting clips, rubber block and cables mounting clip.
Route all cable though valve cover cable slot (picture).
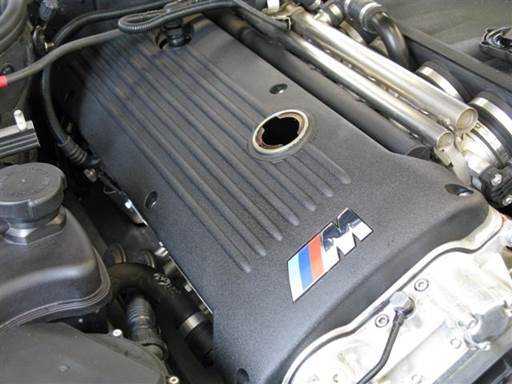
Install engine top cover.
Remove oil fill cap.
Lift up cables and hose and insert top cover into position.
Align cover with 6 mounting studs and lay cover onto studs and valve cover.
Adjust cables at valve cover left rear as needed to facilitate top cover installation.
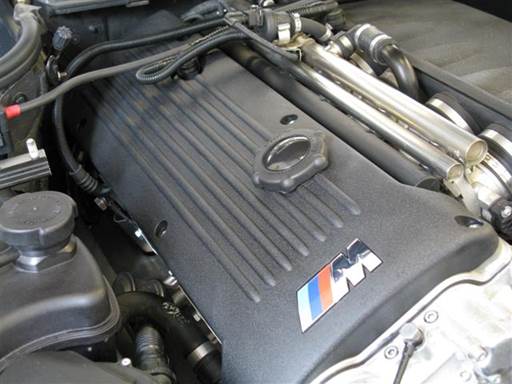
Install oil fill cap.
Install ventilation hose onto crankcase vent valve at cover rear top. Press on hose connector until it snaps into place.
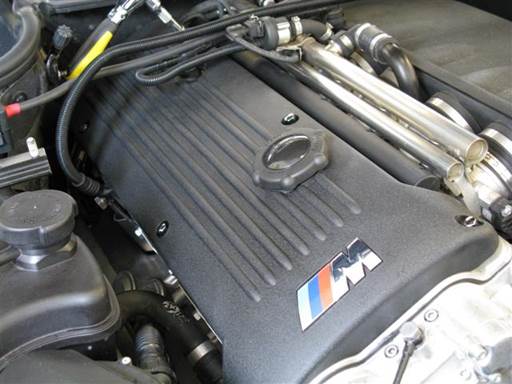
Install top cover 6 mounting caps (10mm socket 3/8″ / 3/8″ ratchet & extension).
Installation of suspension cross brace
If present, install suspension cross brace.
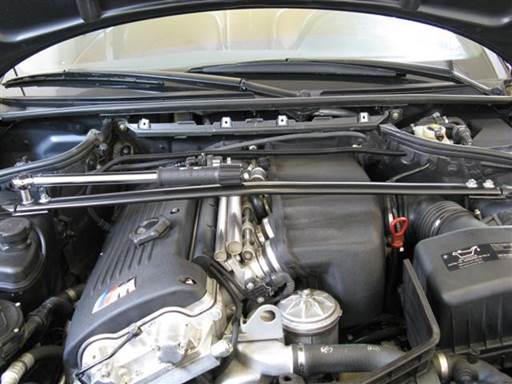
Mount suspension cross brace onto studs at right and left strut towers.
Install 2 mounting nuts at left and right end of suspension cross brace (13mm socket 3/8″ / 3/8″ medium-arm ratchet).
Fully tighten, 40 Nm, (29.5 ft-lb) (13mm socket 3/8″ / 3/8″ torque wrench).
Installation of fan & shroud
E46 M3 fan & shroud installation
Installation of cabin filter housing
E46 M3 cabin filter housing installation
Post repair procedures
Allow gasket sealant to cure a minimum of one hour before driving car.
© 2024 Beisan Systems LLC

