The following information is provided for reference purposes only and should be used at your own risk
In no event shall Beisan Systems, LLC or its members be liable for incidental, consequential, or special loss or damages of any kind however caused.
Introduction
‘Vanos’ is BMW’s name for its variable valve timing units. Vanos units take on various shapes and design according to car year and model (engine model). The vanos discussed here is BMW part # 11-36-7-838-161. It’s a double vanos, meaning both the intake and exhaust valve timing is varied. This vanos unit is part of BMW 6-cylinder engine S54. This engine is incorporated into the M3 E46 00-06, Z3 E36 M Roadster & M Coup 00-02, Z4 E85 M3.2 Roadster 05-08, Z4 E86 M3.2 Coup 06-08.
This vanos experiences three unit failures and two related failures. The primary vanos failure is a vanos solenoid coil pack malfunction. The second, and less common, vanos failure is sticking solenoid valves. The third vanos failure is deteriorating vanos solenoid sealing plate rubber rings. These failures are the focus of this procedure.
The other two vanos related failures are, a rattle caused by loose intake sprocket mounting bolts, and vanos malfunction caused by broken vanos oil pump exhaust sprocket hub driver tab(s).
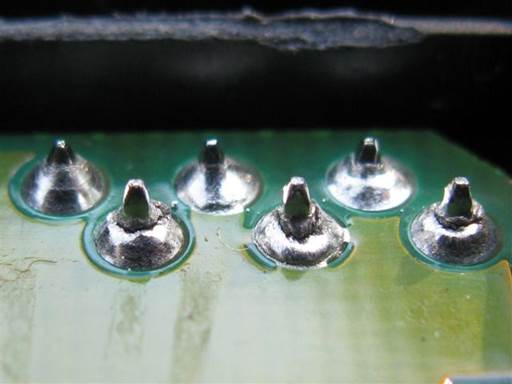
The vanos solenoid coil pack (black plastic housing) failure is due to cracked solder joints. The damaged solder joints are of the connector pins at the PCB (printed circuit board).
There are three main causes of damaged solder joints: cold solder joint, heat cycling, and mechanical movement. Although all the connector pin solder joints are experiencing structural damage, the inner row of pins (intake side) almost always experience significant damage and failure while the outer row of pins (exhaust side) usually maintain the solder connection and don’t experience functional failure. This position specific nature of the failure indicates the cause of the failure is likely vibration. Cold solder joint might also be involved causing weak solder structure.
The solder damage could be caused by external electrical cable/connector movement. But the connector has a silicon gasket that maintains good condition and firmly mounts the cable connector to the coil pack connector. There is also a cable tie which straps the electrical cable just past the connector to the coil pack. Thus cable and cable connector movement is not likely the cause of the solder joint damage.
There is a cavity in the coil pack housing where the connector pins enter the housing (below picture). This leaves a long section of the pins not secured (potted). Also the PCB is last mounted from top onto the housing a relatively long distance from the connector pin solder joints (below picture). Both these design aspects are potential contributors to the likely vibration that damages the connector pins solder joints.
The Beisan solution involves repairing the connector pin solder joints and incorporating design changes to address the problems that likely facilitate the failure.
The coil pack cover is cut off to open the unit and facilitate the repair. The cover is remounted with sealing adhesive.
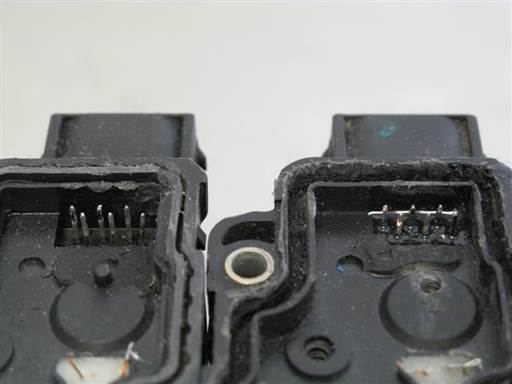
Epoxy is inserted in the connector pins cavity to better secure the pins.
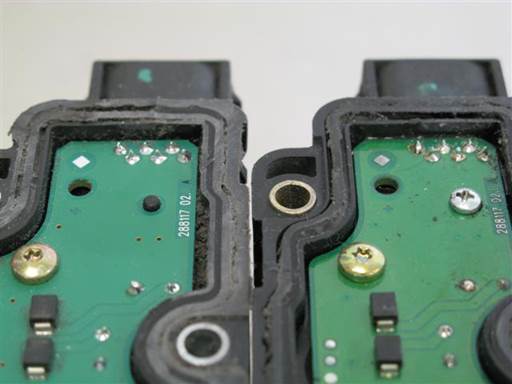
A new bolt is introduced to mount the PCB from top closer to the connector pins. A board alignment stud is removed and the bolt is mounted in its place.
The pins solder joints are removed and the joints are newly soldered.
The vanos solenoid valve sticking failure is due to sludge buildup in the valve piston cylinders. The solution is to clean the valve passages to remove the sludge.
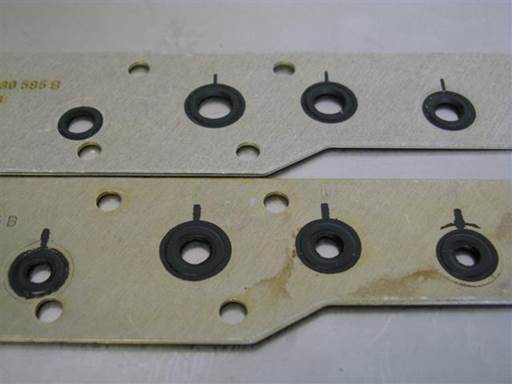
The vanos solenoid sealing plate rubber rings failure is due to the rubber material being Buna (NBR, Nitrile). Buna is limited to 100C (212F) and engine temperatures rise above this level. As a consequence the rubber rings are experiencing notable compression set (flattening) which is allowing oil seepage. Notable compression set is a direct outcome of temperature over exposure.
The Beisan solution to the sealing plate is to cut out the failed rubber rings and install Viton material O-rings of the same thickness as new sealing plate rubber rings. Viton is rated to 204C (400F) and is appropriate for the sealing plate application.
Symptoms
Fault codes:
P0010 (BMW xx, 0xxx): Vanos intake solenoid circuit
P0011 (BMW 67, 0x43): Vanos intake timing over advanced
P0012 (BMW 72, 0x48): Vanos intake timing over retarded
Pxxxx (BMW 184, 0xB8): Vanos intake position control
P1525 (BMW xx, 0xxx): Vanos intake solenoid open circuit
P0013 (BMW xx, 0xxx): Vanos exhaust solenoid circuit
P0014 (BMW 22, 0x16): Vanos exhaust timing over advanced
P0015 (BMW 21, 015): Vanos exhaust timing over retarded
Pxxxx (BMW 185, 0xB9): Vanos exhaust position control
P1531 (BMW xx, 0xxx): Vanos exhaust solenoid open circuit
The failure of the vanos solenoid will cause the DME to not utilize the vanos. Unfortunately the engine timing is left in the same position as when the failure occurred. Thus the engine will likely behave better at low RPM and worse at high RPM, or worse at low RPM and better at high RPM. Engine misfire with fault codes can also occur.
Diagnosis
If a circuit code is present, disconnect the vanos solenoid electrical connector and spray clean both connectors with electronic contact cleaner. If this doesn’t resolve the code then the solenoid coil pack is likely failed.
A relatively less common failure that causes the above codes, less the electrical codes, is sticking solenoid valves. The solenoid valves can be cleaned as outlined in the procedure to address this possibility.
The above codes, less the electrical codes, can also occur when the vanos oil pump driver tabs break. Thus an effort must be taken to distinguish between the vanos solenoid coil pack failure and the oil pump driver tab(s) breakage.
A simple, but not conclusive, method of differentiating between the two failures is to reset the fault codes and start the engine and allow it to idle. If the oil pump driver tabs are broken the fault codes and check engine light will be generated in a few minutes. The solenoid coil pack failure is often intermittent and will take some driving before the fault codes and check engine light appear.
Unfortunately, there are cases where the solenoid coil pack can be significantly failed and the fault codes and check engine light appear at idle after reset. Further in some cases only one of the oil pump driver tabs will break. In such a case the fault codes and check engine light will not appear at idle and some driving will be necessary for them to appear.
A definitive method of assessing which of the two failures exists is to remove the valve cover and inspect the oil pump driver tabs. If one or both are broken then that is the source of the problem. If they are present then the problem is most likely the solenoid coil pack.
Repair Procedure
The following is an E46 M3 vanos solenoid coil pack R&R (remove and replace) procedure.
The engine fault codes will need to be reset at the end of the repair to allow the DME (engine computer) to utilize the vanos.
Repair time: 1 hour.
Parts, Tools, and Shop Supplies
Parts with part number pattern xx-xx-x-xxx-xxx are BMW parts and can be acquired from a BMW dealership.
Beisan Systems only provides the vanos solenoid coil pack.
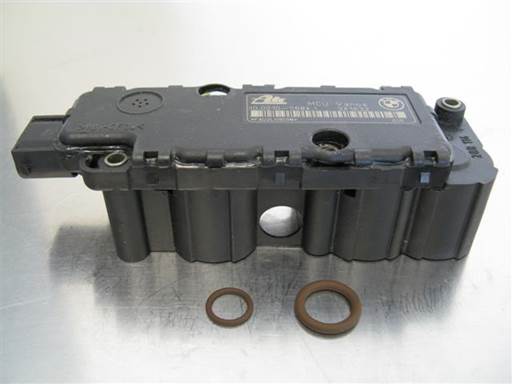
S54 rebuilt vanos solenoid coil pack (BS023) $200 + $300 refundable core charge (www.beisansystems.com)
Note: Beisan vanos solenoid coil pack comes with vanos oil pressure restrictor O-rings.
$300 core charge (deposit) is refunded upon return of original solenoid coil pack to Beisan Systems within 90 days of purchase date.
Coil pack should be wrapped to protect from damage.
Include name and date on purchase transaction in return package.
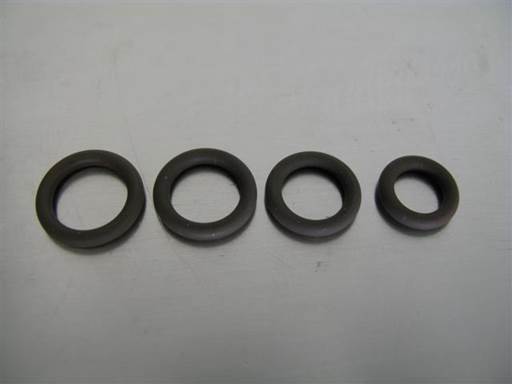
S54 vanos sealing plate repair kit (BS024) $10/each (www.beisansystems.com)
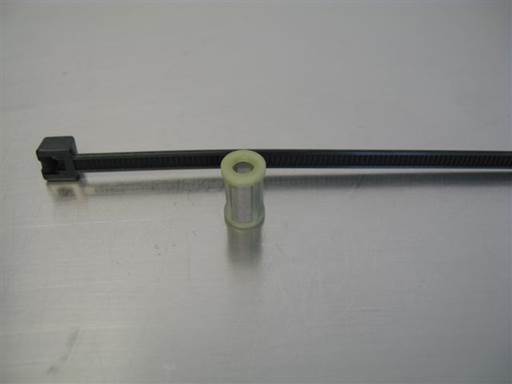
Vanos oil filter (11-36-1-401-971) $9.66/each, cable strap (zip tie)
Note: Oil filter replacement is not required. Oil filter can be spray cleaned (brake cleaner).
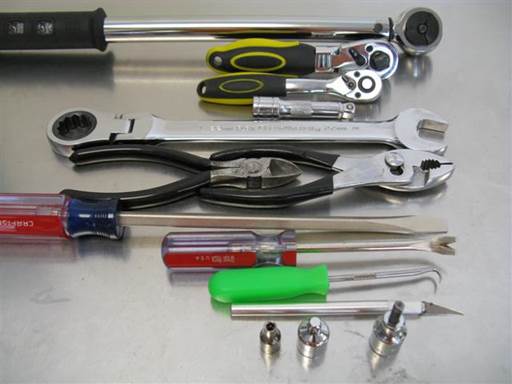
Torque wrench (4 Nm [3 ft-lb], 10 Nm [7 ft-lb])
Note: 4 Nm torque is not required as this can be performed by feel.
3/8′ ratchet, 1/4′ ratchet
3/8“ socket extension (short)
22mm combo wrench
Cutters (medium), pliers (medium)
Flathead screwdriver (large)
Tack lifter
Hook pick tool
Razor knife
E-5 torx or 4mm socket 1/4″, 3/8′ to 1/4′ socket adapter, 5mm hex bit socket 3/8“
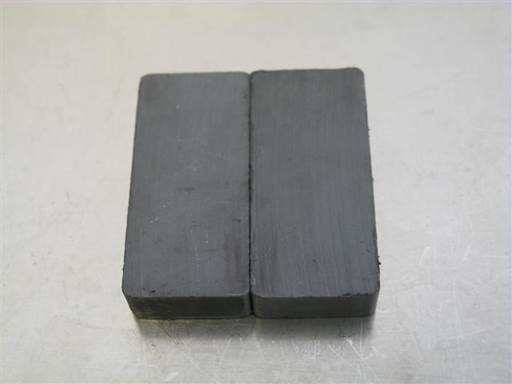
Strong magnet(s) (Harbor Freight Craft Magnet Blocks (2 pc) part #98406, $1.50)
Note: Strong magnet, or multiple magnets to multiply strength, is needed to open vanos solenoid valves for cleaning
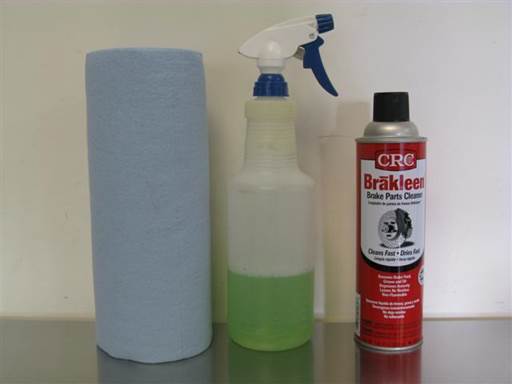
Paper towels, water based cleaner (simple green 1:10), brake cleaner
Engine fault code reader (needed to reset fault codes at end of repair)
Repair
Car engine must be cold to perform repair procedure.
Right and Left designations are from car front at hood orientation.
Removal of fan shroud left air guide
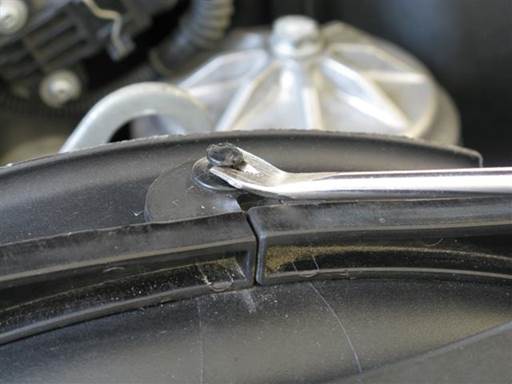
Remove shroud air guide rivet at shroud top. Pry out rivet center pin (tack lifter), then fully pry out rivet from base (tack lifter).
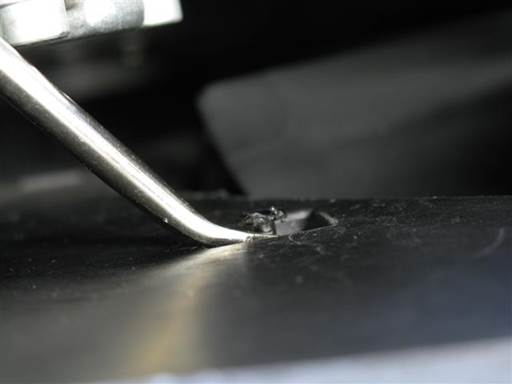
Remove left air guide rivet at rear face of air guide. Pry out rivet center pin (tack lifter), then fully pry out rivet from base (tack lifter).
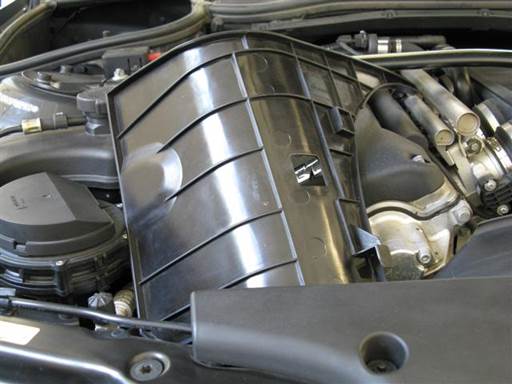
Push left air guide to rear to release from mounting bracket.
Pull up and remove air guide from engine compartment.
Removal of vanos solenoid
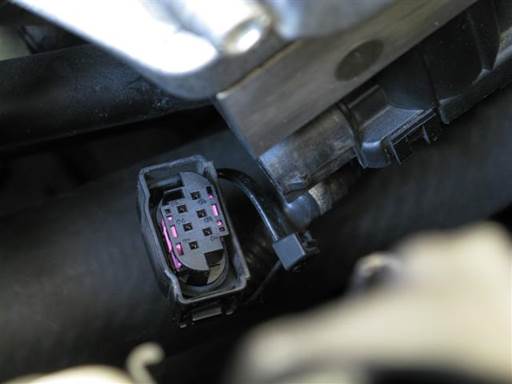
Remove vanos electrical cable connector.
Press in connector side clips and pull off connector. If resistant, pry connector from end (large flathead).
If present, pull off and discard cable strap.
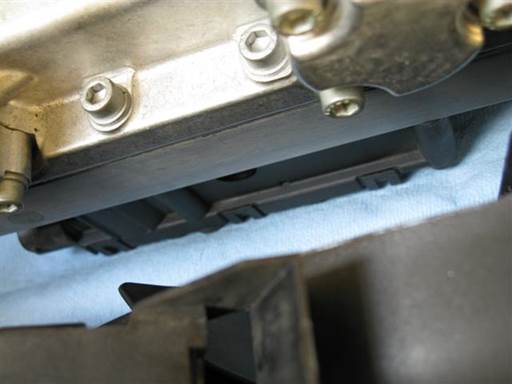
Cover lower radiator hose to protect belts from oil leakage (towels).
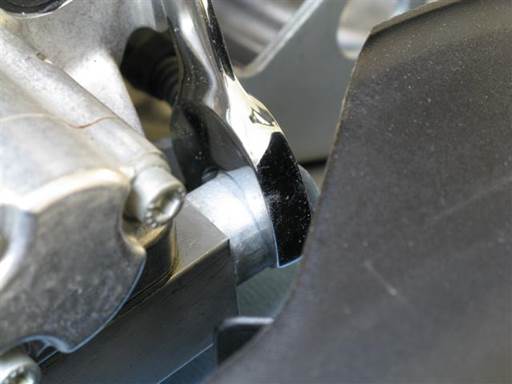
Slightly loosen vanos oil pressure restrictor (22mm open wrench).
Note: Pressure restrictor work will be performed at bench. Loosening is easier to perform while solenoid is mounted.
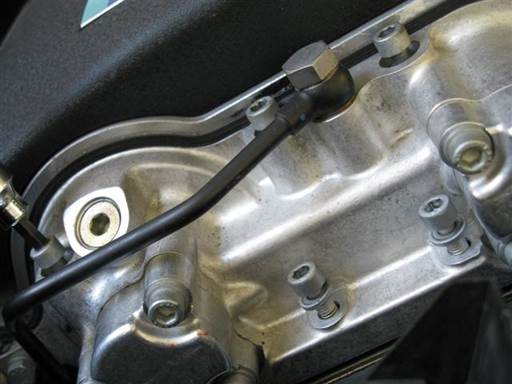
Remove vanos solenoid 5 mounting bolts; 3 upper and 2 lower (5mm hex bit socket 3/8′ / 3/8′ ratchet & extension).
Loosen bolts evenly and support solenoid as it drops from vanos.
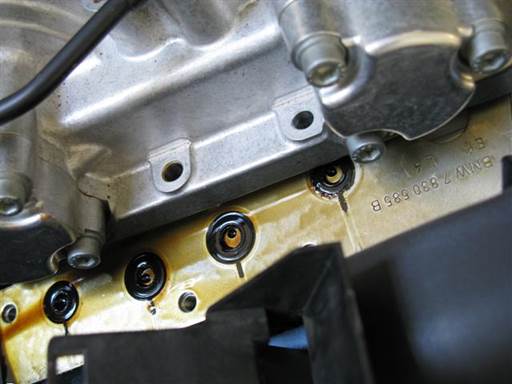
Remove solenoid with sealing plate from engine compartment.
Replacement of solenoid coil pack, pressure restrictor O-rings, and oil filter
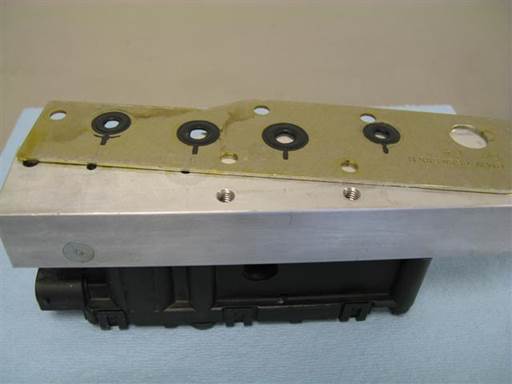
Remove sealing plate and clean oil from solenoid valve body (silver part) (water based cleaner & towels).
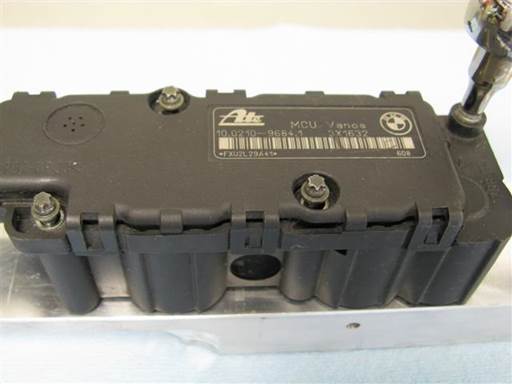
Remove coil pack 4 mounting bolts (E-5 torx or 4mm socket 1/4′ / 1/4″ ratchet).
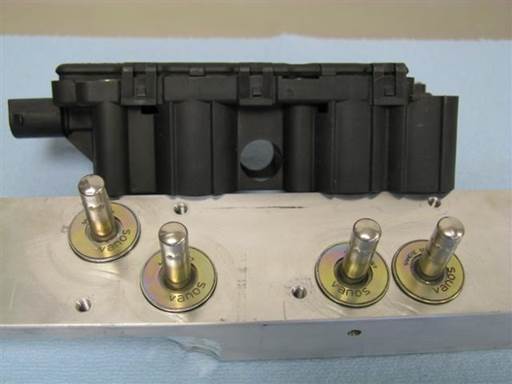
Pull off coil pack (black) from valve body (silver).
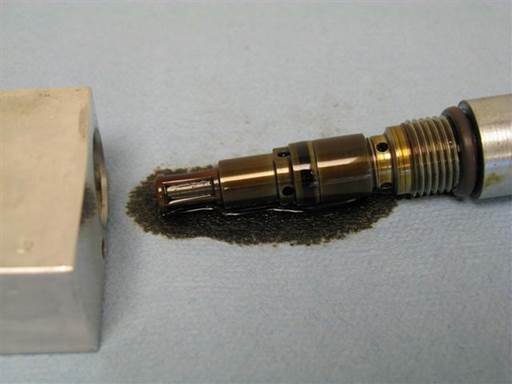
Unscrew oil pressure restrictor from valve body (hand).
Drain and discard oil from valve body.
Cleaning of solenoid valves
Spray cleaner into all valve body available holes to clear out oil (brake cleaner).
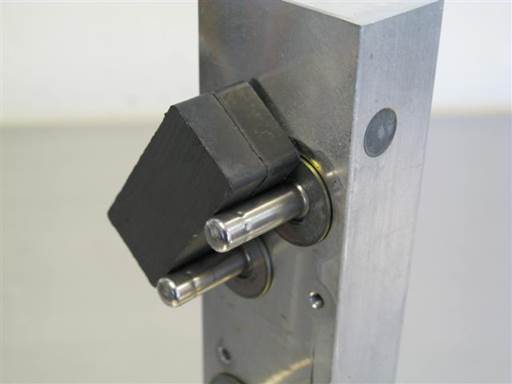
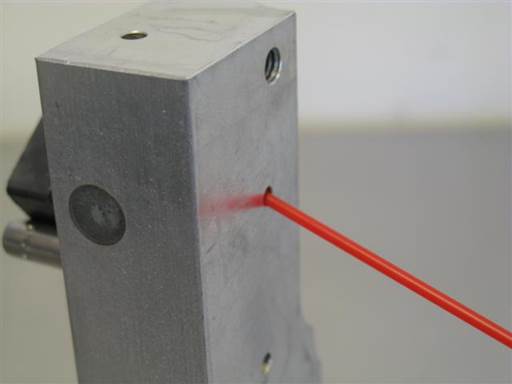
Mount magnet on each valve shaft of valve body to open valve, then spray cleaner in corresponding valve small hole on opposite side of valve body (brake cleaner).
Continue to spray cleaner into valve hole until cleaner runs clean from valve body.
Perform valve opening and cleaning process for 4 valves.
Once valves cleaned, each valve internal piston should be heard easily moving and clicking when magnet is applied on and off valve shaft.
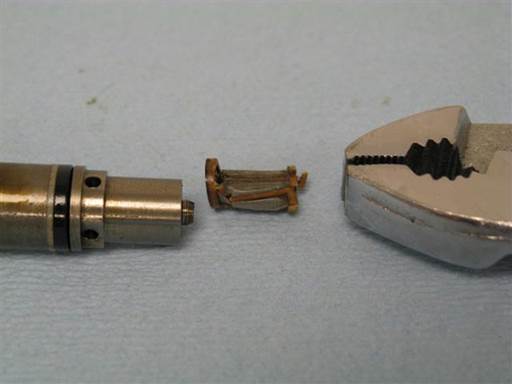
Pull off oil filter from pressure restrictor (pliers).
Note: Oil filter replacement is not a requirement. Oil filter can be spray cleaned (brake cleaner).
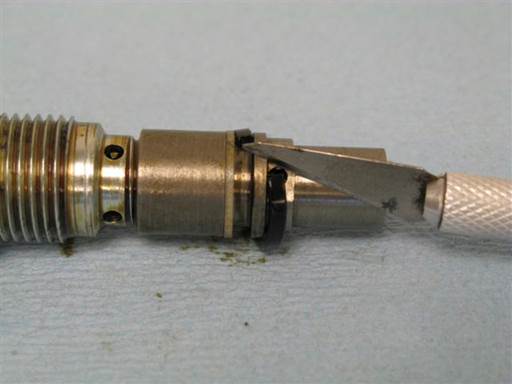
Cut cross section of small O-ring on pressure restrictor (razor knife).
Note: Rocking of blade while pressing helps create cutting motion.
Note: Take care to not cut or damage adjacent plastic washer. Plastic washer already has cross section cut which is needed for installation.
Remove cut O-ring from pressure restrictor.
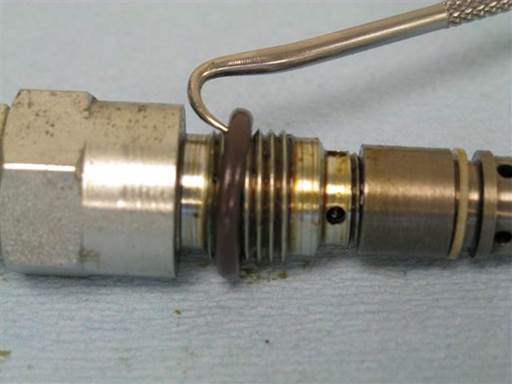
Remove large O-ring from pressure restrictor (hook pick tool).
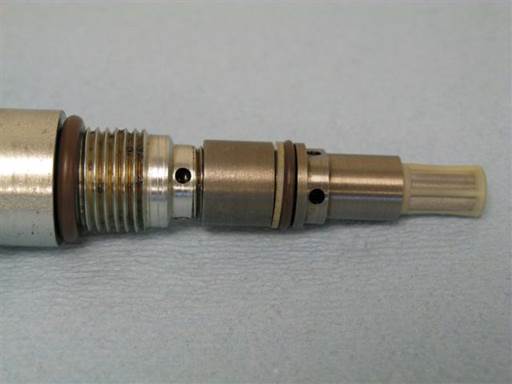
Clean pressure restrictor (brake cleaner & towels).
Install new large O-ring on pressure restrictor. Roll O-ring onto pressure restrictor till O-ring drops into base groove.
Install small O-ring on pressure restrictor. Roll O-ring onto pressure restrictor till O-ring drops into groove.
Install new oil filter on pressure restrictor. Press filter small hole end onto pressure restrictor end stud.
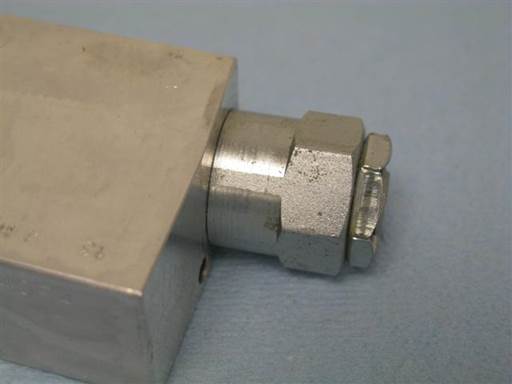
Screw pressure restrictor into valve body (hand).
Note: Pressure restrictor will be tightened once solenoid is mounted on vanos.
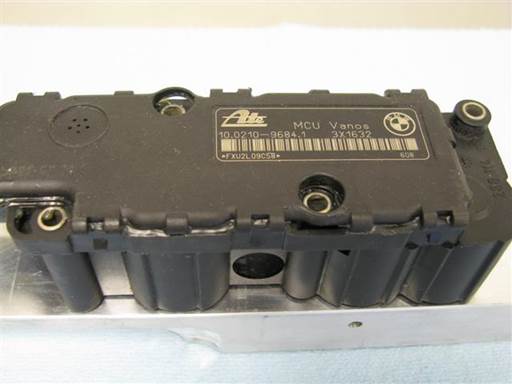
Mount new coil pack on valve body.
Align coil pack holes with valve body studs and mount.
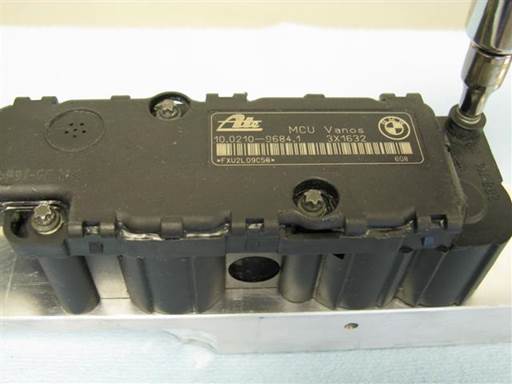
Install coil pack 4 mounting bolts (E-5 torx or 4mm socket 1/4″ / 1/4′ ratchet).
Tighten bolts evenly in multiple passes.
Fully tighten, 4 Nm (3 ft-lb) (E-5 torx or 4mm socket 1/4″ w/ 3/8″ to 1/4′ socket adapter / 3/8″ torque wrench).
Note: Bolts can be tightened lightly by feel. Do not over tighten.
Replacement of vanos sealing plate rubber rings
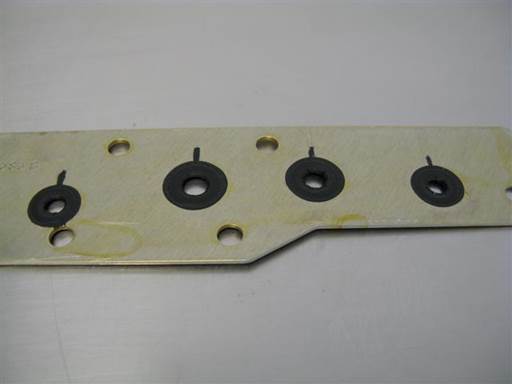
Clean vanos sealing plate (brake cleaner & towels).
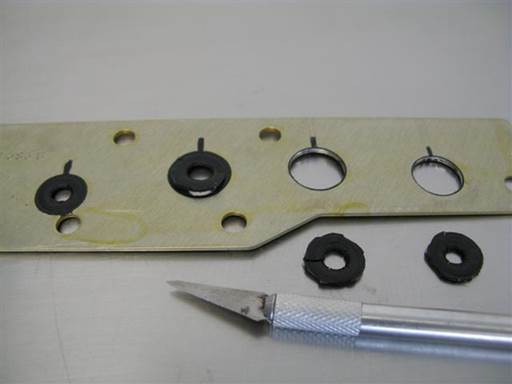
Cut rubber rings from sealing plate (razor knife).
Make radial cut from rubber ring inner diameter to sealing plate hole perimeter, then cut along sealing plate hole perimeter.
Note: Cutting motion facilitates cutting.
Once rubber ring is removed cut out remaining rubber at sealing plate hole perimeter.
Note: Cutting some metal from sealing plate is normal and acceptable.
Note: It is not necessary to remove all rubber from hole perimeter.
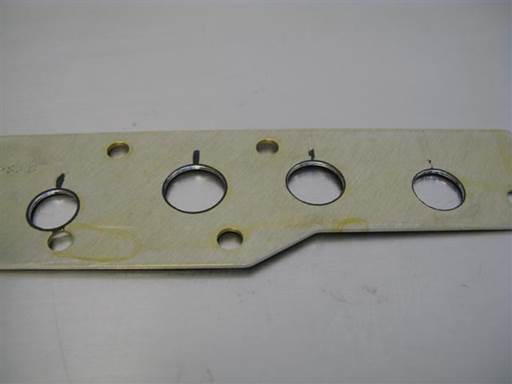
Clean sealing plate rubber ring hole perimeter surfaces (brake cleaner & towels).
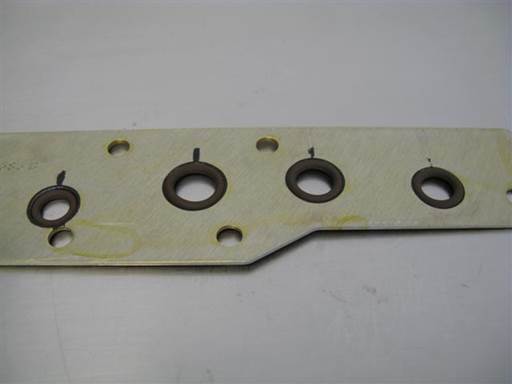
Insert new O-rings into corresponding size sealing plate rubber ring holes.
Note: O-rings fit with slight interference (larger) in holes and thus will maintain their mounted position.
Note: O-rings will adjust position and fit correctly once sealing plate is installed.
Installation of vanos solenoid
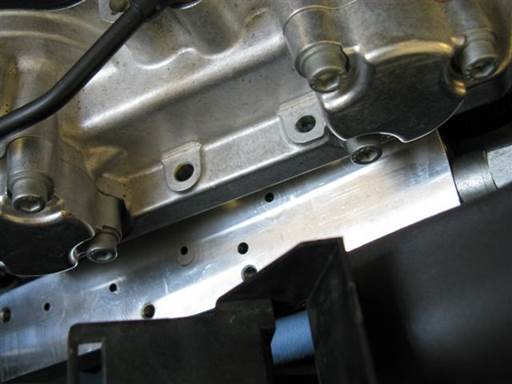
Clean vanos solenoid matting surface and solenoid vanos mating surface (brake cleaner & towels).
Insert solenoid under vanos. Orient oil pressure restrictor to right.
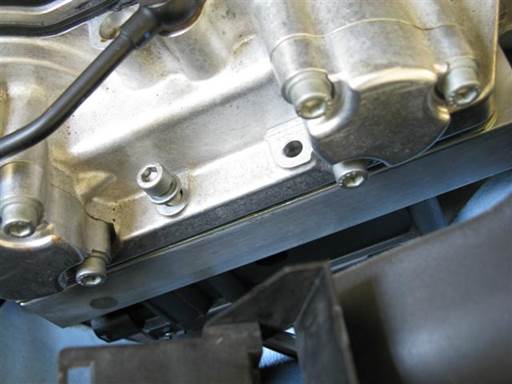
Insert new sealing plate on solenoid. Orient sealing plate notch to left rear.
Align solenoid and sealing plate left front corner to vanos edge.
Install solenoid lower left mounting bolt to hold solenoid (hand).
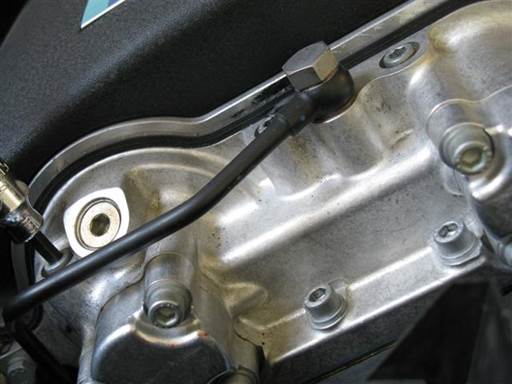
Install solenoid 5 mounting bolts, 3 upper and 2 lower (5mm hex bit socket 3/8′ / 3/8“ ratchet & extension).
Align solenoid and sealing plate to vanos to facilitate bolt insertion.
Tighten bolts evenly in multiple passes.
Fully tighten, 10 Nm (7 ft-lb) (5mm hex bit socket 3/8′ / 3/8′ torque wrench & extension).
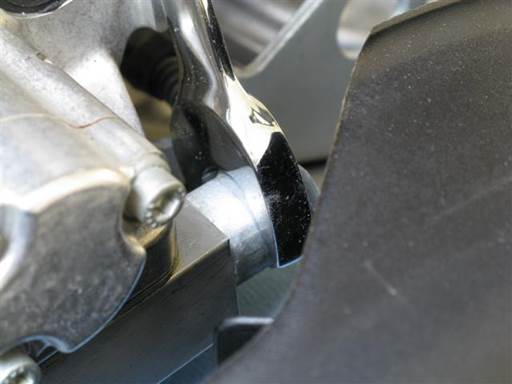
Fully tighten vanos oil pressure restrictor (22mm open wrench)
Note: Pressure restrictor is sealed with base O-ring thus restrictor only needs to be lightly tightened.
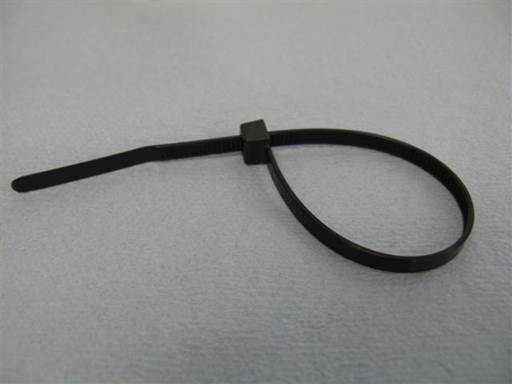
Insert cable strap end into cable strap lock bracket.
Reduce cable strap formed circle to size larger than vanos electrical cable connector.
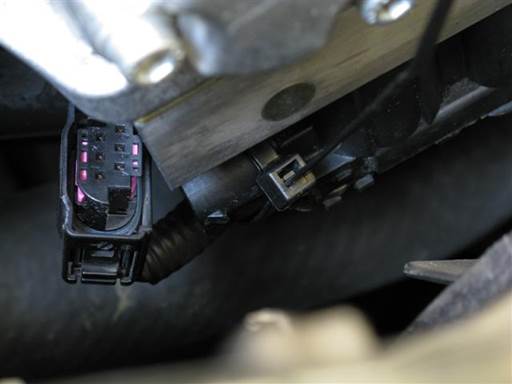
Orient cable strap with excess strip pointing front and up (picture).
Insert cable strap over vanos electrical cable and solenoid electrical connector neck.
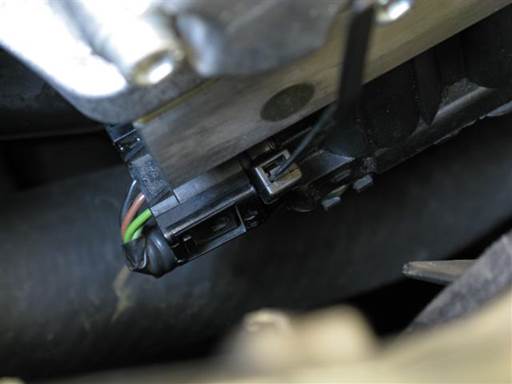
Install vanos electrical cable connector. Press connector until clips snap into place.
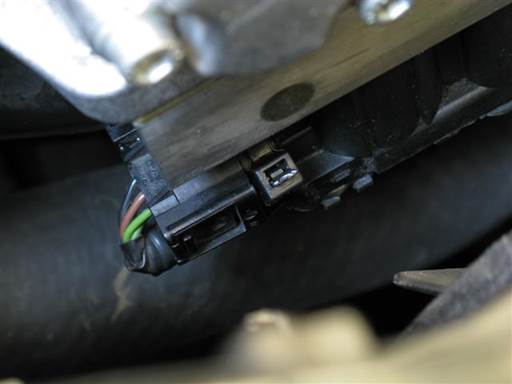
Tighten cable strap on electrical cable and solenoid electrical connector neck.
Cut cable strap excess strip (cutters).
Installation of fan shroud left air guide
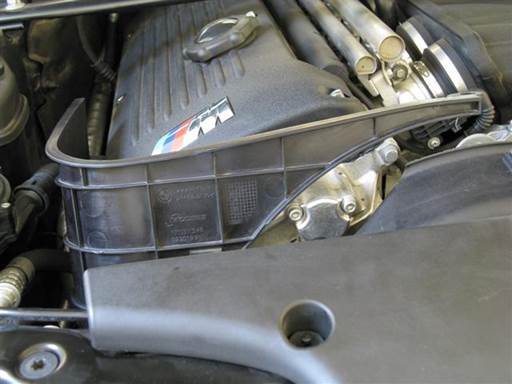
Insert shroud left air guide into place.
Insert guide right lower hook into shroud slot.
Press guide forward and insert guide square hole onto shroud bracket.
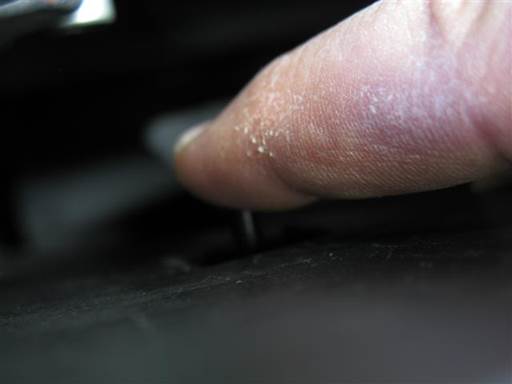
Install rivet at rear face of left air guide. Pry rivet center pin out, fully insert rivet base into air guide, then press in rivet center pin.
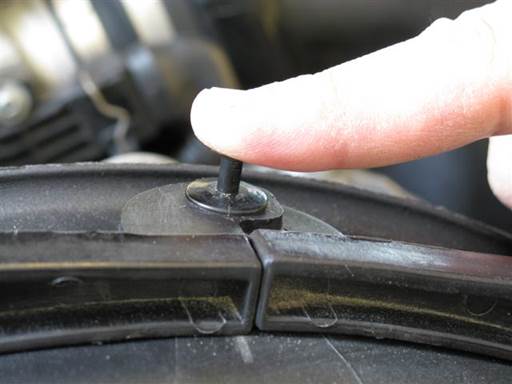
Align left and right shroud air guides at shroud top center.
Install rivet at shroud top center. Pry rivet center pin out, fully insert rivet base into shroud and right and left guides, then press in rivet center pin.
Reset engine fault codes to allow DME (engine computer) to utilize vanos.
Return original solenoid coil pack to Beisan Systems within 60 days of purchase date for a $150 core charge (deposit) refund.
Coil pack should be wrapped to protect from damage.
Include name and date on purchase transaction in return package.
© 2024 Beisan Systems LLC

