The following information is provided for reference purposes only and should be used at your own risk
In no event shall Beisan Systems, LLC or its members be liable for incidental, consequential, or special loss or damages of any kind however caused.
Introduction
“Vanos” is BMW’s name for its variable valve timing units. Vanos units take on various shapes and design according to car year and model (engine model). The vanos discussed here is BMW part # 11-31-1-402-428. It’s a single vanos; meaning only the intake valve timing is varied. This vanos unit is part of BMW 6-cylinder engine Euro S50B30. This engine was incorporated into one car model, the 3-series Euro E36 M3 93-95.
This vanos, like most vanos designs, can develop a rattle. The vanos rattle is caused by wear in the variable valve timing helical (slanted) gears. These gears are found on the camshaft sprocket and splined shaft, which attaches to the vanos. The helical gear wear allows the camshaft to have lash movements that engage the splined shaft axially. At certain RPMs these movements resonate and engage axial play (free space) and cause associate components to hit and rattle. The axial play that facilitates the rattle is found on the helical gears and the splined shaft bearing. Replacing the helical gear components is expensive and the gears will wear again and the rattle will return. Removing the splined shaft bearing axial play significantly reduces the rattle to the point where it’s barely heard or not heard at all in the passenger compartment. Performance cams like the ones on this engine create stronger camshaft lash forces and thus are more susceptible to causing a rattle.
Another component that addresses the rattle is the diaphragm spring that’s incorporated in the intake sprocket. This spring loads the sprocket rotational movement to dampen the rattle quick movements.
Over time the diaphragm spring weakens and degrades in function. Replacing the diaphragm spring with a new one is often needed to fully resolve the rattle.
This diaphragm spring is not available as a separate part for the Euro S50 engines. But fortunately the same diaphragm spring is also used on the S54 and S62 engines and is available separately for these engines. On the S54 engine the part number is 11-36-7-830-684. On the S62 engine the part number is 11-36-7-833-218. But with the S62 engine BMW redesigned the diaphragm spring to thicken it. This part is more effective and lasts longer.
For an in depth discussion of the rattle cause and solution reference the Beisan single and double rattle procedure and single diaphragm spring procedure introductions.
The splined shaft bearing is made of a thick washer and two thrust (roller) bearings. The washer incorporates a stud that’s mounted to the vanos piston. The two thrust bearings sandwich the washer facilitating the splined shaft to rotate at camshaft speed without rotating the vanos piston. The washer and two thrust bearings are incased in a ring and two outer flat washers. The complete bearing is housed inside a splined shaft cavity and is closed off with a threaded cover.
Removing the splined shaft bearing axial play requires modifying or replacing one or more bearing components. The thrust bearings are a standard part and are manufactured to tight tolerances. It’s not feasible to modify or replace them. The center washer is also manufactured to a tight tolerance. The ring is a non-standard part and is manufactured to loose tolerance. It’s also made of standard steel that is annealed (soft). This is causing it to be scored by the center washer and thrust bearings. The outer flat washers reside inside the ring and thus influence the bearing axial fit. The washers are a standard bearing part, but due to their stamped manufacturing have a notable tolerance range which can significantly affect the bearing axial fit.
The ring can be replaced with a ring made of bearing steel that’s hardened and ground to bearing standards. Its height can be tightly controlled to provide a tight bearing axial fit. Standard bearing washers that have been measured and sorted can be combined to provide the needed height to provide a tight bearing axial fit. A bearing adjustment can be made at installation to address any minor axial fit variation.
The vanos rattle repair kit includes a replacement bearing ring and two outer washers.
Opening the splined shaft to modify the bearing requires counter holding the splined shaft and unscrewing the cover. The splined shaft doesn’t have a built in area for grabbing it, and the cover only has two holes in it to manipulate it. The cover threads also have high strength thread locker which makes the cover very difficult to remove.
A splined shaft holder tool is needed to receive and hold the splined shaft, and a socket tool with dowels is needed to insert into the holes in the splined shaft cover and open and close it.
The vanos rattle tools includes a splined shaft holder and splined shaft socket. The holder is square and mounts in a vise and receives and counter holds the splined shaft. The socket is a standard 1/2″ drive size and has dowels that mount into the splined shaft cover holes to open and close the cover. The socket is designed to be used with an impact wrench to overcome the cover thread locker. The socket is also used with a torque wrench for final tightening.
The vanos rattle repair and rattle tool kits can be acquired through Beisan Systems (bee-saan), www.beisansystems.com/products.
Symptoms
Vanos rattle at a certain RPM range, often 1800-2200 RPM. Rattle can also occur at idle.
Repair Procedure
The following is a Euro S50 single vanos splined shaft bearing rattle repair procedure.
This repair should be performed with the Euro S50 single vanos seals repair.
Euro S50 Single Vanos Procedure
Repair time: 1 hour mechanic, 1+ hours DIY.
Parts, Tools, and Shop Supplies
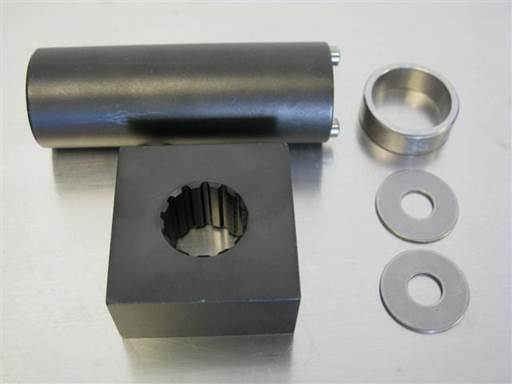
Euro S50 single vanos rattle repair kit (BS032) $40/each (www.beisansystems.com), Euro S50 vanos rattle tool kit (BS094) $20/each (www.beisansystems.com)
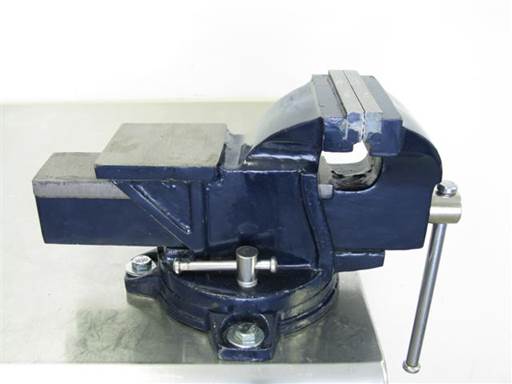
4″, or larger, swivel vise
Note: Vise must be mounted for use.
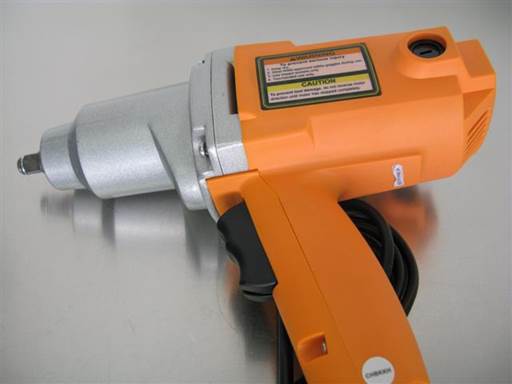
1/2″ impact wrench
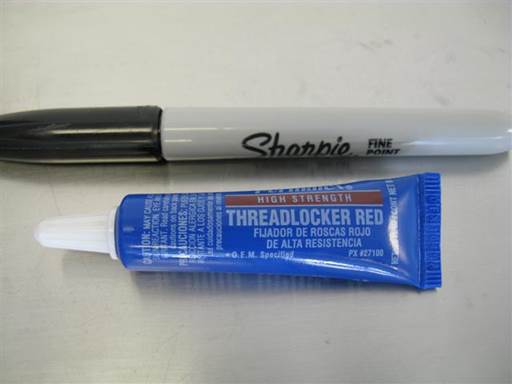
Magic marker, high strength thread locker (Loctite Threadlocker Heavy Duty (Euro Green, US Red), Permatex Threadlocker High Strength Red)
300-400 grit sandpaper (not shown)
Repair
Repair is performed once vanos is removed from engine. Refer to Euro S50 single vanos procedure, Euro S50 Single Vanos Procedure
Removal of intake splined shaft
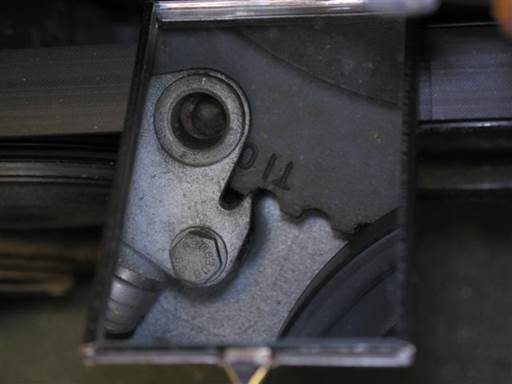
Verify TDC (top dead center) timing marks on engine timing cover and crankshaft harmonic balancer at ~11 o’clock position are aligned (mirror).
Adjust as needed (crankshaft turning socket / 1/2″ long-arm ratchet).
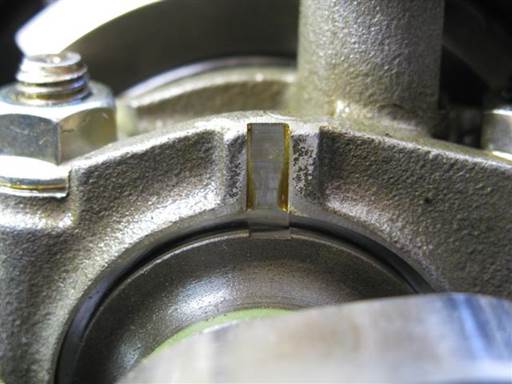
Verify intake camshaft groove on first guide bearing is roughly aligned with groove on first bearing cover.
Adjust as needed (24mm open wrench).
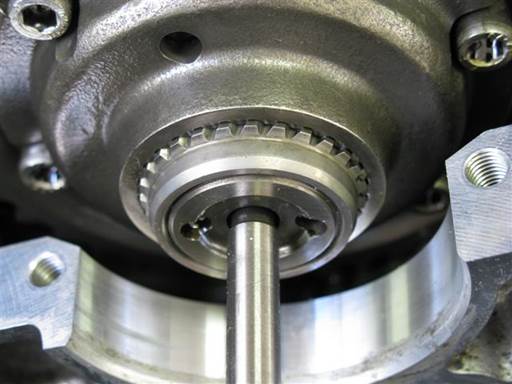
Note amount of intake splined shaft helical gears protruding from splined shaft housing.
Note: This is an important reference position for reinstallation of splined shaft.
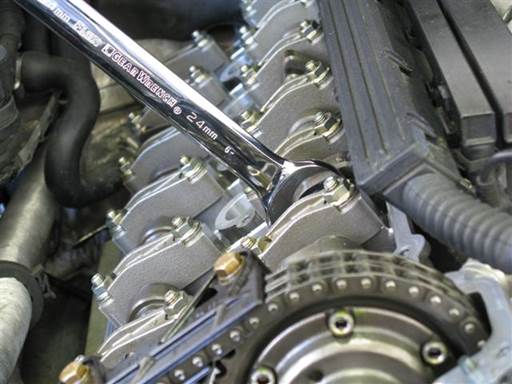
Place open wrench (24mm combo wrench) on intake camshaft hex at front of camshaft.

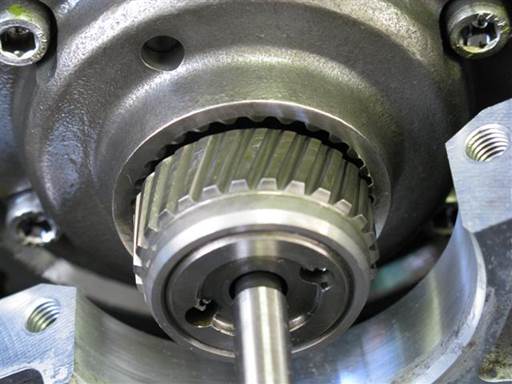
Rotate intake camshaft counter clockwise until intake splined shaft helical gears fully exist splined shaft housing (24mm open wrench).
If camshaft resistant to rotation rock camshaft back and forth to release seize.
Note: Rotating camshaft is most effective when standing at exhaust side of car.
Only turn camshaft as far as needed for splined shaft to exit housing.
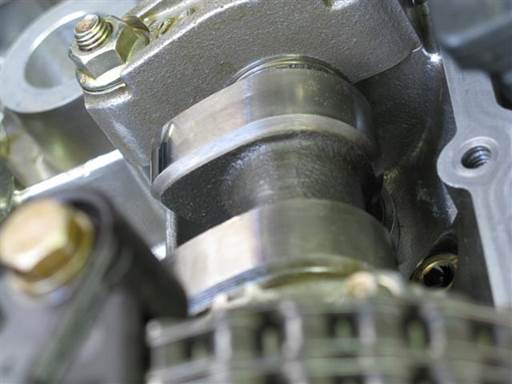
Note intake camshaft cylinder 1 cams will point left and be horizontal.
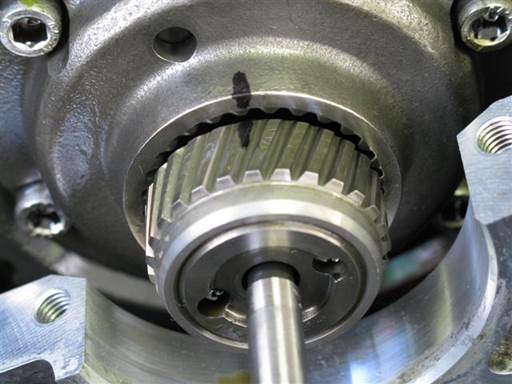
Draw line on splined shaft housing and splined shaft splines at top position (marker).
This line marks matting of splined shaft and housing helical gears.
Note: This is not necessary but is good practice.
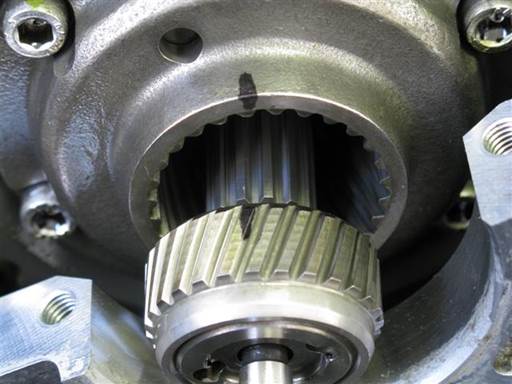
Remove intake splined shaft from housing.
Perform splined shaft rattle kit installation procedure below.
Installation of intake splined shaft
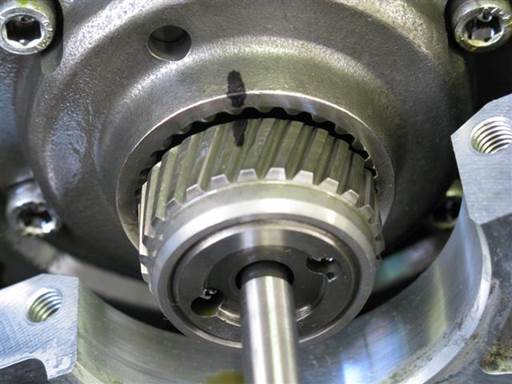
Align intake splined shaft mark with splined shaft housing mark and insert splined shaft into housing and camshaft.

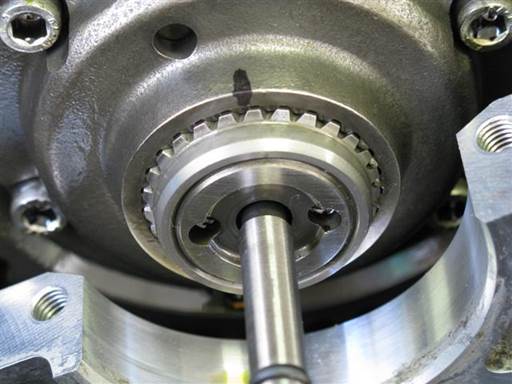
Rotate intake camshaft clockwise while pressing splined shaft into housing (24mm open wrench).
Note: Rotating camshaft is most effective when standing at exhaust side of car.
Splined shaft will insert into housing.

Rotate intake camshaft until intake camshaft groove on first guide bearing is roughly aligned with groove on first bearing cover (24mm open wrench).
Note: Rotating camshaft is most effective when standing at exhaust side of car.
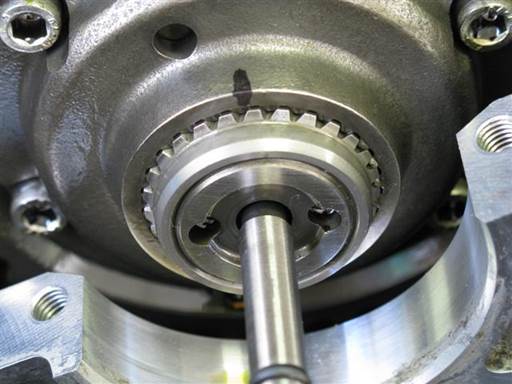
Intake timing is correct if amount of splined shaft helical gears protruding from splined shaft housing is approximately same as before splined shaft removal.
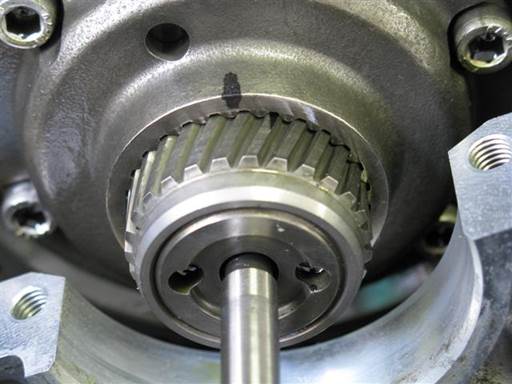
If too much (~10mm) splined shaft helical gears are protruding from housing then intake camshaft was rotated too far clockwise before mounting splined shaft.
Repeat above procedure to remove splined shaft and further turn camshaft counter clockwise until cylinder 1 cams point left and are horizontal (24mm open wrench).
Remount splined shaft following above procedure.
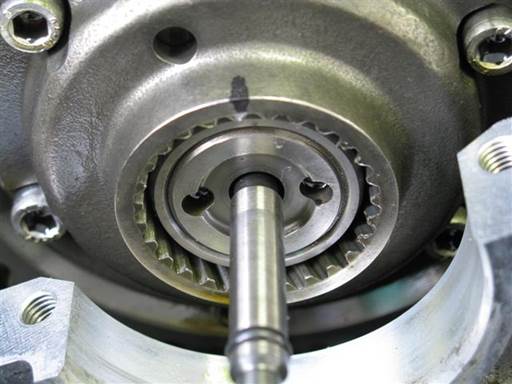
If splined shaft helical gears are not protruding from housing and inserted too far (~10mm) into housing then intake camshaft was rotated too far counter clockwise before mounting splined shaft.
Repeat above procedure to remove splined shaft then rotate camshaft clockwise until cylinder 1 cams point left and are horizontal (24mm open wrench).
Remount splined shaft following above procedure.
Installation of splined shaft rattle kit
Removal of Splined shaft bearing
Clean splined shaft (brake cleaner & towels).
Remove O-ring at splined shaft stud center (90 degree pick).
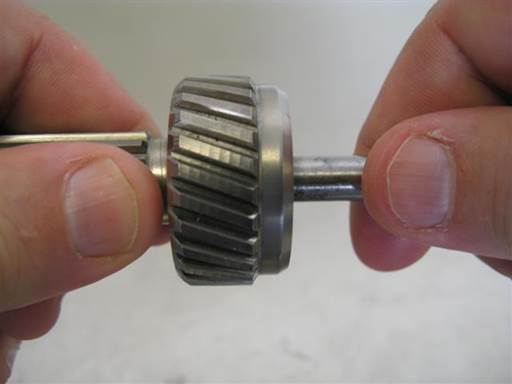
Inspect splined shaft bearing axial play.
Hold splined shaft and tilt (rock) splined shaft stud to each side to note bearing axial play (free space).
Axial play can also be checked by repeated insertion and withdrawal of stud in/out of splined shaft.
Note: Radial play, side to side movement, is normal and necessary. This should not be confused with axial play, in/out movement.
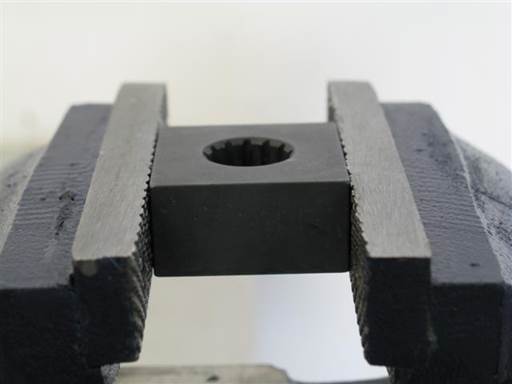
Open vise jaws as far as necessary to insert splined shaft holder.
Insert splined shaft holder in vise and align top to vise jaw top. Strongly tighten vise on splined shaft holder.
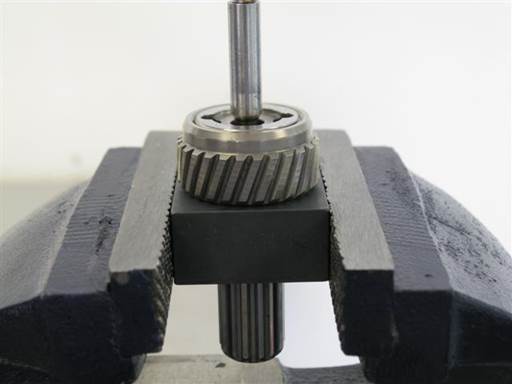
Insert splined shaft in splined shaft holder.
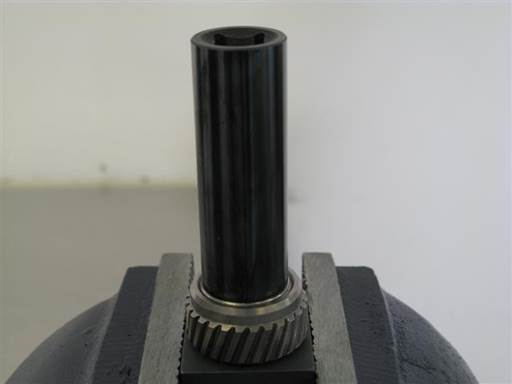
Install splined shaft socket on splined shaft and insert socket pins into splined shaft cover holes.
Note: Socket pins will fit tightly in splined shaft cover holes and rocking of socket might be needed to fully insert pins into holes.
Verify socket pins are fully inserted in splined shaft cover holes and socket is fully seated on splined shaft cover.
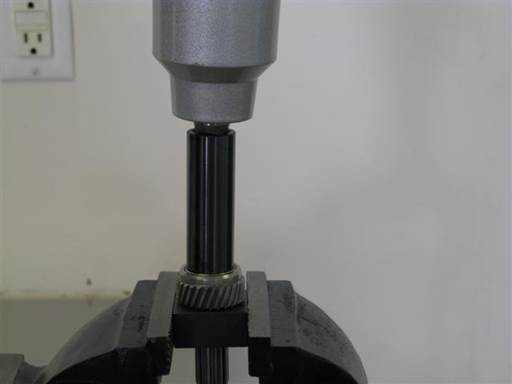
Loosen (break seize) splined shaft cover (splined shaft socket / 1/2″ impact wrench).
If available, set impact wrench power to lowest setting.
Engage impact wrench in reverse for 3 second intervals at a time until cover loosens (seize breaks).
Note: Hold down impact wrench for control.
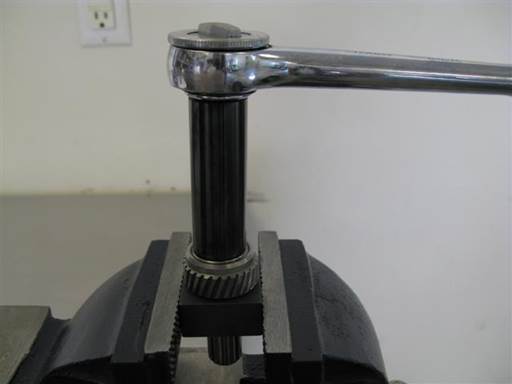
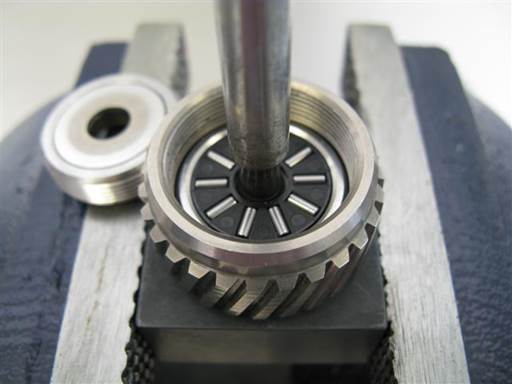
Remove splined shaft cover (splined shaft socket / 1/2″ ratchet).
Note: Splined shaft cover will turn with difficulty due to thread locker.
Bearing top washer will likely be bound to splined shaft cover inner recess and come out with cover.
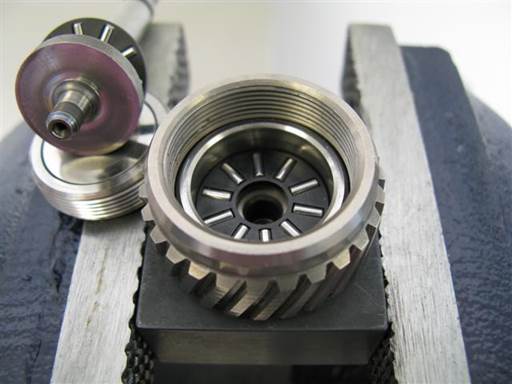
Remove splined shaft center washer / stud (hand).
Note: Splined shaft stud is integral with bearing center washer.
Bearing top thrust (roller) bearing will come out with stud and center washer.
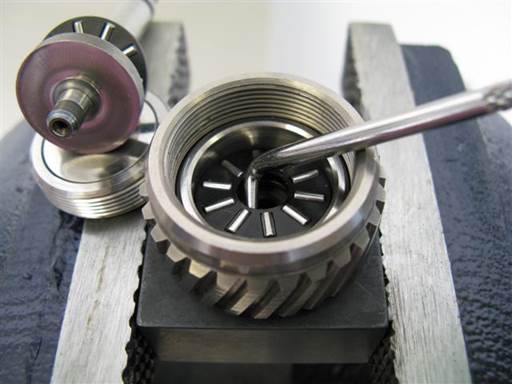
Remove bearing bottom thrust (roller) bearing.
Place pick tip between thrust bearing inner bottom and bottom washer and pry thrust bearing out (90 degree pick).
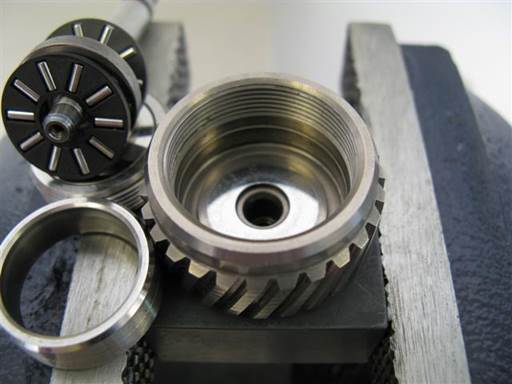
Remove bearing outer ring.
Place towel on table.
Remove splined shaft from holder, tilt upside down, and hit on towel on table.
Bearing ring will dislodge in splined shaft. Remove bearing ring with index finger.
If bearing ring tilts and binds in splined shaft, press ring down in splined shaft to remount, then reattempt removal.
Reinstall splined shaft in splined shaft holder.
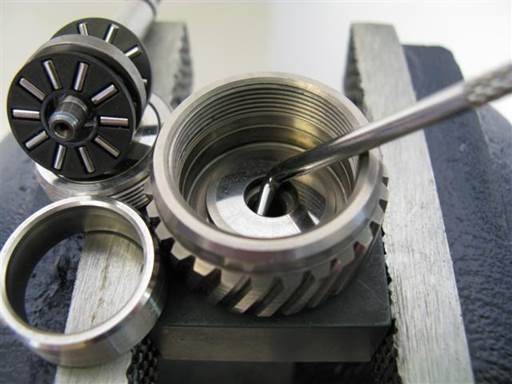
Remove bearing bottom washer.
Place pick tip between washer inner bottom and splined shaft and pry washer out (90 degree pick).
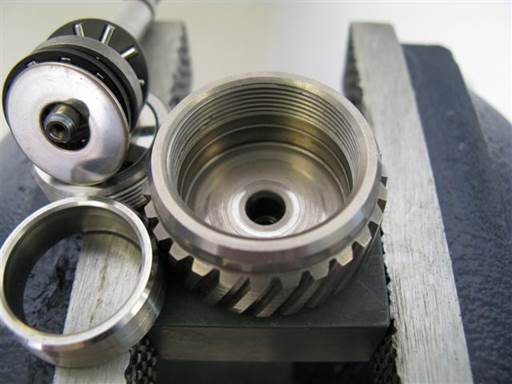
Cleaning of parts
Clean bearing parts (brake cleaner & towels).
Note: It is important bearing parts are thoroughly cleaned. This is needed to properly assess new bearing axial fit.
Remove old thread locker from cover and housing thread. Use pick tool to press tip into thread valley and run pick throughout thread (90 degree pick).
Note: It is critical old thread locker be fully removed to allow new thread locker to bond with parts.
Clean splined shaft bearing cavity and cover (brake cleaner & towels).
Installation of splined shaft bearing
Replace bearing ring and top and bottom washers with new parts.
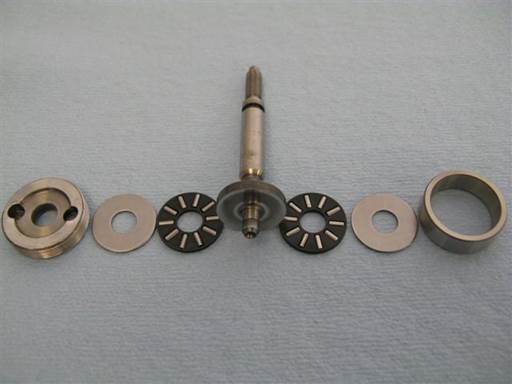
Bearing parts installation sequence from right to left.
Bearing parts from left to right: Cover, top washer, top thrust bearing, center washer / stud, bottom thrust bearing, bottom washer, bearing ring.
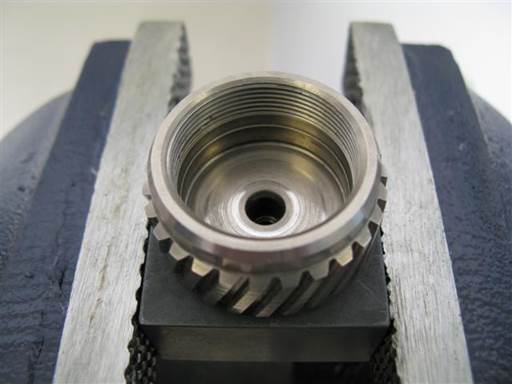
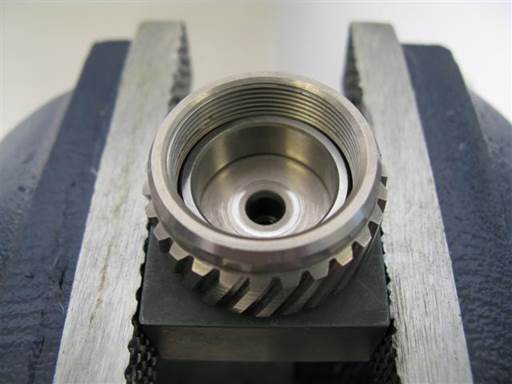
Insert new bearing ring in splined shaft (fingers).
Note: New ring is marked “BS” on outer perimeter.
Initially insert ring in splined shaft.
Insert right and left index fingers into ring. Press fingers against ring inner right and left walls and manipulate ring side to side while slightly pressing down to facilitate ring full insertion.
Rotate position of fingers 90 degrees and repeat ring insertion to verify full insertion.
Note: Ring should fully mate with splined shaft bottom. (picture).
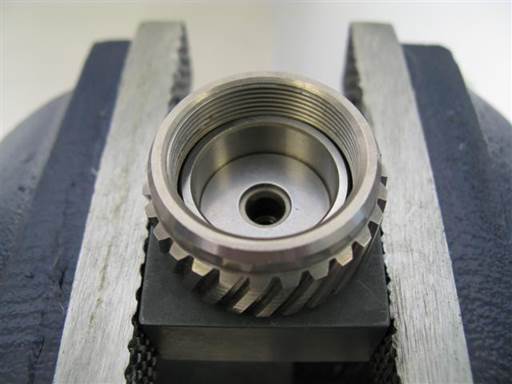
Insert bearing bottom washer in splined shaft bearing ring.
Note: Splined shaft bearing top and bottom washers are interchangeable. Also washer faces are same thus washer can be inserted in either orientation.
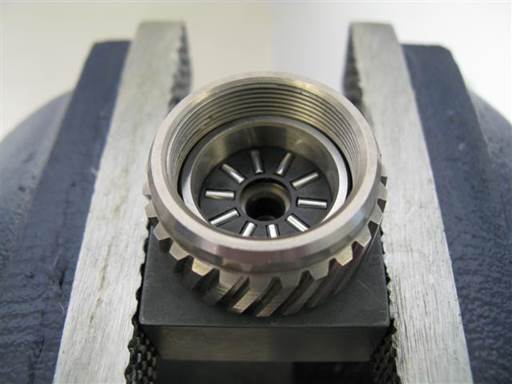
Insert bearing bottom thrust (roller) bearing in splined shaft bearing ring.
Note: Splined shaft bearing top and bottom thrust bearings are interchangeable. Also thrust bearing faces are functionally same thus thrust bearing can be inserted in either orientation.
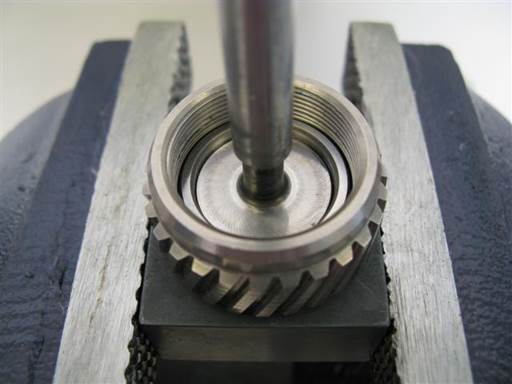
Insert bearing center washer / stud in splined shaft bearing ring.
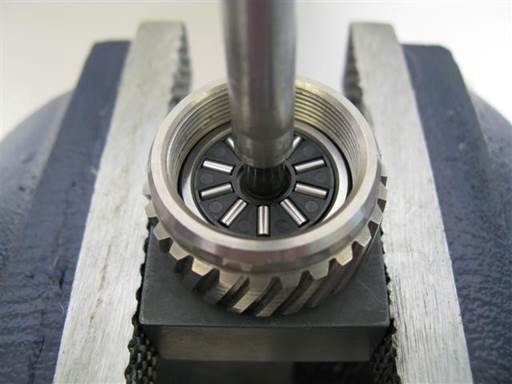
Insert bearing top thrust (roller) bearing onto splined shaft stud and in splined shaft bearing ring.
Note: Thrust bearing faces are functionally same thus thrust bearing can be inserted in either orientation.
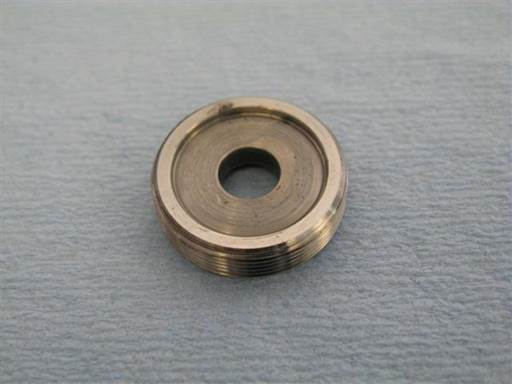
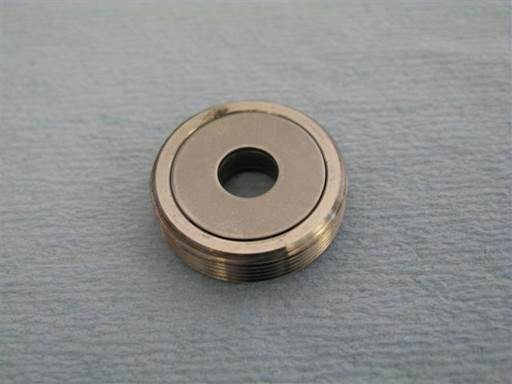
Insert bearing top washer in splined shaft cover inner cavity.
Apply some oil to splined shaft cover inner cavity.
Insert bearing top washer in cover cavity.
Note: Washer will bind to cover due to oil.
Note: Mounting bearing top washer to cover inner cavity allows for cover installation without bearing top washer interference.

Install splined shaft cover with bearing top washer onto splined shaft (splined shaft socket / 1/2″ ratchet).
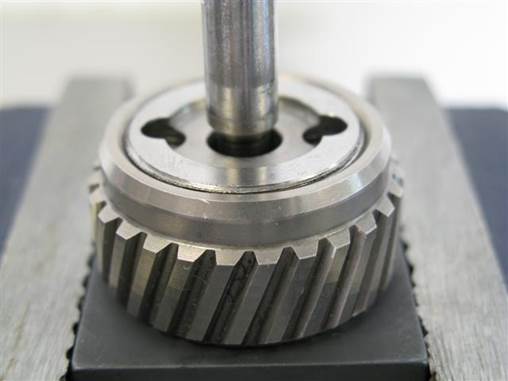
When splined shaft cover is installed its top will be even with splined shaft rim (picture).
If cover is higher than splined shaft rim then bearing parts are not installed correctly and interfering with cover installation. Remove cover and reinstall bearing parts.
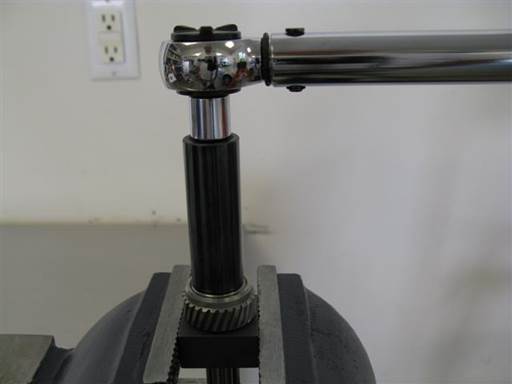
Fully tighten splined shaft cover, 55 Nm (40.5 ft-lb) (splined shaft socket / 3/8″ torque wrench & 3/8″ to 1/2″ socket adapter).
Inspection and adjustment of splined shaft bearing

Inspect splined shaft bearing axial play.
Hold splined shaft and rotate splined shaft stud to note resistance to rotation.
Hold splined shaft and tilt (rock) splined shaft stud to each side to note bearing axial play (free space).
Note: Axial fit cannot be properly assessed until splined shaft cover is fully tightened.
Note: Radial play, side to side movement, is normal and necessary. This should not be confused with axial play, in/out movement.
If splined shaft stud binds and is difficult to rotate then axial fit it too tight and loosening adjustment is needed.
If splined shaft stud has any tilt movement then axial play is present and tightening adjustment is needed.
Any level of resistance (pre-load), without binding, in splined shaft stud rotation indicates no axial play and is considered an optimal fit.
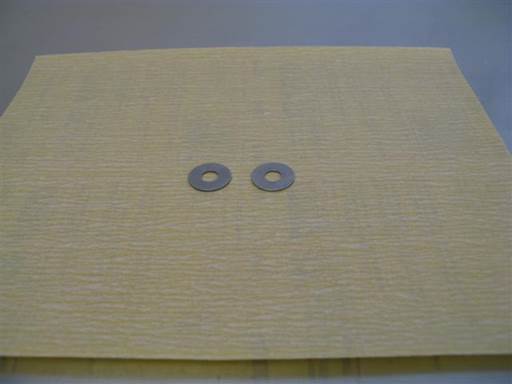
Bearing loosening adjustment.
If splined shaft binds and is difficult to rotate then axial fit it too tight and loosening adjustment is needed.
Disassemble splined shaft bearing per above procedure.
Place sandpaper (300-400 grit) on flat table top. Place bearing outer washer on sandpaper.
Slide washer side to side on sandpaper ~6″ back and forth while moderately pressing washer on sandpaper. Perform sanding for 10 seconds.
Rotate washer 90 degrees and repeat sanding process.
Flip washer to opposite side and repeat above sanding procedure; 10 seconds sanding, rotate 90 degrees, 10 seconds sanding.
Clean washer (brake cleaner & towels).
Repeat washer sanding for second outer washer.
Reassemble splined shaft bearing per above procedure and reassess bearing axial fit.
Note: Washers are made from hardened steel and do not easily wear. Sanding procedure will remove ~.0025mm washer height, total ~.005. Washers might need max .015mm height adjustment.
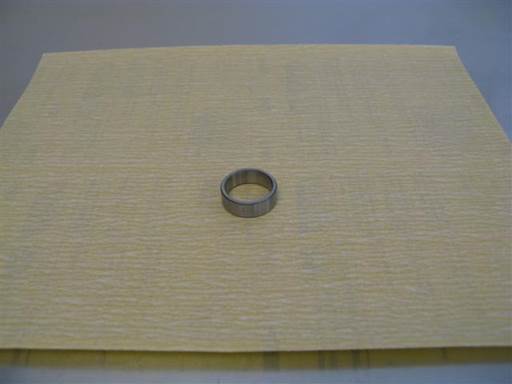
Bearing tightening adjustment.
If splined shaft has any tilt movement then axial play is present and tightening adjustment is needed.
Disassemble splined shaft bearing per above procedure.
Place sandpaper (300-400 grit) on flat table top. Place bearing ring on sandpaper.
Slide ring side to side on sandpaper ~6″ back and forth while moderately pressing ring on sandpaper. Perform sanding for 5 seconds.
Rotate ring 90 degrees and repeat sanding process.
Flip ring to opposite side and repeat above sanding procedure; 5 seconds sanding, rotate 90 degrees, 5 seconds sanding.
Clean ring (brake cleaner & towels).
Reassemble splined shaft bearing per above procedure and reassess bearing axial fit.
Note: Ring is made from hardened steel and does not easily wear. Sanding procedure will remove ~.005mm ring height. Ring might need max .015mm height adjustment.
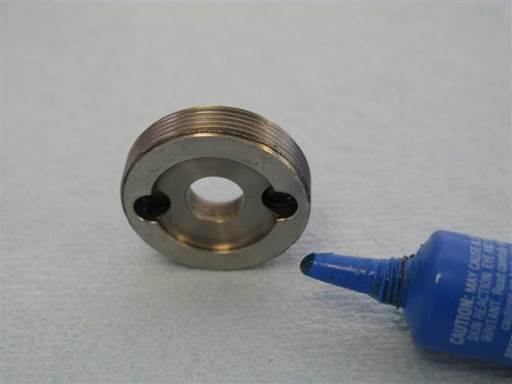
Once splined shaft bearing fit is assessed, and if needed adjustment performed, thread locker needs to be applied to splined shaft cover.
Remove splined shaft cover from splined shaft per above procedure.
Apply thread locker at middle of threads along perimeter of cover (high strength thread locker).
Reinstall splined shaft cover and fully tighten per above instructions.
Reinstall splined shaft stud O-ring.
Insert O-ring on splined shaft stud and roll O-ring down stud and drop into groove (fingers).
Verification of engine timing
Perform following engine timing verification once vanos has been reinstall on engine head and just before vanos solenoid installation.
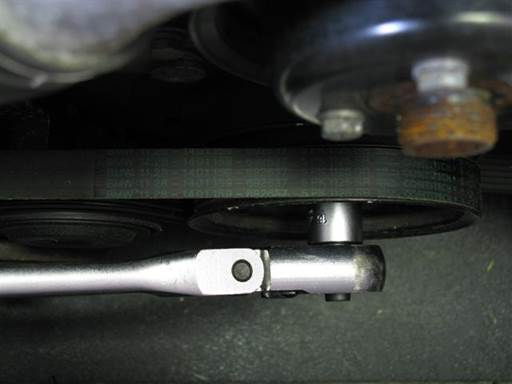
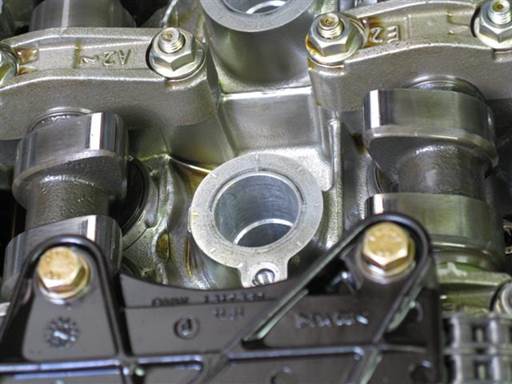
Turn crankshaft pulley clockwise for two revolutions (crankshaft turning socket / 1/2″ long-arm ratchet).
If crankshaft binds and can’t be turned this is due to valve/piston interference and indicates timing is set wrong.
Turn crankshaft pulley clockwise until cylinder 1 intake and exhaust cams point to each other at ~45 degree angle (crankshaft turning socket / 1/2″ long-arm ratchet).
Note: Turning crankshaft counter clockwise is acceptable.

Inspect TDC (top dead center) timing marks on engine timing cover and crankshaft harmonic balancer at ~11 o’clock position (mirror).
Adjust crankshaft pulley to align TDC timing marks (crankshaft turning socket / 1/2″ long-arm ratchet).
Note: Align pointer on timing cover with 1 mark on harmonic balancer.
Note: If timing marks on harmonic balancer not visible they might be hidden behind water pump pulley. Turn crankshaft pulley counter clockwise.
Note: Precise alignment is not necessary.
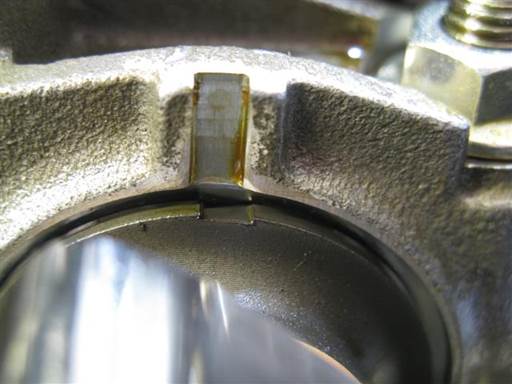
Exhaust camshaft groove on first guide bearing will be roughly aligned with groove on first bearing cover (picture).
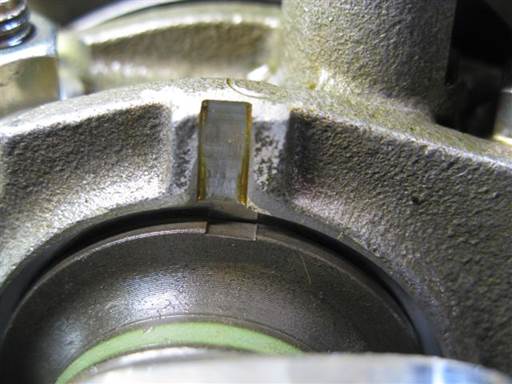
Fully retard intake camshaft timing.
Place open wrench (24mm combo wrench) on intake camshaft hex at front of camshaft.
Rotate intake camshaft counter clockwise to adjustment end position. If camshaft resistant to rotation rock camshaft back and forth to release seize.
Note: Rotating camshaft is most effective when standing at exhaust side of car.
Camshaft groove on first guide bearing will be roughly aligned with groove on first bearing cover (picture).
If intake or exhaust camshaft timing grooves do not align within small deviation then engine timing it set wrong.
© 2024 Beisan Systems LLC

